Payroll Manual
Payroll
After doing all the activities, users can come to create the Payroll for the month. Employees, departments, projects, and many more can make Payroll. Hinawi ERP Payroll is designed to be processed in two different ways:
- HR Employee's Payroll
- Timesheet Employee's Payroll
The difference between the two is:
Overtime
For Timesheet employees, users must define the overtime Setup and, later, every month, the overtime hours. Hinawi ERP will automatically calculate the overtime Amount. For HR employees, there is no such automatic overtime calculation from hours, but users can manually add the total overtime Amount.
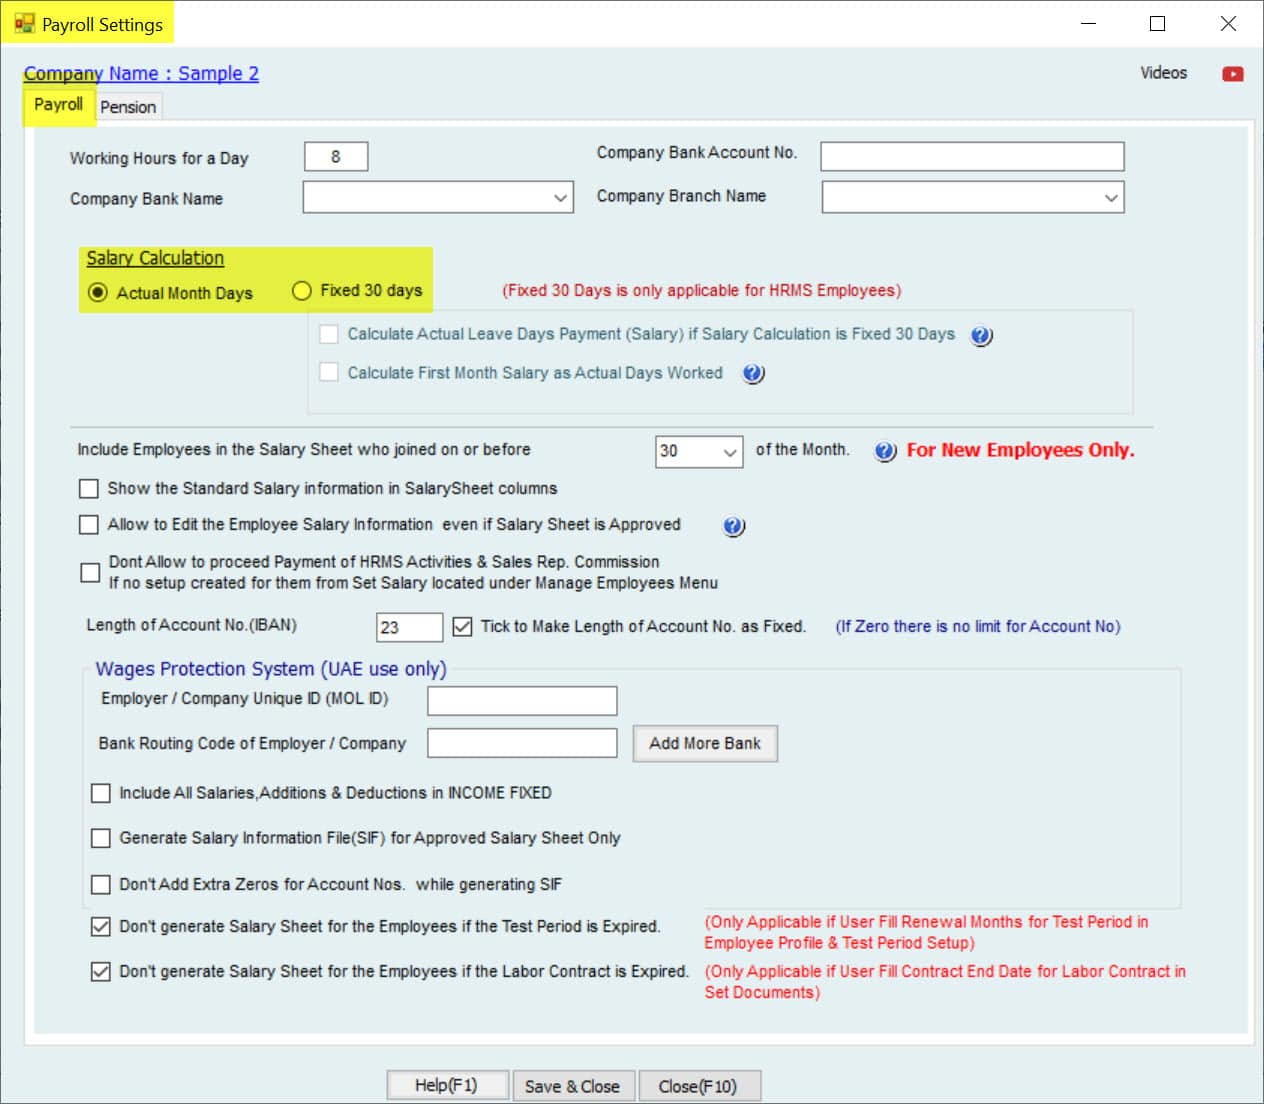
Calculation Days Basis
For HR employees, Payroll can be calculated on Actual Days Basis or Fixed 30 Days. The total Salary will be the same, but the difference will come when there is any absence during the month. But for Timesheet employees, it is only by Actual hours/days worked.
Payroll Process
After creating the activities (If any), e.g., leaves, absences, addition/deductions, etc., HR Employee Payroll can be created.
In Timesheet Payroll, one additional step is there, which is the creation of a Timesheet. Timesheet Payroll will be created only after creating the Timesheet.
Absence creation
HR Employee's absence will be created from the absence window and requires approval. Timesheet Employee's absence will be created directly from Timesheet.
Costing by project
Different projects can create Timesheet Employee Payroll, and projects can generate reports. Whereas for HR, Payroll can be processed by one project only.
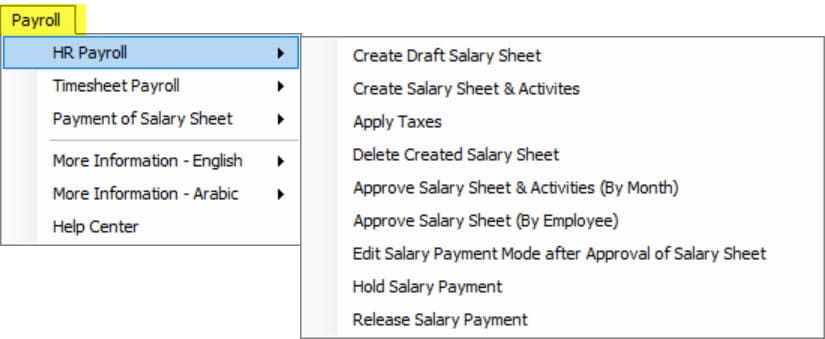
HR Payroll
Create a Draft Salary Sheet
A draft Salary sheet can be created before creating the actual Salary sheet. This draft is usually needed after creating the activities but before their approval or making the actual Payroll. To create a draft, go to:
Payroll➔ HR Payroll➔ Create Draft Salary Sheet

Select the Company to create a draft Salary and click on the draft Salary sheet button down. A new window will open.

Select the month to see the draft, filter the employees and add to the table.
Users can customize the display of columns and see the relevant ones only. This display can be set as default for this window.
All the created activities will show their respective effects here.
Create Salary Sheet & Activities
Finally, a Salary sheet can be created after the approval of activities.
Important:
A Salary sheet cannot be created for a month if there is any activity without approval for the month or if last month's Salary is not created.
To create a Salary sheet, go to:
Payroll➔ HR Payroll➔ Create Salary Sheet and Activities.

Select the relevant month and year.
Filter the employees and click on save Salary to create or click on the print button to print.
Approve Salary Sheet and Activities
Users who want to create more activities after creating a Salary sheet can create them. Moreover, the User can approve and complete the Salary with the suitable effect regarding these activities. But after approval, no changes can be made to the Salary sheet. To approve, go to:
Payroll➔ HR Payroll➔ Approve Salary Sheet and Activities
A window will show all the created months' salaries. Select the required one for approval and click on the preview button for a final review before approving. In this preview window, the User can print:
- Salary sheet
- Pay slip (Summary and Detailed) and approve the Salary.

Hold / Release Salary Payment
Users can Hold/release an Employee's Salary or group of employees after approval. To hold pay, go to
Payroll➔ HR Payroll➔ Hold Salary Payment
Please select from the dropdown Unpaid Months, checkmark the employees you wish to hold their Salary, and then click on the Hold Salary Payments button.
To release the held salaries, go to the:
Payroll➔ HR Payroll➔ Release Salary Payment
Select from the dropdown Hold Salary Months, checkmark the employees to release Salary, and click on the Release Salary button.
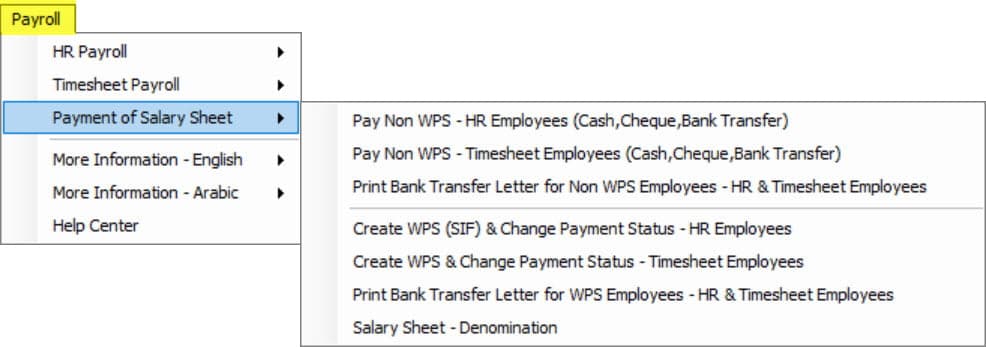
Pay Salary Sheet
The Salary sheet can be paid after approval. Salary Sheets on Hold cannot be paid until they get released. To pay the Salary sheet, go to:
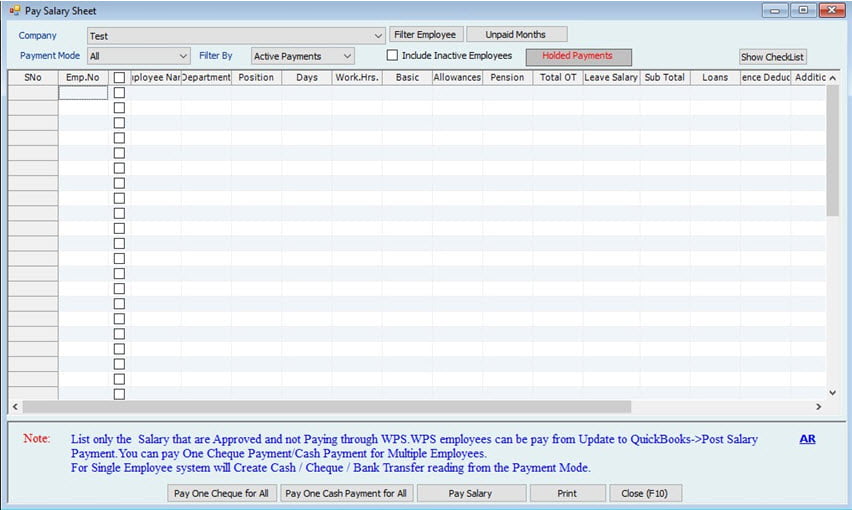
Payroll➔ HR Payroll➔ Pay Salary Sheet➔ Pay Full Payment
Select the month from the unpaid month dropdown to pay.
Users can filter the employees by payment modes like Cash/bank or other filters.
Select the employees and click on the Pay Salary button to pay the salaries.
Wages Protection System (WPS)
Hinawi ERP can transfer employees' salaries through Wages Protection System (WPS) by creating a Salary information file (SIF). Go to:
Payroll➔ HR Payroll➔ Wages Protection System➔ Salary Information File
Users have the option in Payroll settings whether SIF should be generated for the approved Salary sheet only or it can be created even after it is created.
To use this window, the User must fill in all the required information. E.g., bank information of the employer, bank information of the Employee, Salary transfer mode, and labor ID information.

Select the month and year. Select the sponsor (if required).
The User can filter by paid or unpaid salaries. Also, they can filter the employees in many ways and add them to the table. Here again, the User has a choice if the SIF file should show the Salary for each Employee in one Amount or each component separately. e.g., basic Salary and transportation separately. This option is available in the Payroll settings.
If any information is missing, the System will highlight the fields to be filled. After ensuring everything is fine, the User can click on generate SIF file to create a compatible notepad file. It can also be generated in excel, and a few other formats are considered acceptable.
Timesheet Payroll
Create Salary Sheet (Detailed/Summary)
For Timesheet employees, there is no draft. Their Salary can be directly created from:
Payroll➔ Timesheet Payroll➔ Create Salary sheet
Remember:
Salary for Timesheet employees can only be created after creating Timesheet. Any changes in the Timesheet after creating the Salary will affect the Salary sheet but before approval. To create a Timesheet Salary, go to:
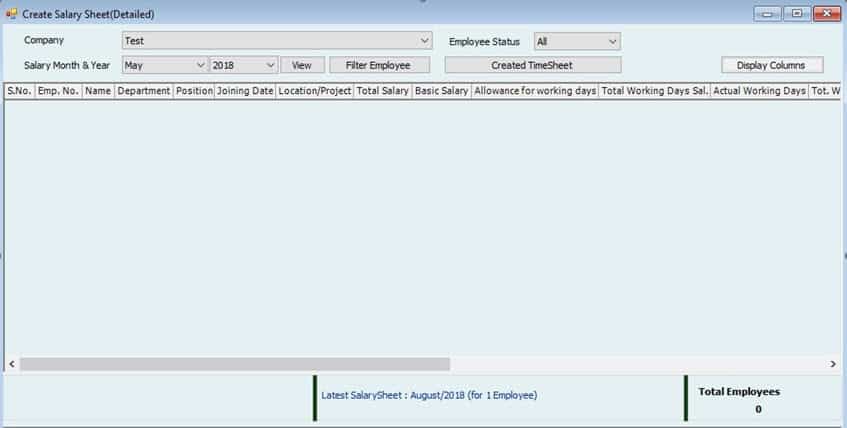
Select the created Timesheet from the dropdown for the System to load employees. The User can preview and print the Salary slip or save the Salary.
Approve Salary Sheet
The Salary sheet for Timesheet employees can be approved from
Payroll➔ Timesheet Payroll➔ Approve Salary Sheet

Select the created Salary sheet from the dropdown, tick mark the employees, and click on approve.
Salary Sheet – Denomination
This option in Hinawi ERP is suitable for companies that pay workers' salaries through Cash. The User can come to this window and see how much currency notes will be used to pay the salaries for selected staff. Go to
Payroll➔ Timesheet Payroll➔ Salary Sheet – Denomination

Filter the employees for Payroll. After that, the System will automatically give the currency note numbers. Example: How much is required to pay these salaries?
Hold / Release Salary Payment
The User can Hold / Release an Employee's Salary or group of employees after approval. To hold pay, go to
Payroll➔ Timesheet Payroll➔ Hold Salary Payment
Select from the dropdown Unpaid Months, check to mark the employees to hold Salary, and click on Hold Salary Payments button.
To release the held salaries, go to the:
Payroll➔ Timesheet Payroll➔ Release Salary Payment
Select from the dropdown Salary Months on Hold check mark the employees to release Salary, and click on the Release Salary button.
Pay Salary Sheet
The Salary sheet can be paid after approval. Salary sheets on hold cannot be paid until they are released. To pay the Salary sheet, go to:
Payroll➔ Timesheet Payroll➔ Pay Salary Sheet
Select the month from the unpaid month dropdown to pay.
The User can filter the employees by payment modes like Cash/bank or other filters.
Select the employees and click on the Pay Salary button to pay the salaries.


 العربية