
Module Setup
The setup feature is crucial for setting a company’s regulations, arrangement, and control policy. Before logging any operations, the user must set up this module’s company file and private settings.
If these settings are not made, the client may find that results do not align with their policies and need to re-enter their operations.
The setup module is the most important step. It must be done before using the software.


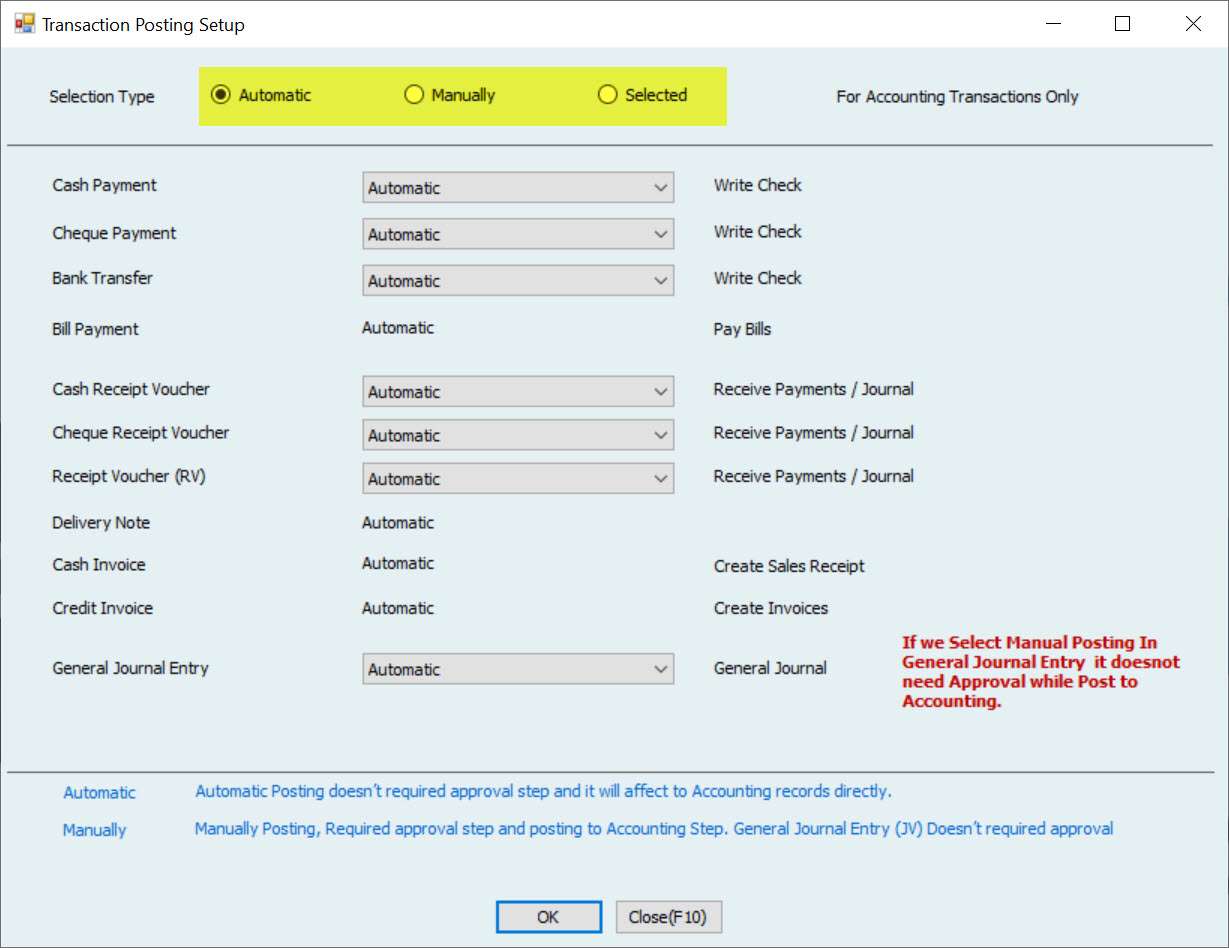
Please remember to set up the posting method before start using Accounting.
Please go to General File Setup.

Accounting Module Roadmap
| Activities | Posting Method to Accounting. (Automatic or Manual) | Need Approval Step? | Option to change to Unapprove? | Is required to Post to Accounting? (Post Approved Activities). | Can Edit after approval? | Can Void after approval? | Can Edit after Posted to Accounting? | Can Void after Posted to Accounting? |
Payments | ||||||||
| Cash Payment Cheque Payment Bank Transfer | Automatic | No Its Auto Approved | No | Posted Automatically | Yes | Yes | Yes If not use post PDC | Yes |
| Manual | Yes | No | Yes | No | Yes | No | Yes | |
| Pay Bills ( Cash, Cheque or Bank Transfer | Automatic Only | No Its Auto Approved | No | Posted Automatically | Yes | Yes | Yes If not use post PDC | Yes |
Collections | ||||||||
| Cash Receipt Voucher, Cheque Receipt Voucher and Cash & Cheque Receipt Voucher. | Automatic | No Its Auto Approved | No | Posted Automatically | Yes | Yes | Yes If CUC is not posted | Yes |
| Manual | Yes | No | Yes | No | Yes | No | Yes | |
| It’s not allowed to Edit, Void, or any other actions after doing Post PDC or after Doing Reconcile Cheques. The delete option is not available either before or after any action. | ||||||||
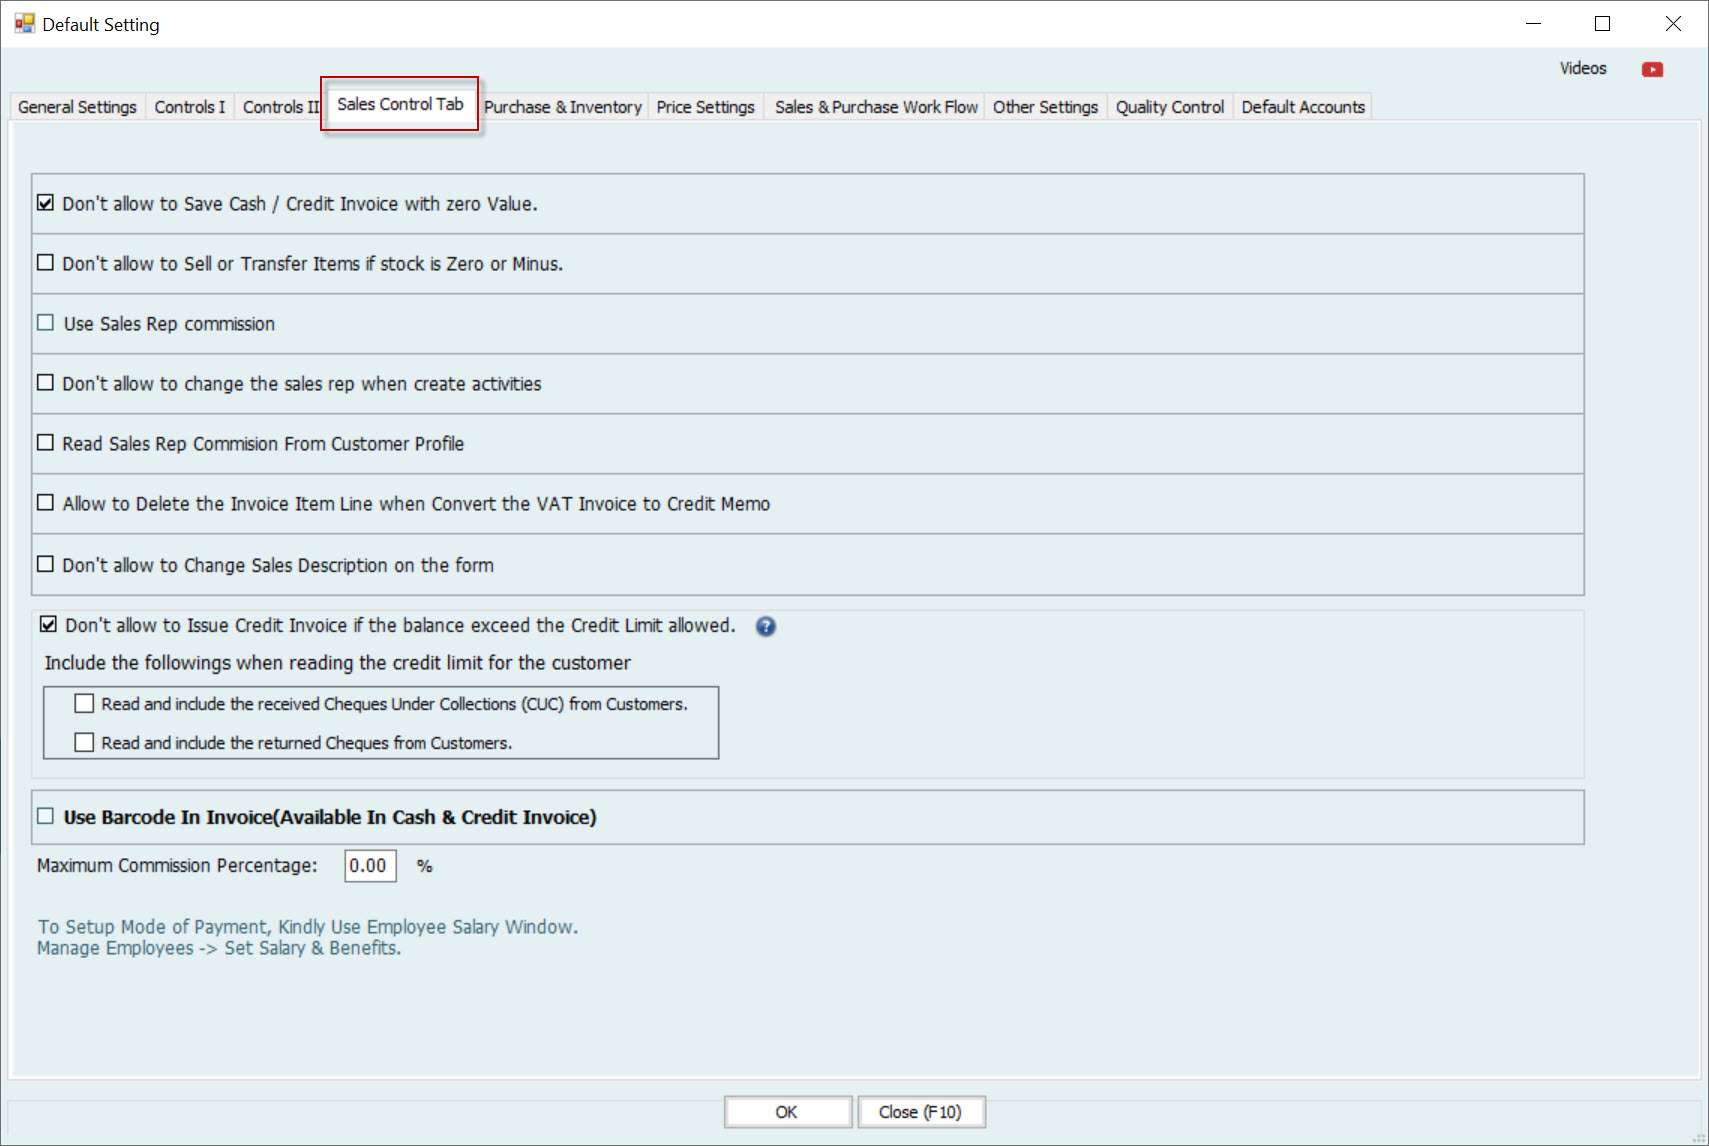
Sales Workflow | ||||||||
| Quotation | No Accounting Effect. | Yes | Yes | Not Applicable | Yes, but it must make unapproved. | Yes, but it must make unapproved. | Not Applicable | Not Applicable |
| Delivery of Items \ Services | No Accounting Effect. | No It’s Auto Approved | No | Posted Automatically | Yes, if the next step is not done. | Yes, if the next step is not done. | Not Applicable | Not Applicable |
| Cash Invoice | Automatic Only | No It’s Auto Approved | No | Posted Automatically | Yes, if the next step is not done. | Yes, if the next step is not done. | Yes, but if Not linked with receiving payment. | Yes |
| Credit Invoice | Automatic Only | No It’s Auto Approved | No | Posted Automatically | Yes, if the next step is not done. | Yes, if the next step is not done. | Yes, but if Not linked with receiving payment. | Yes |
| Credit Memo | Automatic Only | No Its Auto Approved | No | Posted Automatically | Yes, if the next step is not done. | Yes, if the next step is not done. | Yes, but if Not linked with receiving payment. | Yes |
| The delete option is not in use. | ||||||||
| Activities | Posting Method to Accounting. (Automatic or Manual) | Need Approval Step? | Option to change to Unapprove? | Post to Accounting Menu. (Post Approved Activities). | Can Edit after approval? | Can Void after approval? | Can Edit after Posted to Accounting? | Can Void after Posted to Accounting? |
Purchase Workflow | ||||||||
| Material Request | No Accounting Effect. | Yes | Yes | Not Applicable | Yes, but must make unapprove and if next step is NOT Done. | Yes, but must make unapprove and if next step is NOT Done. | Not Applicable | Not Applicable |
| Price Inquiry from Vendors + Copmpare Prices. | No Accounting effect. | Yes | Yes | Not Applicable | Yes, but must make unapprove and if next step (Purchase Order) is NOT Created. | Yes, but must make unapprove and if next step (Purchase Order) is NOT Created. | Not Applicable | Not Applicable |
| Purchase Order | No Accounting Effect. | Yes | Yes | Not Applicable | Yes, but must make unapprove and if next step (Item Receipt) is NOT Created. | Yes, but must make unapprove and if next step (Item Receipt) is NOT Created. | Not Applicable | Not Applicable |
| Item Receipt | Automatic Only | No It’s Auto Approved | No | Posted Automatically | Yes, but must make unapprove and if next step (Bills) is NOT Created. | Yes, but must make unapprove and if next step (Bills) is NOT Created. | Yes, but if next step (Bills) is NOT Created. | Yes, but if next step (Bills) is NOT Created. |
| Bills (Credit Purchase) | Automatic Only | No It’s Auto Approved | No | Posted Automatically | Yes, if next step (Payment) is NOT Created. | Yes, if next step (Payment) is NOT Created. | Yes but if the payment not created. | Yes but if the payment not created. |
| Credit Bill (Return Purchase) | Automatic Only | No It’s Auto Approved | No | Posted Automatically | Yes | Yes | Yes | Yes |
| The delete option is not available either before or after any action. | ||||||||
| Activities | Posting Method to Accounting. (Automatic or Manual) | Need Approval Step? | Option to change to Unapprove? | Post to Accounting Menu. (Post Approved Activities). | Can Edit after approval? | Can Void after approval? | Can Edit after Posted to Accounting? | Can Void after Posted to Accounting? |
Manufacturing | ||||||||
| Job Card | No Accounting Effect. | Yes | Yes | Not Applicable | No, the User can make Unapprove to change the status to Created. | Yes, if the status is created. | Not Applicable | Not Applicable |
| Issue Items for Productions (SIV) | Automatic Only | No It’s Auto Approved | No | Posted Automatically | No | Yes | No | No |
| Return Items from Productions (SRV) | Automatic Only | No It’s Auto Approved | No | Posted Automatically | No | Yes | No | No |
| Production Stages | No Accounting Effect. | No | No | Not Applicable | No | No | Not Applicable | Not Applicable |
| Producing of Finished Items | Automatic Only | No It’s Auto Approved | No | Posted Automatically | No | Yes | No | No |
| Return Items after Productions | Automatic Only | No It’s Auto Approved | No | Posted Automatically | No | No | No | No |
| Post Direct and Indirect Cost | Automatic Only | No It’s Auto Approved | No | Posted Automatically | No | No | No | No |
| Accounting (Create JV) | Automatic | No It’s Auto Approved | No | Posted Automatically | Yes | Yes | Yes | Yes |
| Manual | Approval Option is not required | No | Yes | The approval step is not required | Yes | Yes | Yes | |
Automatic Created JV. | Automatic only | No Its Auto Approved | No | Posted Automatically | No | No | No | No |
The system will automatically create JV when the following are created: Post PDC, Post CUC, Post Prepaid expenses, Reversal Advance Payment Received or Paid, Reconcile Cheqes Issued or Received for all changes of the status, and more from different modules. The delete option is not available either before or after any action. | ||||||||
Cash Payments are an integral part of daily accounting. This can be either for petty cash or any other payments to related parties in terms of cash.

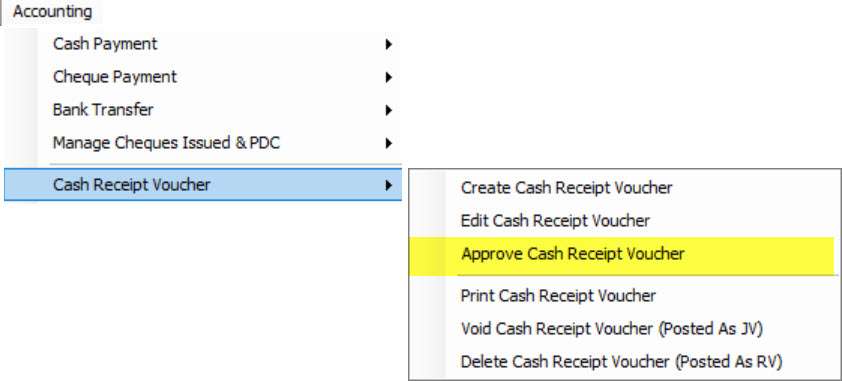
4. Approve Cash Payment Voucher
5. Print Approved Cash Payment
To create a cash payment, go to
Accounting -> Cash Payment -> Cash Payment -> Create Cash Payment
Shortcut: CTRL+P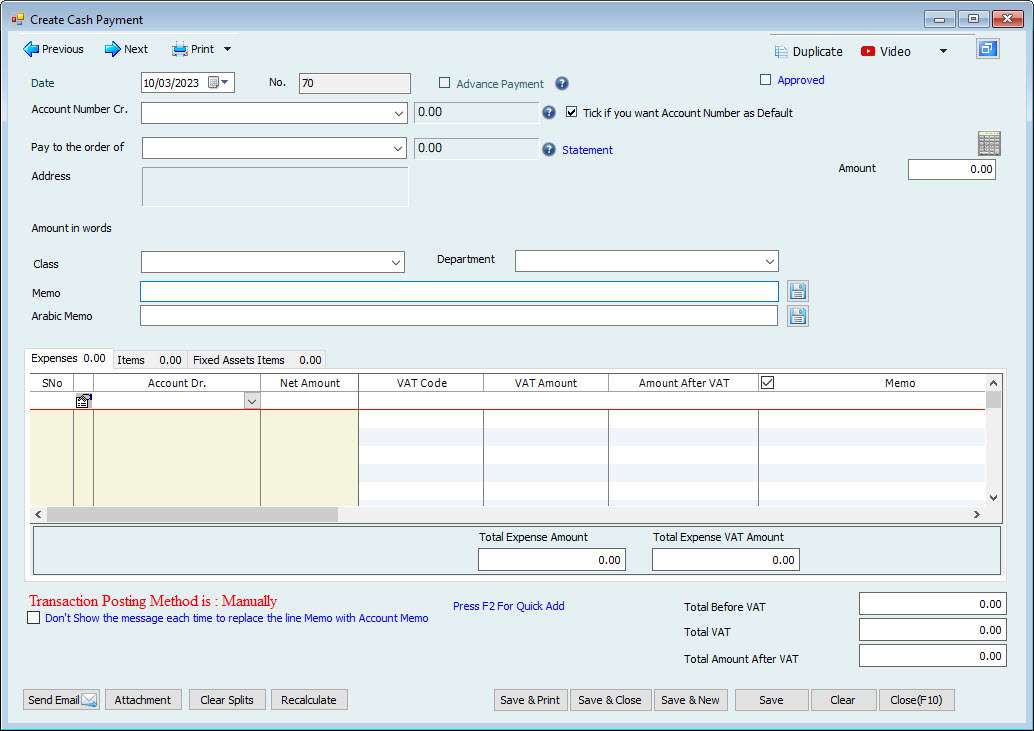
Enter the PV Date in the date column.
Enter the PV number in No. column. (This number will be generated automatically from the last transaction number)
If the transaction posting method is manual, the user can approve the transaction from this check box “Approved” also rather than going to approve window.
Select the Account (Credit) from where the payment is being made.
Note: The user can only select the “Cash” type account in this column.
(If Hinawi Software is integrated with QuickBooks since cash account type is not available in QuickBooks, this account will be saved as Bank type in QuickBooks.)
Select the name from Pay to the order of dropdown to whom payment is being made.
Enter the amount of the transaction.
Users can select the building and unit from the dropdown if this payment is related to a Real Estate unit or building.
Write the memo of the transaction.
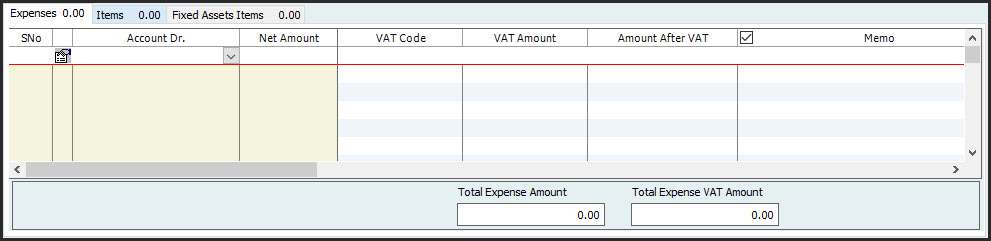
Expenses

In this table user can select the
Account (Debit) for what the payment is made. It can be an expense or any other account.
Amount.
VAT Code – The user can select the VAT code assigned to the selected account. There is an option in the system to Predefine VAT Code for the account so that at the time of selecting the account, the system will automatically fill in the VAT code assigned for the Account.
VAT Amount – The system will automatically calculate the VAT amount
Amount after VAT – The column will display the Amount after VAT
Memo for each line.
Arabic Memo – The column will display the Arabic Memo for the account reading from the profile. Users can manually enter also.
Bill No. of the expense receipt.
Bill Date.
Customer / Job if the expense is for any specific customer/job. (Name will be a must if the user selects Accounts Receivable type in the account column).
The billable option is optional to select. This box can be checked only after selecting the Expense/cost account and customer name. If user check marks the box, this cost can be added while invoicing to this customer.
Is Prepaid? This option is optional to select. This box can be checked only after selecting the account with “Other Current asset” account type.
Class to link this amount with which unit or item. etc.
Fixed Asset Item can be selected from the dropdown if the user wants to link expense with the fixed asset. (This will not change the cost of the asset)
Employee if you need to link this payment with a specific employee.
Department to choose the department of the selected employee.
Add to Cost to add this expense on the cost report of the employee.
Deduction to make this payment a deduction amount of the employee.
Deduction Item
Property: unit if you need to link this payment with property or unit
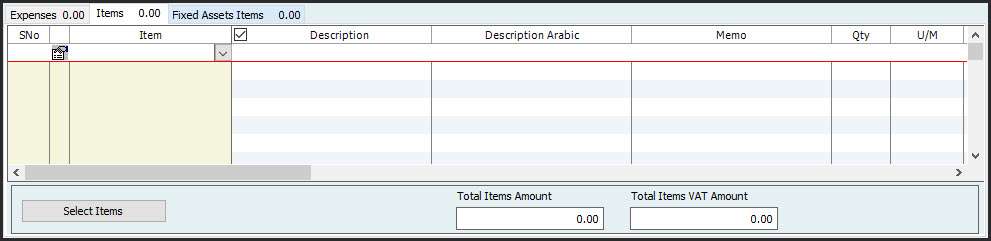
Item
The items tab can be filled in the same way
Following are the Columns defined for the Items Tab.
Items – Select the Item from the drop-down
Description – The system will fill the description automatically from the Item profile. Users can edit or enter the description manually also
Description Arabic – System will fill the description automatically from the Item profile. Users can edit or enter the description manually also
Write a line memo to give more details
Quantity – To enter the Quantity
U/M – The system will read it from the item profile, the user can change it as well
Cost – The system will read it from the item profile, the user can change it as well
Net Amount
VAT Code – The system will read the VAT code from the Item Profile
VAT Amount – The system will automatically calculate the VAT amount according to the Vat code selected
Amount After VAT Column will automatically calculate it according to the amount and vat information entered
Bill No., and Bill Date Columns are used to record the bill details
Tick the Is Billable option if the user want to make the line as billable
Class – The user can select the class from the drop-down.
Fixed Asset Item – The user can select the Fixed asset to link it here. This is for reporting purposes
Employee
Department
Property: Unit
Estimate No.
Tender Items
Fixed Asset Item

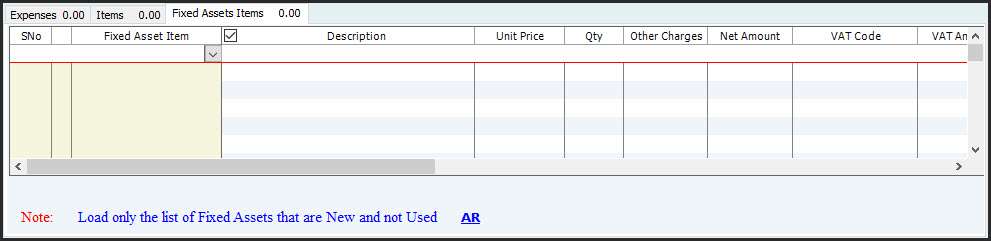
The fixed asset Items tab can be used when a new fixed asset is bought.
The user has to select the “Vendor name,” and the “Load new Asset” button will appear. If any asset is created as new, the user can load the asset using this button. Then enter the price of this asset and save. This price will be saved as fixed asset cost and depreciation will be calculated accordingly.
This option indicates additional in Hinawi Software as opposed to QuickBooks.
Edit Cash Payment
To Edit the Cash Payment created. Go to Accounting Menu – Cash Payment – Edit Cash Payment.
The system will display all the Cash Payments created. The user can double-click on the transaction which the user wants to edit, it will open the Cash Payment form with the data. Make the changes and Click on the save button.
To Print the Cash Payment created. Go to Accounting Menu – Cash Payment – Print Cash Payment.
The system will display all the Cash Payments created. The user has to select the cash Payment (s) & Click on the Print button located in the bottom left corner of the form. It will open the pre-defined templates for the Cash payment. Select the template and click on the Ok button to Print.
After printing, the system will pop up one message “Is Printed Correctly?”
The user must click Yes to change the status of the payment as Printed, then the transaction will be removed from this window.
To Reprint the transaction, the User needs to Go to
Reports -> Payments Reports -> Cash Payment & Pay Bills -> Printed Cash Payment List.
Select the transaction and Click on the Reprint PV button in the form’s bottom left corner to reprint.
Approve Cash Payment Voucher
This option will be available if the system runs on Manual transaction Posting mode.
To Approve the Cash Payment created. Go to Accounting Menu – Cash Payment – Approve Cash Payment.
This option will be available for the Manual transaction Posting mode.
The system will display all the Cash Payments created. The user must select the cash Payment (s) & Click on the Approve button in the form’s bottom left corner.
Print Approved Cash Payment
To Print the Approved Cash Payment. Go to Accounting Menu – Cash Payment – Print Approved Cash Payment.
This option will be available for the Manual transaction Posting mode.
The system will display all the Cash Payments created. The user must select the cash Payment (s) & Click on the Print button located in the bottom left corner of the form.
Void Cash Payment
To Void the Cash Payment created. Go to Accounting Menu – Cash Payment – Void Cash Payment.
The system will display all the Cash Payments created. The user has to select the cash Payment (s) & Click on the Void button located in the bottom left corner of the form. It will change the transaction as Voided. System will keep the record with zero value.
Cash Pay Bills
The cash pay bills feature can only be used in Hinawi Software if there is a bill already entered in the system. Obviously, users need a bill to make payments against.
1. Create Cash Pay Bills
2. Edit Cash to Bay Bills
3. Print Approved Cash Pay Bills Voucher
4. Void Cash Payment Voucher
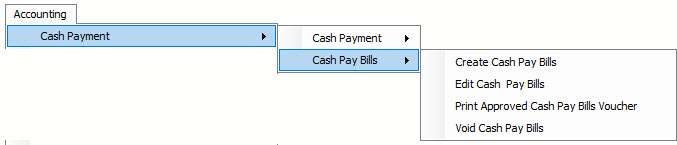
Create Cash Pay Bills
To make a Cash Pay bill payment, Go to Accounting-> Cash Payment-> Cash Pay Bills-> Create Cash Pay Bills

Select the name of Vendor and Accounts Payable account, and all the bills for this vendor will show in the columns down.
Enter the PV Date in the date column.
Enter the PV number in No. column. (This number will be generated automatically from the last transaction number)
Select the Account Number (Credit) from where the payment is being made.
Note: Users can only select the “Cash” type account in this column To create a new account, focus on the drop-down and press the F2 button on the keyboard. The system will pop up the account profile window, where the user can select the type of the Account as Cash and enter the rest of the details. After Pressing the save button there, the newly created account will come automatically into the account drop-down.
Select the Accounts Payable (Debit) from the A/P Account Dr. dropdown
After selecting the account and Pay to the Order, the System will load all the unpaid bills of the selected vendor in the detail section
The amount of the transaction will automatically be calculated from bills and appear in the amount column.
Memo & Arabic memo fields can be used to record more information about the payment.
The system will list the unpaid bills of the vendor in the detail section. Select the bills to pay, users can change the amount to pay for bills by editing the Amount to Pay field.
Click on the save button to save.
If the user wants to print the Payment information, Click on the Save and Print button. The system will pop up the dialogue box with all the predefined templates. Select the right one and click Ok to print.
After pressing the save button, the bill status will be changed to paid and users cannot edit the bills anymore.
Edit Cash Pay Bill
To Edit the Cash Pay Bill created. Go to Accounting Menu – Cash Payment – Cash Pay Bill – Edit Cash Pay Bill.
The system will display all the Cash Pay Bills created. User can double-click on the transaction which the user wants to edit, it will open the Pay Bill form with the data. Make the changes and Click on the save button.
Print Approved Cash Pay Bills
To Edit the Cash Pay Bill created. Go to Accounting Menu – Cash Payment – Cash Pay Bill – Print Approved Cash Pay Bill.
The system will display all the Cash Pay Bills created. Select the transaction and click the Approve button in the bottom left corner. This will change the status of the transaction to Approved.
Void Cash Pay Bills
To Edit the Cash Pay Bill created. Go to Accounting Menu – Cash Payment – Cash Pay Bill – Print Void Cash Pay Bill.
The system will display all the Cash Pay Bills created. Select the transaction and click the Void button in the bottom left corner. This will cancel the payment and release the link with the bill.
Cheque Payments are the most used payment mode for any type of business.
Features of the Cheque Payment are as follows:
1. Create Cheque Payment
2. Edit Cheque Payment
3. Print Payment Voucher (for Approval)
4. Approve Cheque Payment (this menu will be available only if the system is running in Manual transaction posting mode)
5. Print Payment Voucher
6. Print Cheque
7. Print Cheque with Payment Voucher
8. Deliver Cheque (s)
9. Void Cheque (s)
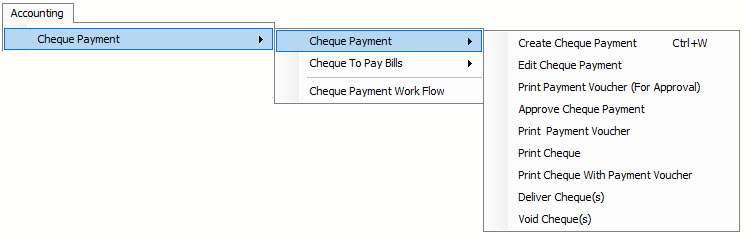
Create Cheque Payment
Create Cheque Payment To create a cheque payment,
Go to Accounting –> Cheque Payment –> Cheque Payment –> Create Cheque Payment
Shortcut: CTRL+W

Enter the PV Date in the date column.
Enter the PV number in No. column. (This number will be generated automatically from the last transaction number)
Select the Bank Account (Credit) from where the payment is being made.
Note: The user can only select the “Bank, PDC, and CUC” type account in this column.
Select the Bank Name in the bank name column. This name is important because, at the time of printing cheques, the user must select the bank name for which the cheque needs to be printed.
Users can make an advance payment to Vendors on the condition that the name must be a vendor and the Debit side should not be Accounts Payable type.
Select the name from Pay to the order of dropdown to whom payment is being made.
Most of the time name will be printed on the payment voucher as it is but if the user wants to print a different name on the cheque then the name in the software, change the name in Print on the cheque as column and it will be printed on the cheque.
Enter the Cheque number in cheque no. column.
Note: The cheque number is automatically created based on the bank name Not based on Account Number. This means the cheque number follows the bank name, not the account name.
If you have more than one account (current and saving account) in the same bank you must create multiple bank names for example:
National Bank-Current account
National Bank-Saving account
Important: If Hinawi Software is integrated with QuickBooks Software
Since there is only one column for numbers in QuickBooks, now the user has the choice of whether this payment should be posted to QuickBooks by PV No. or Cheque No. Whatever number the user wants to post by, simply tick mark the box beside that number and the transaction will be updated by that number.
Enter the Cheque Date in the cheque date column.
Important: If Hinawi Software is integrated with QuickBooks Software,
Since there is only one column for a date in QuickBooks, now the user has the choice of whether this payment should be posted to QuickBooks by PV date or Cheque date. Whatever date the user wants to post by, simply tick mark the box beside that date, and the transaction will be updated by that date.
Enter the amount of the transaction.
Users can select the building and unit from the dropdown if this payment is related to a Real Estate unit or building.
Write the memo of the transaction.
Write the memo in Arabic of the transaction.
Expenses
In this table, the user can select the
Account (Debit) for what the payment is made. It can be an expense or any other account.
Amount.
VAT Code – The user can select the VAT code assigned to the selected account. There is an option in the system to Predefine the VAT Code for the account so that at the time of selecting the account, the system will automatically fill in the VAT code assigned for the Account.
VAT Amount – The system will automatically calculate the VAT amount
Amount after VAT – The column will display the Amount after VAT
Memo for each line.
Arabic Memo – The column will display the Arabic Memo for the account reading from the profile. Users can manually enter also.
Bill No. of the expense receipt.
Bill Date.
Customer / Job if the expense is for any specific customer/job. (Name will be a must if the user selects Accounts Receivable type in the account column).
The billable option is optional to select. This box can be checked only after selecting the Expense/cost account and customer name. If the user check marks the box, this cost can be added while invoicing to this customer.
Is Prepaid? This option is optional to select. This box can be checked only after selecting the account with the “Other Current asset” account type.
Class to link this amount with which unit or item. etc.
Fixed Asset Item can be selected from the dropdown if the user wants to link expense with the fixed asset. (This will not change the cost of the asset)
Employee if you need to link this payment with a specific employee.
Department to choose the department of the selected employee.
Add to Cost to add this expense on the cost report of the employee.
The deduction to make this payment is a deduction amount of the employee.
Deduction Item
Property: unit if you need to link this payment with property or unit.
Note: The user can show or hide columns in the table by clicking on the image cell after the Sno. Column.
Item
The items tab can be filled in the same way
Following are the Columns defined for the Items Tab.
Items – Select the Item from the drop-down
Description – The system will fill the description automatically from the Item profile. Users can edit or enter the description manually also
Description Arabic – System will fill the description automatically from the Item profile. Users can edit or enter the description manually also
Memo
Quantity – To enter the Quantity
U/M – The system will read it from the item profile, the user can change it as well
Cost – The system will read it from the item profile, the user can change it as well
Net Amount
VAT Code – The system will read the VAT code from the Item Profile
VAT Amount – The system will automatically calculate the VAT amount according to the Vat code selected
Amount After VAT
Bill No.
Bill Date
Billable
Class – The user can select the class from the drop-down.
Fixed Asset Item – The user can select the Fixed asset to link it here. This is for reporting purposes
Employee
Department
Property: Unit
Estimate No.
Tender Items
Fixed Asset Item
The fixed asset Items tab can be used when a new fixed asset is bought.
The user must select the “Vendor name” and the “Load new Asset” button will appear. If there is any asset created as new, the user can load the asset using this button. Then enter the price of this asset and save. This price will be saved as fixed asset cost and depreciation will be calculated accordingly.
This option indicates additional in Hinawi Software as opposed to QuickBooks
Edit Cheque Payment
To Edit the Cheque Payment created.
Go to Accounting Menu – Cheque Payment – Edit Cheque Payment.
The system will display all the Cheque Payments created. The user can double-click on the transaction which the user wants to edit, it will open the Cheque Payment form with the data. Make the changes and Click on the save button.
Print Payment Voucher (for Approval)
This option is applicable only if the system is running on Manual transaction posting mode
Go to Accounting Menu – Cheque Payment – Print Payment Voucher (for Approval)
The system will display all the Cheque Payments created. Select Payment and click on the Print button located in the bottom left corner. This will open a dialogue box with all the predefined templates of the Cheque Payment Voucher. Choose one of the templates and click Ok to Print. After printing, the system will give a message “Is Printed Correctly?” Click Yes or No according to the Print result. If you click Yes, the System will consider the Payment is Printed Correctly and it will be moved to Approve Cheque Payment window, otherwise, the Payment will remain in the same list.
Approve Cheque Payment
This option is applicable only if the system is running on Manual transaction posting mode
To Approve the Cheque Payment Voucher that you have created,
Go to Accounting Menu – Cheque Payment – Approve Cheque Payment
The system will display all the Cheque Payments created. Select the Payment and click on Approve button located in the bottom left corner. This will change the status of the selected transaction to Approved.
Print Payment Voucher
To Print the Cheque Payment Voucher that you have created,
Go to Accounting Menu – Cheque Payment – Print Payment Voucher
The system will display only the Cheque Payments that are Approved and not Voided then after confirming that it’s printed correctly the transaction will be removed from the list.
To Print the Payment Voucher, first select the transactions to Print & Click on the Print button located down. This will open a dialogue box with all the predefined templates of the Cheque Payment Voucher. Choose one of the templates and click Ok to Print. After printing, the system will give a message “Is Printed Correctly?” Click Yes or No according to the Print result. If you click Yes, the System will consider the Payment is Printed Correctly and it will be moved to the Print Cheque window, otherwise, the Payment will remain in the same list.
Print Cheque
To Print the Cheque of the Payment that you have created,
Go to Accounting Menu – Cheque Payment – Print Cheque
The system will display only the Cheque Payments that already Printed the Payment Voucher and not Voided then after confirming that it’s printed correctly the transaction will be removed from the list
To Print the Cheque, first select the transactions to Print & Click on the Print button located down. This will open a dialogue box with all the predefined Cheque templates. Choose one of the templates and click Ok to Print. After printing, the system will give a message “Is Printed Correctly?” Click Yes or No according to the Print result. If you click Yes, the System will consider the Payment is Printed Correctly and it will be moved from here, Otherwise, the Payment will remain in the same list.
After Printing both the Payment Voucher and Cheque the User can deliver the Cheque(s)
Print Cheque with Payment Voucher
Print the Cheque & Payment Voucher together on one page
Go to Accounting Menu – Cheque Payment – Print Cheque with Payment Voucher
The system will display only the Cheque Payments that already Printed the Payment Voucher and not Voided then after confirming that it’s printed correctly the transaction will be removed from the list
To Print the Cheque with the Payment Voucher, first select the transactions to Print & Click on the Print button located down. This will open a dialogue box with all the predefined Cheque and Payment Voucher templates. Choose one of the templates and click Ok to Print. After printing, the system will give a message “Is Printed Correctly?” Click Yes or No according to the Print result. If you click Yes, the System will consider the Payment is Printed Correctly and it will be moved from here, Otherwise, the Payment will remain in the same list.
Deliver Cheque (s)
To Deliver the Cheque for the Payment that you have Printed,
Go to Accounting Menu – Cheque Payment – Deliver Cheque
The system will display only the Payments that are already Printed both Payment Voucher and Cheque and also not voided. Select the payments to deliver, and click on the Deliver button. This will change the status of the Payment to Delivered. Once the Payment is delivered, the User can find these Cheques in the ‘Post PDC’ window if the cheque is Post dated Cheque. If the Cheque is the current date, it will move to Reconcile Cheques Issued window for further procedure.
Void Cheque (s)
To Void \ Cancel the Payment
Go to Accounting Menu – Cheque Payment – Void Cheque
The system will display all the Payments that are not yet reconciled or posted. Users can void it by selecting the payments and Clicking on the Void button down there. The system will make the transaction zero value after voiding the transaction. Even after void, the user will still be able to see the transaction in the reports and the transaction window with the status as Voided.
Cheque To Pay Bills
The cheque-to-pay bills feature can only be used in Hinawi Software ERP if there is an already entered bill in the system. Obviously, the user needs a bill to make payment against.
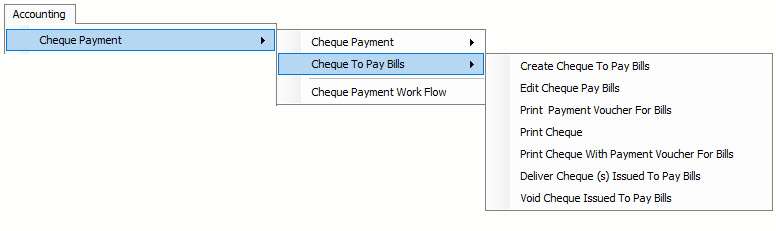
Features of Cheque to Pay Bills are the following
- Create Cheque to Pay Bills
- Edit Cheque Pay Bills
- Pint Payment Voucher for Bills
- Print Cheque
- Print Cheque with Payment Voucher for Bills
- Delivery Cheque (s) Issued to Pay Bills
- Void Cheque Issued to Pay the Bills
Create Cheque To Pay Bills
To make a bill payment using a cheque, go to
Accounting –> Cheque Payment –> Cheque to Pay Bills –> Create Cheque to Pay Bills
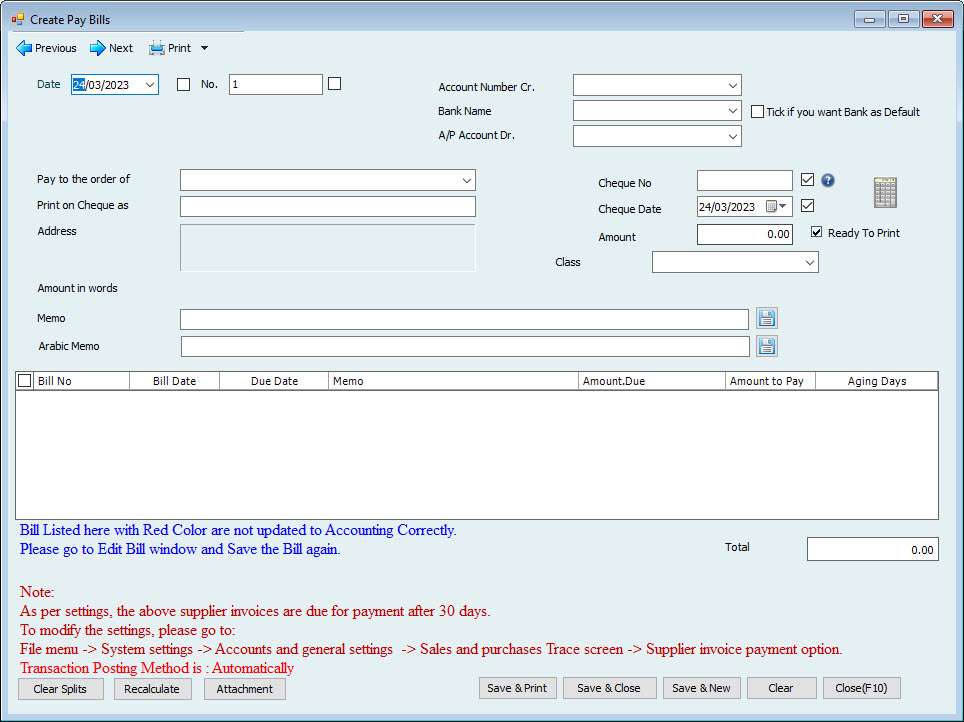
Select the name of Vendor and Accounts Payable account, all the bills for this vendor will show in the columns down.
Most of the time name will be printed on the payment voucher as it is but if the user wants to print a different name on the cheque then the name in the software, change the name in Print on the cheque as column and it will be printed on the cheque.
Enter the PV Date in the date column.
Enter the PV number in No. column. (This number will be generated automatically from the last transaction number)
Select the Bank Account (Credit) from where the payment is being made.
Note: The user can only select the “Bank, PDC, and CUC” type account in this column.
Select the Bank Name in the bank name column. This name is important because, at the time of printing cheques, the user must select the bank name for which the cheque needs to be printed.
The amount of the transaction will automatically be calculated from bills and appear in the amount column.
Enter the Cheque number in cheque no. column. (This number will be generated automatically from the last transaction number)
Important: Since there is only one column for numbers in QuickBooks, now the user has the choice of whether this payment should be posted to QuickBooks by PV No. or Cheque No. Whatever number the user wants to post by, simply tick mark the box beside that number and the transaction will be updated by that number.
Enter the Cheque Date in the cheque date column.
Important: Since there is only one column for a date in QuickBooks, now the user has the choice of whether this payment should be posted to QuickBooks by PV date or Cheque date. Whatever date the user wants to post by, simply tick mark the box beside that date and the transaction will be updated by that date.
Select the bills to pay and the user can change the amount to pay for bills.
Click on the save button to save.
After pressing the save button, the bill status will be changed to “Paid” and the user cannot edit the bills anymore.
Users can set aging days to Pay the Bills by
File menu -> System settings -> Accounts and general settings -> Sales and purchases Trace screen -> Supplier invoice payment option.
Edit Cheque Pay Bills
To Edit the Pay Bills created.
Go to Accounting Menu – Cheque Payment – Cheque Pay Bills – Edit Cheque Pay Bills.
The system will display all the Cheque Pay Bills created. The user can double-click on the transaction which the user wants to edit, it will open the Cheque Pay Bill form with the data. Make the changes and Click on the save button.
Pint Payment Voucher for Bills
To Print the Payment Voucher for the Pay Bills that you have created,
Go to Accounting Menu – Cheque Payment – Cheque Pay Bills – Print Payment Voucher for Bills
The system will display only the Cheque Pay Bills that are Approved and not Voided then after confirming that it’s printed correctly the transaction will be removed from the list.
To Print the Payment Voucher, first select the transactions to Print & Click on the Print button located down. This will open a dialogue box with all the predefined templates of the Cheque Payment Voucher. Choose one of the templates and click Ok to Print. After printing, the system will give a message “Is Printed Correctly?” Click Yes or No according to the Print result. If you click Yes, the System will consider the Payment is Printed Correctly and it will be moved to the Print Cheque window, otherwise, the Payment will remain in the same list.
Print Cheque
To Print the Cheque for the Pay Bills that you have created,
Go to Accounting Menu – Cheque Payment – Cheque Pay Bills – Print Cheque
The system will display only the Pay Bills that already Printed the Payment Voucher and not Voided then after confirming that it’s printed correctly the transaction will be removed from the list
To Print the Cheque, first select the transactions to Print & Click on the Print button located down. This will open a dialogue box with all the predefined Cheque templates. Choose one of the templates and click Ok to Print. After printing, the system will give a message “Is Printed Correctly?” Click Yes or No according to the Print result. If you click Yes, the System will consider the Payment is Printed Correctly and it will be moved from here, Otherwise, the Payment will remain in the same list.
After Printing both the Payment Voucher and Cheque the User can deliver the Cheque(s)
Print Cheque with Payment Voucher for Bills
Print the Cheque & Payment Voucher together on one page
Go to Accounting Menu – Cheque Payment – Cheque Pay Bills – Print Cheque with Payment Voucher for Bills
The system will display only the Cheque Pay Bills that already Printed the Payment Voucher and not Voided then after confirming that it’s printed correctly the transaction will be removed from the list
To Print the Cheque with the Payment Voucher, first select the transactions to Print & Click on the Print button located down. This will open a dialogue box with all the predefined Cheque and Payment Voucher templates. Choose one of the templates and click Ok to Print. After printing, the system will give a message “Is Printed Correctly?” Click Yes or No according to the Print result. If you click Yes, the System will consider the Payment is Printed Correctly and it will be moved from here, Otherwise, the Payment will remain in the same list.
Delivery Cheque (s) Issued to Pay Bills
To Deliver the Cheque Issued to Pay the Bills that you have Printed,
Go to Accounting Menu – Cheque Payment – Cheque Pay Bills – Deliver Cheque (s) Issued to Pay Bills
The system will display only the Pay Bills that are already Printed both Payment Voucher and Cheque and also not voided. Select the Pay Bills to deliver, and click on the Deliver button. This will change the status of the Payment to Delivered.
Void Cheque Issued to Pay the Bills
To Void \ Cancel the Payment
Go to Accounting Menu – Cheque Payment – Cheque Pay Bills – Void Cheque Issued to Pay Bills
The system will display all the Pay Bills that are not yet voided. Users can void it by selecting Pay Bills and Clicking on the Void button down there. The system will make the transaction to zero value and release the Bill attached to the transaction after voiding.
The Bank Transfer method in Hinawi ERP’s accounting module provides users several options for managing and tracking bank transfers.
To create a bank transfer, users navigate to the appropriate menu in Hinawi ERP and enter the required details, such as the payee, amount, and transfer date. Once the bank transfer has been created, users can edit it as needed by changing the transfer details.
To print a payment voucher for approval, users can select the bank transfer in question and select the “print voucher” option. This will create a document that can be reviewed and approved by the appropriate parties.
To approve a bank transfer, users can select the transfer in question and select the “Approve” option. This will mark the transfer as approved, and it can be edited.
After approving a bank transfer, users can print an approved payment voucher by selecting the transfer and choosing the “print voucher” option. This document can be used as a record of the approved transfer. Users can also print a letter to the bank by selecting the “Print letter to bank” option. This letter can be used to inform the bank of the details required to complete the transfer.
If a transfer needs to be voided, the user can select the relevant transfer and choose the “Cancel” option. This will cancel the transfer and remove it from the system.
In summary, the Bank Transfer method in Hinawi ERP’s accounting module provides users with several options for managing and tracking bank transfers, including creating, editing, approving, printing vouchers and letters to the bank, and voiding transactions as needed.
![]()
Bank transfer Pay Bills
The Bank Transfer payment method in Hinawi ERP’s accounting module also provides options for managing Bank Transfer payments for supplier Bills. Users can create and edit Bank Transfer payment Bills, print approved Bank Transfer Payment Vouchers, and cancel Bank Transfer payment Bills as needed.
![]()
| Step 1: Create a Payment Voucher (PV), Or PayBills form with expected Entries options. | Step 2: Posting \ Revise Entries based on what has been selected in Step 1 | Step 3: Read Notes Please |
| Debit Side | ||
| Dr. Expenses (Tab) | User can use any of the Accounts used in the Expense Tab with the following criteria (1). If the account selected is Accounts Receivable Type, then User must Select the Customer Name from the | Not Allowed to save with Zero amount. Some Accounts are NOT allowed to do direct posting on it. 01. 0298·Cheque Issued Return 02. 0299·Cheque Issued Cancelled 03. 0292·Cheque Received Return 04. 0293·Cheque Received Cancelled 05. 0299100·Cheque Issued Lost 06. 02300·Endorsement of Cheque 07. 02301·Endorsement of Cheque Received 08. 02302·Return Endorsed Received Cheque 09. VAT Accounts 10 Fixed Assets Based on Setup by category used. |
| Dr. Items (Tab) | Users can make Payments for selected Items Using the Items Tab in the Payment Voucher. It reads from Item List. | User can use more than one tab in the same Payment Voucher. |
| Dr. Fixed Assets (Tab) | Users can Purchase Fixed Assets using the Fixed Asset Tab with the following criteria: (1) First, the user must create the assets information from the Fixed Assets module. | User have to create the Asset from Fixed Assets Module as NEW Asset before purchasing it. |
| Dr. Accounts Payable | (1) Used when selecting PayBills form. (2) The debit side will be (AP) Account only. (3) User has to select which vendor bills to pay. | If selected PayBills, user can’t select any of first 3 Tabs. |
| Credit Side | ||
| Cr. Bank | Select bank account when cheque date is Current Dated Cheque. The Entry will be: | Using (Deliver the Cheque) is a must to do to See these Cheques in Step 4 Reconcile Cheques Issued window |
| Cr. PDC | Use this Account if the cheque issued is NOT current dated (Future Date). The Entry will be: On Due Date of the cheque; User can Post the – Post Dated Cheque -. Entry will be as the following; Dr. PDC Additional Option: Remove from the List, | After (Posting PDC) process, then these Cheques will be see in Step 4 at Reconclile Cheque Issued window |
| And the credit side might be as below: | ||
| Cr. Endorsement | This option can be used from “Pay from Endorsed Received Cheques” Form. Entry will be: Dr. Accounts Payable | These Cheques will not be seen in Reconcile Cheque Issued list. |
After Payment From Endorsed Received Cheques, User has the option to Go to Accounting >> Manage Cheques Received & CUC >> Return Endorsed Received Cheques; (1). ReCharge the amount to Customer |


| Reconcile Cheques Issued | ||
| From Current \ Latest Status | To New Status | Memo |
| Delivered | Passed / Cleared | No Entry, The Cheque will be removed from the list |
| Delivered | Canceled | Dr. Bank |
| Cr. 0299 Cheque Issued Cancelled (Default Account, the user can’t change) The cheque will be removed from the list. | ||
| Delivered | Returned | Dr. Bank |
| Cr. 0298 Cheque Issued Returned. (Default Account, the user can’t change). The cheque will be REMAIN on the list, and the status will change. | ||
| Delivered | Hold | No Entry, The cheque will be REMAIN in the list, and the status will change. |
| Delivered | Lost | Dr. Bank |
| Cr. 0299100 Cheque Issued Lost (Default Account, user can’t change). The cheque will be removed from the list. | ||
| No Canceled Status from Current to New Status | ||
| Posted by PDC | Passed / Cleared | No Entry, The Cheque will be removed from the list |
| Posted by PDC | Canceled | Dr. Bank |
| Cr. 0299 Cheque Issued Cancelled (Default Account, user can’t change). The cheque will be removed from the list. | ||
| Posted by PDC | Returned | Dr. Bank |
| Cr. 0298 Cheque Issued Returned. (Default Account, user can’t change). The cheque will remain in the list and the status will change. | ||
| Posted by PDC | Hold | No Entry,The cheque will remain in the list and the status will change. |
| Posted by PDC | Lost | Dr. Bank |
| Cr. 0299100 Cheque Issued Lost. (Default Account, user can’t change). The cheque will be removed from the list. | ||
| Returned | Passed / Cleared | Dr. 0298 Cheque Issued Returned. (Default Account, user can’t change). The cheque will be removed from the list. |
| Cr. Bank. The cheque will be removed from the list. | ||
| Returned | Canceled | Dr. 0298 Cheque Issued Returned. (Default Account, user can’t change). |
| Cr. 0299 Cheque Issued Cancelled (Default Account, user can’t change). The cheque will be removed from the list. | ||
| Returned | Returned | Not Allowed |
| Returned | Hold | Not Allowed (Not logic because the cheque is already in Hold with the Vendor) |
| Returned | Lost | Dr. 0298 Cheque Issued Returned. (Default Account, user can’t change). |
| Cr. 0299100 Cheque Issued Lost (Default Account, the user can’t change). The cheque will be removed from the list. | ||
| Hold | Passed / Cleared | No Entry, The Cheque will be removed from the list |
| Hold | Canceled | Dr. Bank |
| Cr. 0299 Cheque Issued Cancelled. (Default Account, user can’t change). The cheque will be removed from the list. | ||
| Hold | Returned | Dr. Bank |
| Cr. 0298 Cheque Issued Returned. (Default Account, the user can’t change). The cheque will be REMAIN in the list, and the status will change. | ||
| Hold | Hold | Not Allowed |
| Hold | Lost | Dr. Bank |
| Cr. 0299100 Cheque Issued Lost. (Default Account, user can’t change). The cheque will be removed from the list. | ||
| No Lost Status from Current to New Status | ||
| Note: | ||
Cheques with Status Posted can’t be Changed to Lost status. Cheques with Status Returned can’t be Changed to Hold status. | ||
Delivered Mains: The cheque date is the current date. The Credit Side is Cr. Bank. The user MUST use the activity: Deliver Cheque. The Cheque is with the Vendor |
Posted by PDC Mains: The cheque date WAS the future date at the time of creation. Now the cheque is posted because The First entry was Cr. PDC The Entry when do – Post PDC – is: Dr. PDC Cr. Bank. The Cheque is with the Vendor. |
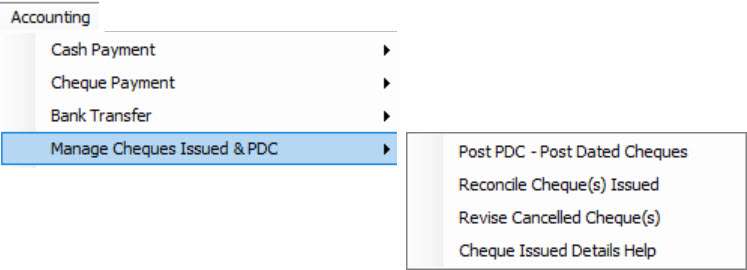
In Hinawi ERP, the Manage Cheques Issued & PDC feature allows users to manage cheques issued by the company, and post-dated cheques (PDCs) received from customers.
The Post PDC – Post Dated Cheques feature allows users to post PDCs to the appropriate accounts. This can help companies track and manage PDCs more effectively.
The Reconcile Cheque(s) Issued feature allows users to reconcile issued cheques with the company’s records to ensure accuracy. This can help companies ensure that their records are up-to-date and accurate.
The Revise Cancelled Cheque(s) feature allows users to revise canceled cheques if necessary. This can be useful if a cheque has been canceled due to a mistake or other issue.
The Cheque Issued Details Help feature provides information and guidance on managing cheques issued and PDCs in Hinawi ERP. This can be useful for users new to the system or who need additional assistance with this feature.
This menu, if the posting setup: Is Automatic

This menu, if the posting setup: Is Manual
Post to Accounting after approval
Accounting Entry:
Dr. Cash
or
Dr. Bank
Cr. Customers or another name
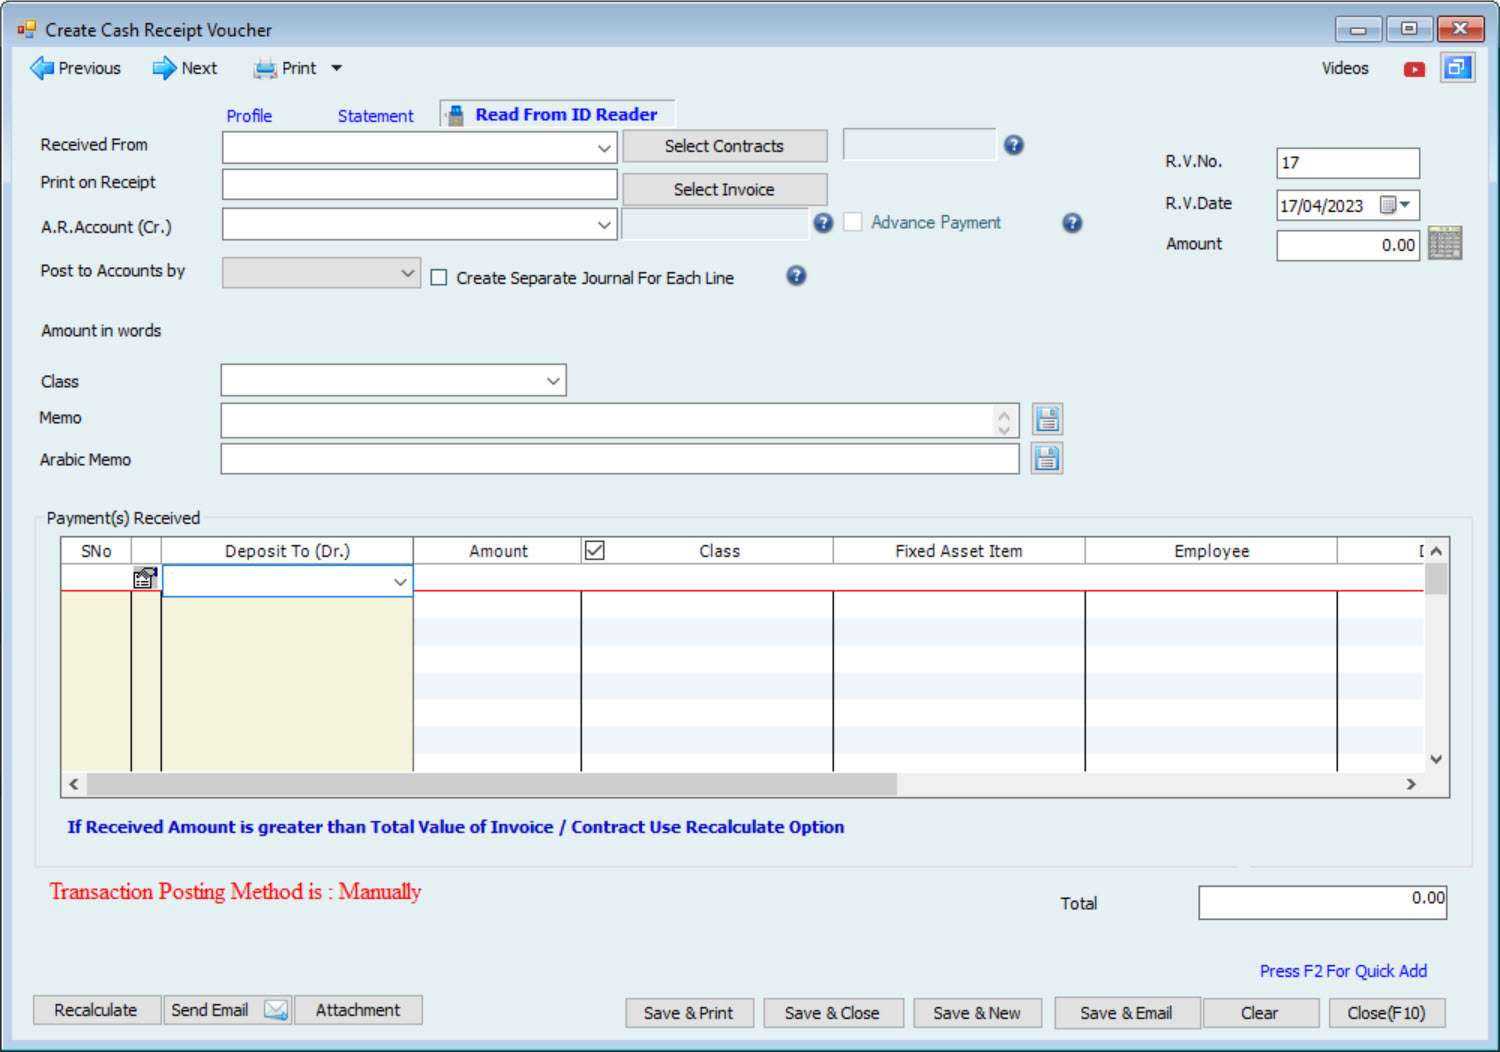
The cash receipt method in Hinawi ERP’s accounting module provides users with several options for managing and tracking cash receipts.
To create a cash receipt, users navigate to the appropriate menu in Hinawi ERP and enter the required details, such as the payer, amount, and date received. Once the cash receipt is created, users can edit it as needed by changing the receipt details.
To approve a cash receipt, users can select the receipt in question and select the “Approve” option. This will mark the receipt as approved, and it can be processed.
To print a cash voucher, users can select the voucher in question and select the “Print Voucher” option. This will create a physical copy of the voucher that can be used as a receipt for the transaction.
Users can select the receipt in question and choose the “void” option if a receipt needs to be voided. However, this option is only available if the receipt was posted as a journal voucher (JV). If the document was posted as an incoming document (RV), it could only be voided.
To delete a cash receipt posted as an RV, the user can select the relevant receipt and choose the “Delete” option. This will remove the receipt from the system.
In summary, the cash receipt method in the Hinawi ERP accounting module provides users with several options for managing and tracking cash receipts, including the ability to create, edit, approve, print, cancel (if posted as JV), and delete (if posted as RV) receipts as needed.
This menu, if the posting setup: Is Automatic
This menu, if the posting setup: Is Manual
Post to Accounting after approval
Accounting Entries for Received Cheques
01. This is considered a Current Dated Cheque.
Dr. Bank Cr. Customer or another name
Printing the Receipt Voucher is a MUST to see this cheque in Reconcile Cheques List.
02. When receiving future cheque date:-
Dr. CUC Cr. Customer or another name
When Depositing the cheque in the Bank for collections, use Post CUC:
Dr. Bank Cr. CUC (Not allowed to change)
Before Posting CUC, User can do the following options from Post CUC LIST (Its additional features): Accounting Menu >>> Manage Received Cheques & CUC.
(1) Remove cheques From the List (Not allowed for Discounted Cheques):-
Dr. Accounts Receivable Cr. CUC Account (Not allowed to change)
(2) Replace Cheque’s from the list (Not allowed for Cheques from Opening Balance Entry & Discounted Cheques); after you replace the cheque, you have to go to Replace Cheque window to create a new RV:-
Dr. Accounts Recievable Cr. CUC Account (Not allowed to change)
(3) Present cheque’s After:
There will not be any Entry; The system will hold the cheque for a specific period as user-defined for Posting; the Transactions after Present:-
Present To Post to Bank -> Not Accepted until the date is coming.
To Replace -> Accepted even if the date is not coming and the system is with generating JV.
To Remove -> Accepted even if the date is not coming and the system is with generating JV.
To Present -> Accepted and hold the cheque to the new date.
(Note: Scroll down to see options 2-2 for Discount Cheque if required before doing Post CUC).
After Posting CUC, these cheques will be seen in Reconcile Cheques List.
Those Cheques which are Removed, Replaced, or Present after will not go to Reconcile Cheques List window.
Read more about discounts and endorsement of the cheques.
The Cheque Receipt method in Hinawi ERP’s Accounting module provides users with several options for managing and tracking cheque collections.
To create a cheque receipt, users can navigate to the appropriate menu in the Hinawi ERP system and enter the required details, such as the payer, amount, and date received. Once the cheque receipt is created, users can edit it as needed by making the necessary changes to the receipt details.
To approve a cheque receipt voucher, users can select the voucher in question and select the “Approve” option. This will mark the receipt voucher as approved and can be processed.
To print a temporary cheque receipt, users can select the voucher and select the “print temporary voucher” option. This will create a physical copy of the voucher that can be used as a temporary transaction record. Once the cheque has been received, users can print the final cheque receipt voucher by selecting the “Print Voucher” option.
In some cases, users may need to convert a temporary receipt voucher into a final voucher. For this purpose, users can select the temporary voucher and choose the “Convert to final voucher” option. This will update the voucher to reflect the final receipt of the cheque.
If a cheque receipt voucher needs to be voided, users can select the relevant receipt and choose the “void” option. However, this option is only available if the receipt was posted as a journal voucher (JV). If the voucher has been posted as a receipt voucher (RV), it can only be deleted.
To delete an incoming cheque document posted as an RV, the user can select the voucher and the “Delete” option. This will remove the voucher from the system.
In addition to these options, the Cheque Receipt Voucher method in the accounting module of Hinawi ERP also provides the ability to reconcile cheques received. This is done by selecting the cheques in question and selecting the “Reconcile” option. This will update the system to reflect the receipt of the cheques and ensure that they are properly accounted for.
In summary, the Cheque Receipt Voucher method in Hinawi ERP’s accounting module provides users with several options for managing and tracking cheque collections, including the ability to create, edit, approve, print, convert temporary vouchers to final vouchers, void (if posted as JV), delete (if posted as RV), and reconcile cheques as needed.
Post to Accounting after approval
The Cash/Cheque Receipt Voucher method in the Accounting Module of Hinawi ERP provides users with a range of options for managing and tracking cash and cheque collections.
To edit a cash/cheque receipt voucher, users can select the voucher in question and make any necessary changes to the receipt details.
To approve a cash/cheque receipt voucher, users can select the voucher in question and choose the “approve” option. This will mark the voucher as approved and allow it to be processed.
To print a temporary cash/cheque receipt voucher, users can select the voucher in question and the “print temporary voucher” option. This will generate a physical copy of the voucher that can be used as a temporary transaction record. Once the cash/cheque has been received, users can print the final cash/cheque receipt voucher by selecting the “print voucher” option.
In some cases, users may need to convert a temporary receipt voucher to a final one. Users can select the temporary voucher and choose the “convert to final voucher” option. This will update the voucher to reflect the final receipt of the cash/cheque.
If a cash/cheque receipt voucher needs to be voided, users can select the voucher in question and choose the “void” option. However, this option is only available if the voucher has been posted as a journal voucher (JV). If the voucher has been posted as a receipt voucher (RV), it can only be deleted.
To delete a cash/cheque receipt voucher posted as an RV, users can select the voucher in question and choose the “delete” option. This will remove the voucher from the system.
In addition to these options, the Cash/Cheque Receipt Voucher method in the Accounting Module of Hinawi ERP also allows users to reconcile cheques received. This can be done by selecting the cheques and choosing the “reconcile” option. This will update the system to reflect the receipt of the cheques and ensure that they are properly accounted for.
In summary, the Cash/Cheque Receipt Voucher method in the Accounting Module of Hinawi ERP provides users with a range of options for managing and tracking cash and cheque collections, including the ability to edit, approve, print temporary and final vouchers, convert temporary vouchers to final vouchers, void (if posted as a JV), delete (if posted as an RV), and reconcile cheques as needed.
The Bank Transfer Receipt Voucher method in the Accounting Module of Hinawi ERP provides users with various options for managing and tracking bank transfer collections.
To create a bank transfer receipt voucher, users can navigate to the appropriate menu in the Hinawi ERP system and enter the necessary details, such as the payer, amount, and receipt date. Once the bank transfer receipt voucher has been created, users can edit it if needed by making necessary changes to the receipt details.
Users can select the voucher to approve a bank transfer receipt voucher and choose the “approve” option. This will mark the voucher as approved and allow it to be processed.
To print a bank transfer receipt voucher, users can select the voucher in question and select the “print voucher” option. This will generate a physical copy of the voucher that can be used as a transaction record.
If a bank transfer receipt voucher needs to be voided, users can select the voucher in question and choose the “void” option. However, this option is only available if the voucher has been posted as a journal voucher (JV). If the voucher has been posted as a receipt voucher (RV), it can only be deleted.
To delete a bank transfer receipt voucher posted as an RV, users can select the voucher in question and choose the “delete” option. This will remove the voucher from the system.
Accounting Entries for Discount Cheque
Discount received Cheque. If the debit side is CUC.
|

When receiving future cheque date:-
Dr. CUC Cr. Customer or another name
When Depositing the cheque in the Bank for collections, use Post CUC:
Dr. Bank Cr. CUC (Not allowed to change)
Before Posting CUC, User can do the following options from Post CUC LIST (Its additional features): Accounting Menu >>> Manage Received Cheques & CUC.
(1) Remove cheques From the List (Not allowed for Discounted Cheques):-
Dr. Accounts Receivable Cr. CUC Account (Not allowed to change)
(2) Replace Cheque’s from the list (Not allowed for Cheques from Opening Balance Entry & Discounted Cheques); after you replace the cheque, you have to go to Replace Cheque window to create a new RV:-
Dr. Accounts Recievable Cr. CUC Account (Not allowed to change)
(3) Present cheque’s After:
There will not be any Entry; The system will hold the cheque for a specific period as user-defined for Posting; the Transactions after Present:-
Present To Post to Bank -> Not Accepted until the date is coming.
To Replace -> Accepted even if the date is not coming and the system is with generating JV.
To Remove -> Accepted even if the date is not coming and the system is with generating JV.
To Present -> Accepted and hold the cheque to the new date.
(Note: Scroll down to see options 2-2 for Discount Cheque if required before doing Post CUC).
After Posting CUC, these cheques will be seen in Step 4 at Reconcile Cheques List.
Those Cheques which are Removed, Replaced, or Present after will not go to Reconcile Cheques List window.
In Hinawi ERP, the Reconcile Cheque(s) Received feature is part of the Cheque Received Work Flow, which helps companies manage and track customer cheques.
The Manage Cheques Received & CUC feature allows users to manage cheques received and cheques under collection (CUC). The Discount Cheque feature allows users to apply discounts to customer cheques. The Post CUC – Cheques Under Collection feature allows users to post CUC to the appropriate accounts.
The Reconcile Cheque(s) Received feature allows users to reconcile received cheques with the company’s records to ensure accuracy. This can help companies ensure that their records are up-to-date and accurate. The Replace Received Cheques feature allows users to replace received cheques if necessary. The Create Charges for Returned Received Cheque feature allows users to create charges for returned cheques.
The Endorsement of Received Cheques feature allows users to endorse received cheques. The Pay from Endorsed Received Cheques feature allows users to pay from endorsed received cheques. The Return Endorsed Received Cheques feature allows users to return endorsed received cheques. The Move Returned Cheque(s) To Customer feature allows users to move returned cheques to customers. The Passed / Clear Cheque(s) Moved To Customer feature allows users to move passed / clear cheques to customers.
Accounting Entries for Reconcile Received Cheques
Important Note:
The reconcile list will display the current dated cheques which debited account is: Bank type.
If debited account is ChequeS Under Collections (CUC) type, then user must do Post the CUC to see the cheques in this list.
| A- From Post / Print to Other Status | |||
| From Post / Print -> To Passed | No Journal Voucher Entry | No JV and the cheque will remove from the list | |
| From Post / Print -> To Returned | Dr. Returned Cheque | Cr. Bank | Auto Created JV will be from Account type Returned Cheque to Account type Bank. |
| From Post / Print -> To Hold | No Journal Voucher Entry | The cheque will remain in the Reconcile window list. | |
| From Post / Print -> To Lost | Dr. Lost Cheque | Cr. Bank | Auto Created JV will be to Bank, and it will delete from the list, the cheque status must be printed |
| B- From Returned to Other Status | |||
| From Returned -> To Passed | Dr. Bank | Cr. Returned Cheque | The cheque will delete from the list. It will be in the Report. |
| From Returned -> To Returned | You can’t do this | No Journal Voucher | |
| From Returned -> To Hold | You can’t do this | No Journal Voucher | |
| From Returned -> To Lost | Dr. Lost Cheque | Cr. Returned Cheque | Auto-created JV, and the cheque will be deleted from the list |
| From Return -> To Replace | No Journal Voucher Entry | Change Status to be Replaced, then go to the next step. | |
| C- From Hold to Other Status | |||
| From Hold -> To Passed | No Journal Voucher Entry | The cheque will delete from the list. It will be in the Report. | |
| From Hold -> To Hold | You can’t do this | No Journal Voucher | |
| From Hold -> To Returned | Dr. Returned Cheque | Cr. Bank | The cheque remains in the list |
| From Hold -> To Lost | Dr. Lost Cheque | Cr. Bank | The cheque is deleted from the list |
| Replace Returned cheque with Current Date Cheque. | Dr. Bank | Cr. Returned Cheque | Use Replace Window located under the Accounting menu. |
| Reversal Entry Canceled | Dr. Account Receivable | Cr. Canceled Cheque | Create JV to close the amount in, Canceled and Lost Cheque if cheque is not replaced. |
| Reversal Entry Lost | Dr. XX | Cr. Lost Cheque | |
| Remove Cheques From List | Dr. Accounts Receivable | Cr. CUC | |
| Dr. Opening Balance | Cr. CUC | Before posting the cheque, if the user chooses to Remove from the list. | |
Endorsement Received Cheques
| Dr. Endorsement | If the Debit side is Endorsement, the Received Cheque will go to a new List Called. Pay from Endorsed Cheque; Users can use Cheque Payment Form to pay to Vendors ONLY using the cheques received and the Entry will be as follows. Dr. Accounts Payable ( The Account type will be Accounts Payable only). Cr. Endorsement (Not allowed to change) If the Endorsement Cheque is Returned,, the entries below will be created automatically and are not allowed to change. Go to: Accounting Menu >>> Manage Received Cheques & CUC Dr. Endorsement Return Received Cheque Cr. Accounts Payable Then Dr. Accounts Recievable Cr. Endorsement Return Received Cheque Note: User can allocate this payment with vendor Bills. Go to Accounting Menu >> Bills >> Set Credits. The Endorsed cheques received that is used to pay the vendors will be seen in Step 4 at Reconcile Cheques List. |
| Cr. Accounts Receivable | The user has to select the Customer name only |
| Cr. Advance Payment \ Contra Account (Liabilities Account type) | Dr. Advance Payment(Not allowed to change). Cr. User will Select Manually from the drop down. Go to: Accounting Menu >> Accountant. To use the credit side, the user has to tick the box (Advance Payment) while creating the RV. |
In Hinawi ERP, the Legal Actions on Cheque(s) Received feature allows companies to manage and track legal actions related to customer cheques.
The Returned (Bounced) Cheque List feature provides a list of cheques returned or bounced due to insufficient funds. The Create Police Case Cheque List feature allows users to create a police case for a returned cheque. The Create Civil Case Cheque List feature allows users to create a civil case for a returned cheque.
The Settlement of Cheque feature allows users to mark a cheque as settled. The Unpaid Settlement Cheques feature provides a list of unpaid settlement cheques. The Close Legal Case feature allows users to close a legal case related to a returned cheque.
The Pay to the Lawyer – Legal Case feature allows users to pay a lawyer for a case related to a returned cheque. The Pay to the Lawyer – Civil Case feature allows users to pay the lawyer for a civil case related to a returned cheque.
The Cheque Received Details Help feature provides information and guidance on managing legal actions related to cheques received in Hinawi ERP. This can be useful for users new to the system or who need additional assistance with this feature.
Legal Module Journal Entries
Transaction Actitity | Debit Account | Credit Account | Notes |
Move to Police Case | No Journal Voucher Entry | When the user decided to move the returned cheque to the police case | |
Create Police Case | Dr. A/R |
Cr. Advance Payment for Legal Case | As per the legal module setup, the amount will be half of the late payment fees for the legal case. |
Move to civil Case | No Journal Voucher Entry | When decided to move the Police case to the Civil case | |
Create Police Case | Dr. A/R
| Cr. Advance Payment for Civil Case professional fees | The amount will be as per Legal Module Setup |
Settlement of Cheque | Dr. A/R | Cr. Cheques Received Return Cr. Late Payment Fees Account Cr. Legal Case Account Cr. Civil Case Professional Fees | The Credit accounts will appear in the JV as per the setup of the legal module ( Posting Accounts Tab ) |
| Dr. Bank / Cash | Cr. A/R | When collecting the payment as RV |
Close legal Case | No Journal Voucher Entry | The Cheque will be removed from the legal case list | |
Pay to the Lawyer – Legal Case | Dr. Legal Case Account | Cr. Cash / Bank | The amount that appeared when creating legal advance JV |
Pay to the lawyer – Civil Case | Dr. Civil Case Professional Fees | Cr. Cash /Bank | The amount that appeared when creating civil case professional fees JV |
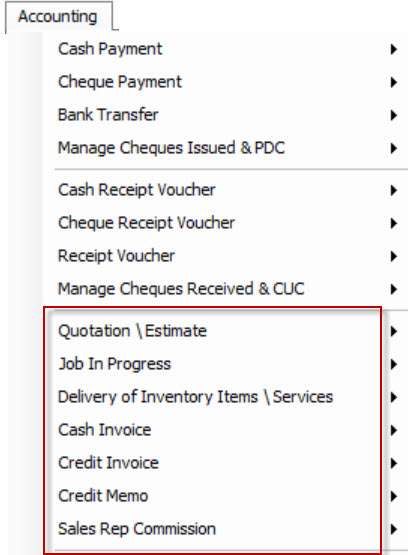
The sales workflow in Hinawi ERP’s accounting module includes several steps that help companies manage and track their sales processes.
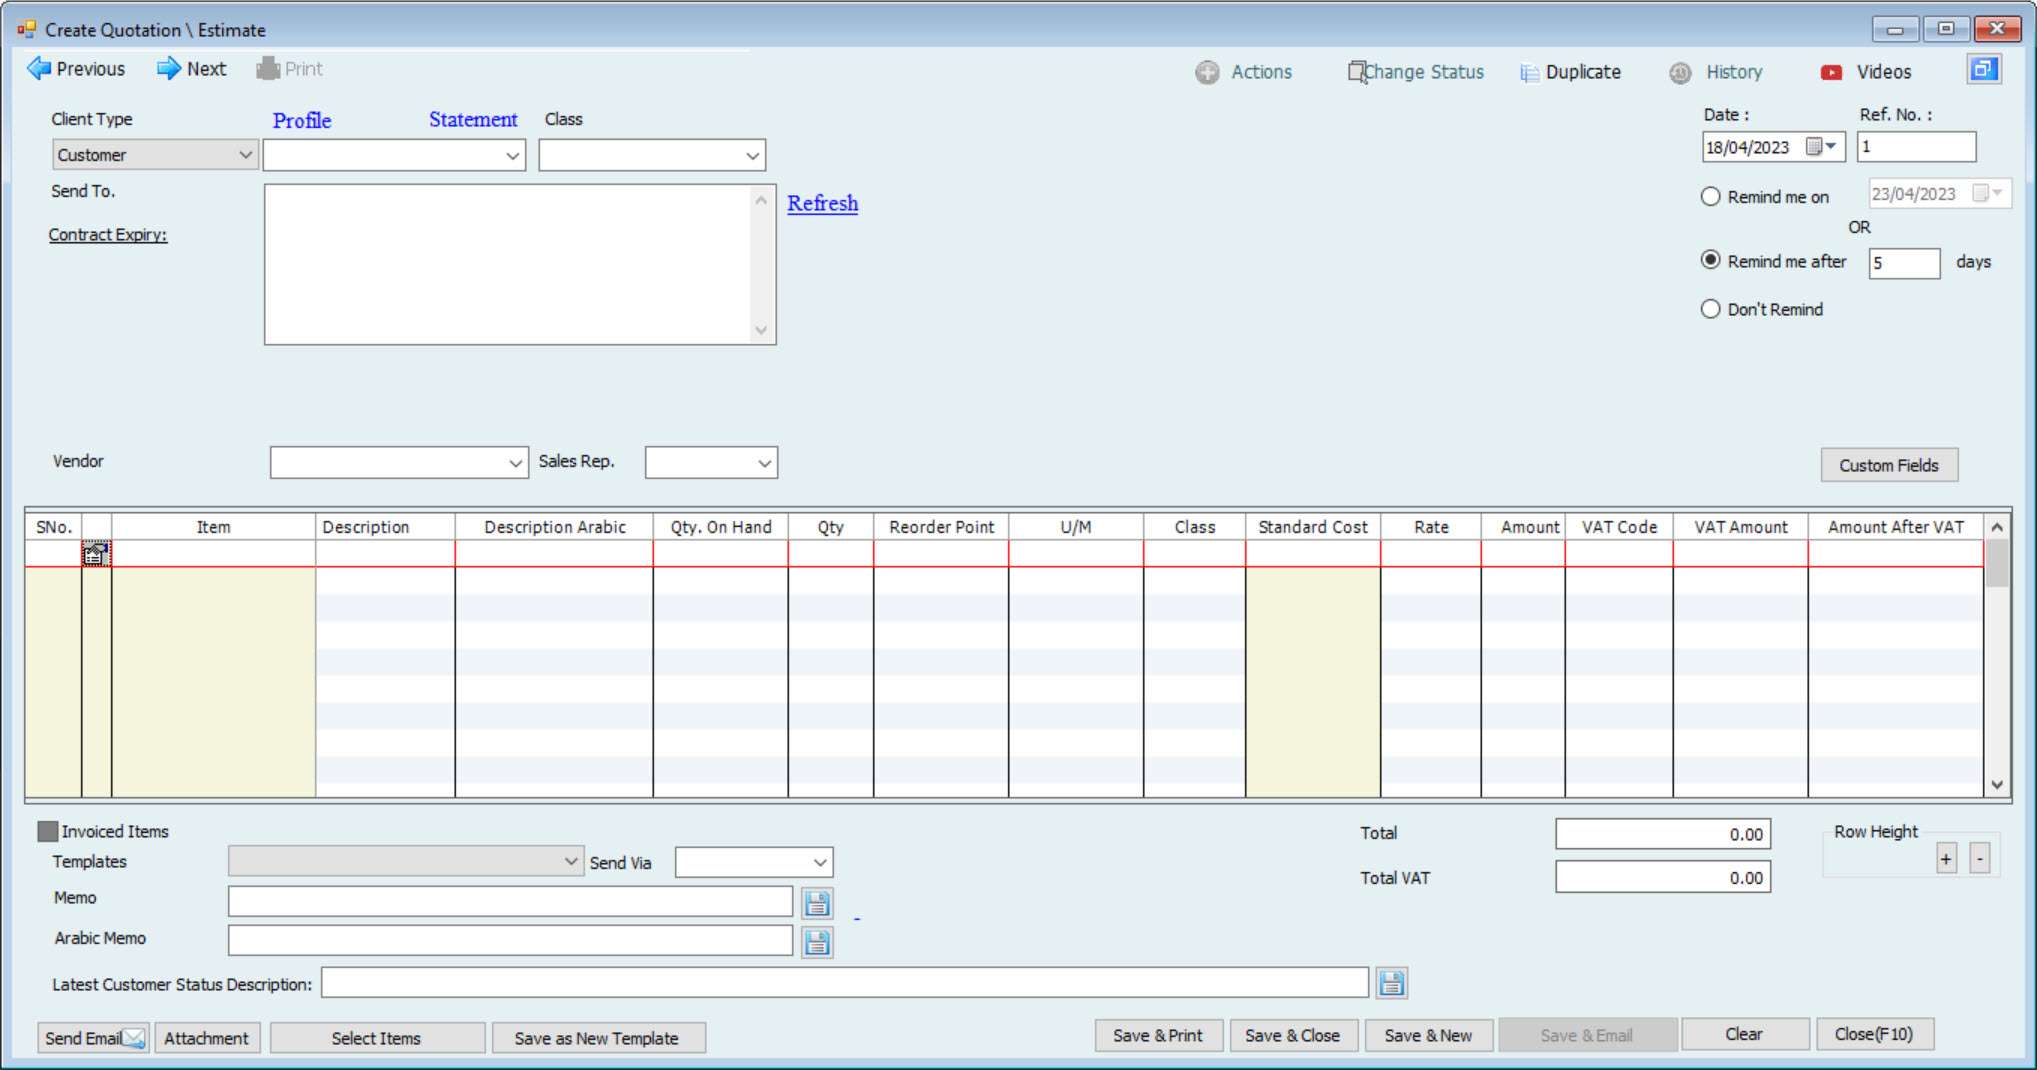
The first step is to create a quotation or estimate that lists the products or services offered for sale and the associated costs. If necessary, users can edit the quote or estimate to ensure accuracy. They may also print a copy for their records, share it with the appropriate parties, or delete the document when it is no longer needed.
Once a quote or estimate is complete and ready for editing, it can be approved by an authorized user. Users can also track the status of a quote or estimate or change it if necessary. If a quote or estimate needs to be revised or canceled, the approval can be canceled, and the document returned to the requestor for further processing.
Once a quote or estimate is approved, users can create a delivery or invoice for the products or services sold. They can also create templates for quotes or estimates to save time and ensure a consistent document format.
Users can use the “Order in Progress” feature to track orders in progress. They can move approved quotes to the Work in Progress list, view a list of all work in progress, and close a job once it is complete. The Order Status History feature allows users to view a sales order’s status history, including any changes made.
Users can also move approved quotes to the Annual Maintenance Contract (AMC) list to track ongoing maintenance contracts. They can also move completed contracts to the AMC list, and expired contracts are moved from the progress and AMC lists. The AMC list allows users to view and manage all ongoing maintenance contracts in one place.
The sales workflow in Hinawi ERP’s accounting module includes several steps for managing deliveries and invoices.
Users can use the Create Delivery function to create delivery of stock items or services. If necessary, they can edit the delivery details to ensure accuracy. They can also print a copy of the delivery for their records, share it with relevant parties, or cancel the delivery if it is no longer needed.
Users can use the Create Cash Invoice function to create a cash invoice. They can edit the details of the invoice if needed, print a copy for their records or share it with relevant parties, or cancel the invoice if it is no longer needed. Users can also close issued vouchers using the Close Issued Vouchers function.
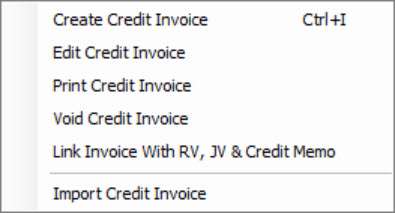
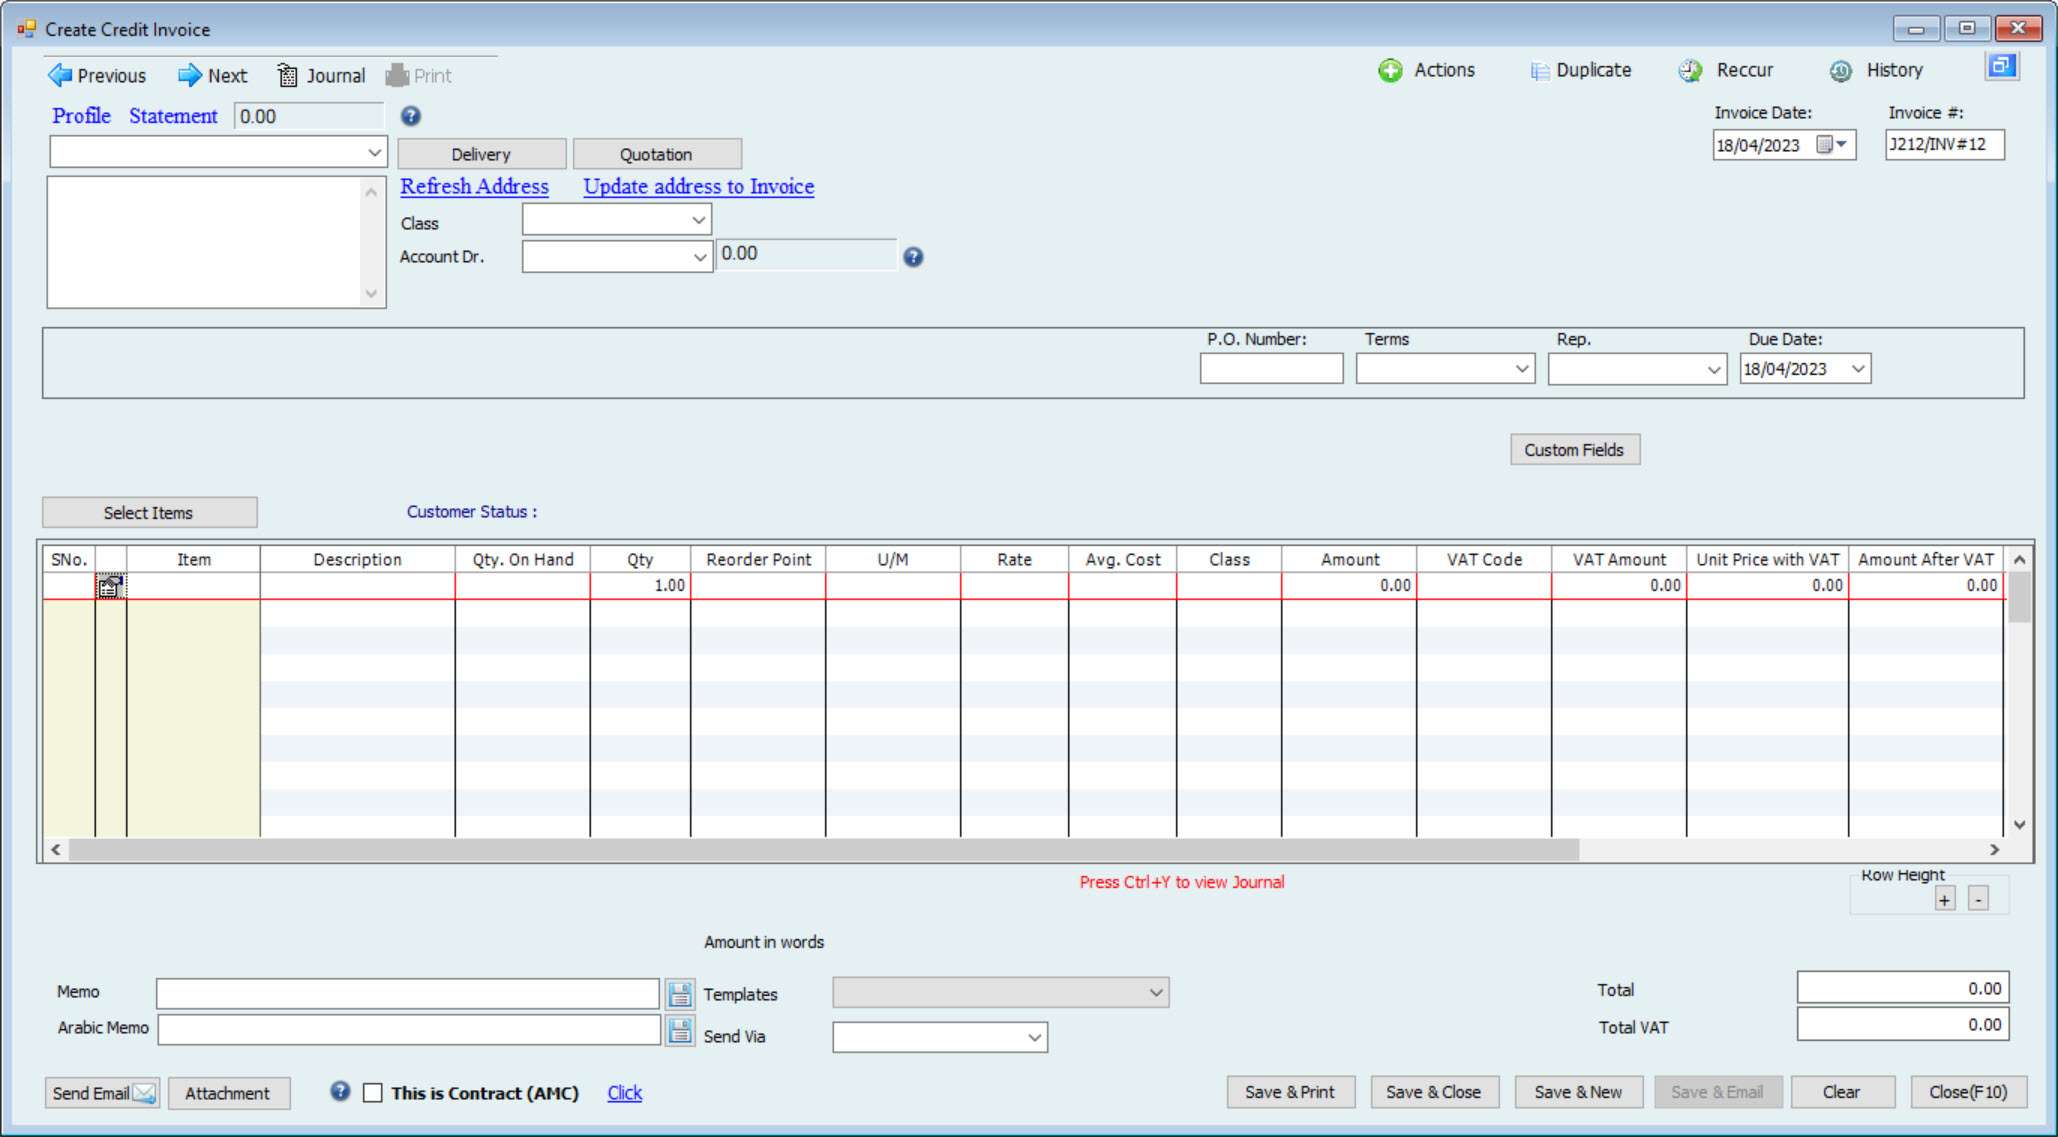
Users can use the Create Credit Invoice function to create a credit invoice. They can edit the details of the invoice if needed, print a copy for their records, share it with relevant parties, or cancel the invoice if it is no longer needed. Users can also link the invoice to a payment voucher (RV), journal voucher (JV), or credit memo using the Link Invoice to RV, JV, and Credit Memo functions. Users can also import credit memo invoices using the Import Credit Memo Invoice function.
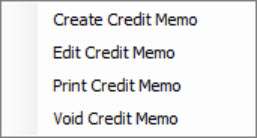
Users can use the Create Credit Memo function to create a credit memo. They can edit the details of the credit memo if needed, print a copy for their records, share it with relevant parties, or cancel the credit memo if it is no longer needed.
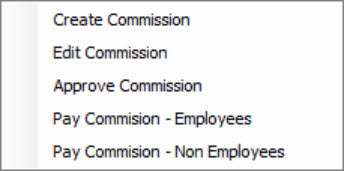
The sales workflow in Hinawi ERP also includes a commission management feature for sales reps. Users can create commission records, edit them as needed, and approve them for payment. They can also pay commissions to employees or non-employees using the Pay Commission – Employee and Pay Commission – Non-Employee functions.


| Hinawi ERP calculation for the cost of selling inventory when an item is sold without available stock quantity. | ||||
| Standard Cost | Selling Price | |||
| Accounting Entries | 20.00 | 25.00 | Form | |
| 1 | Create an Invoice without Quantity | INVOICE | ||
| Dr. | Cr. | |||
| Dr. Accounts Receivable | 25.00 | |||
| Cr. Income Account of Item | 25.00 | |||
| Dr.COGS of Item | 20.00 | |||
| Cr. Asset Account of Item | 20.00 | |||
| Total | 45.00 | 45.00 | ||
| 2 | Create Bill After Invoice Date with no change in Std. Cost | BILL | ||
| Dr. | Cr. | |||
| Cr. Accounts Payable | 20.00 | |||
| Dr.Asset Account of Item | 20.00 | |||
| Total | 20.00 | 20.00 | ||
| Invoice Remains Same, which is: | INVOICE | |||
| Dr. | Cr. | |||
| Dr. Accounts Receivable | 25.00 | |||
| Cr. Income Account of Item | 25.00 | |||
| Dr.COGS of Item | 20.00 | |||
| Cr. Asset Account of Item | 20.00 | |||
| Total | 45.00 | 45.00 | ||
| 3 | Create Bill before Invoice Date with no change in Std. Cost | BILL | ||
| Dr. | Cr. | |||
| Cr. Accounts Payable | 20.00 | |||
| Dr.Asset Account of Item | 20.00 | |||
| Total | 20.00 | 20.00 | ||
| Invoice Remains the Same, which is: | INVOICE | |||
| Dr. | Cr. | |||
| Dr. Accounts Receivable | 25.00 | |||
| Cr. Income Account of Item | 25.00 | |||
| Dr.COGS of Item | 20.00 | |||
| Cr. Asset Account of Item | 20.00 | |||
| Total | 45.00 | 45.00 | ||
| 4 | Create Bill After Invoice Date with a change in Std. Cost (Increase Cost to 22.00) | BILL | ||
| Dr. | Cr. | |||
| Cr. Accounts Payable | 22.00 | |||
| Dr.Asset Account of Item | 22.00 | |||
| Dr.COGS of Item | 2.00 | |||
| Cr. Asset Account of Item | 2.00 | |||
| Total | 24.00 | 24.00 | ||
| Invoice Remains the Same, which is: | INVOICE | |||
| Dr. | Cr. | |||
| Dr. Accounts Receivable | 25.00 | |||
| Cr. Income Account of Item | 25.00 | |||
| Dr.COGS of Item | 20.00 | |||
| Cr. Asset Account of Item | 20.00 | |||
| Total | 45.00 | 45.00 | ||
| 5 | Create Bill Before Invoice Date with a change in Std. Cost (Increase Cost to 22.00) | BILL | ||
| Dr. | Cr. | |||
| Cr. Accounts Payable | 22.00 | |||
| Dr.Asset Account of Item | 22.00 | |||
| Total | 22.00 | 22.00 | ||
| Invoice Changed | INVOICE | |||
| Dr. | Cr. | |||
| Dr. Accounts Receivable | 25.00 | |||
| Cr. Income Account of Item | 25.00 | |||
| Dr.COGS of Item | 22.00 | |||
| Cr. Asset Account of Item | 22.00 | |||
| Total | 47.00 | 47.00 | ||
| 6 | Create Bill After Invoice Date with a change in Std. Cost (Decrease Cost to 18.00) | BILL | ||
| Dr. | Cr. | |||
| Cr. Accounts Payable | 18.00 | |||
| Dr.Asset Account of Item | 18.00 | |||
| Dr.Asset Account of Item | 2.00 | |||
| Cr. COGS of the Item | 2.00 | |||
| Total | 20.00 | 20.00 | ||
| Invoice Remains the Same, which is: | INVOICE | |||
| Dr. | Cr. | |||
| Dr. Accounts Receivable | 25.00 | |||
| Cr. Income Account of Item | 25.00 | |||
| Dr.COGS of Item | 20.00 | |||
| Cr. Asset Account of Item | 20.00 | |||
| Total | 45.00 | 45.00 | ||
| 7 | Create Bill Before Invoice Date with a change in Std. Cost (Increase Cost to 18.00) | BILL | ||
| Dr. | Cr. | |||
| Cr. Accounts Payable | 18.00 | |||
| Dr.Asset Account of Item | 18.00 | |||
| Total | 18.00 | 18.00 | ||
| Invoice Changed | INVOICE | |||
| Dr. | Cr. | |||
| Dr. Accounts Receivable | 25.00 | |||
| Cr. Income Account of Item | 25.00 | |||
| Dr.COGS of Item | 18.00 | |||
| Cr. Asset Account of Item | 18.00 | |||
| Total | 43.00 | 43.00 | ||

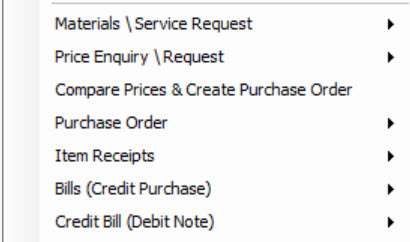
The purchasing workflow in Hinawi ERP’s accounting module includes several steps to help companies streamline their purchasing processes and make informed decisions about materials and services.
The first step is to create a material or service request, which outlines the specific items or services needed for a project or business transaction. If necessary, users can edit the request to ensure accuracy. Once a request is complete, it must be approved by an authorized user before it can be processed. If a request needs to be revised or canceled, it cannot be approved and will be returned to the requester for further processing. Users can also print a copy of a request for their records, share it with relevant parties, or cancel a request if it is no longer needed.
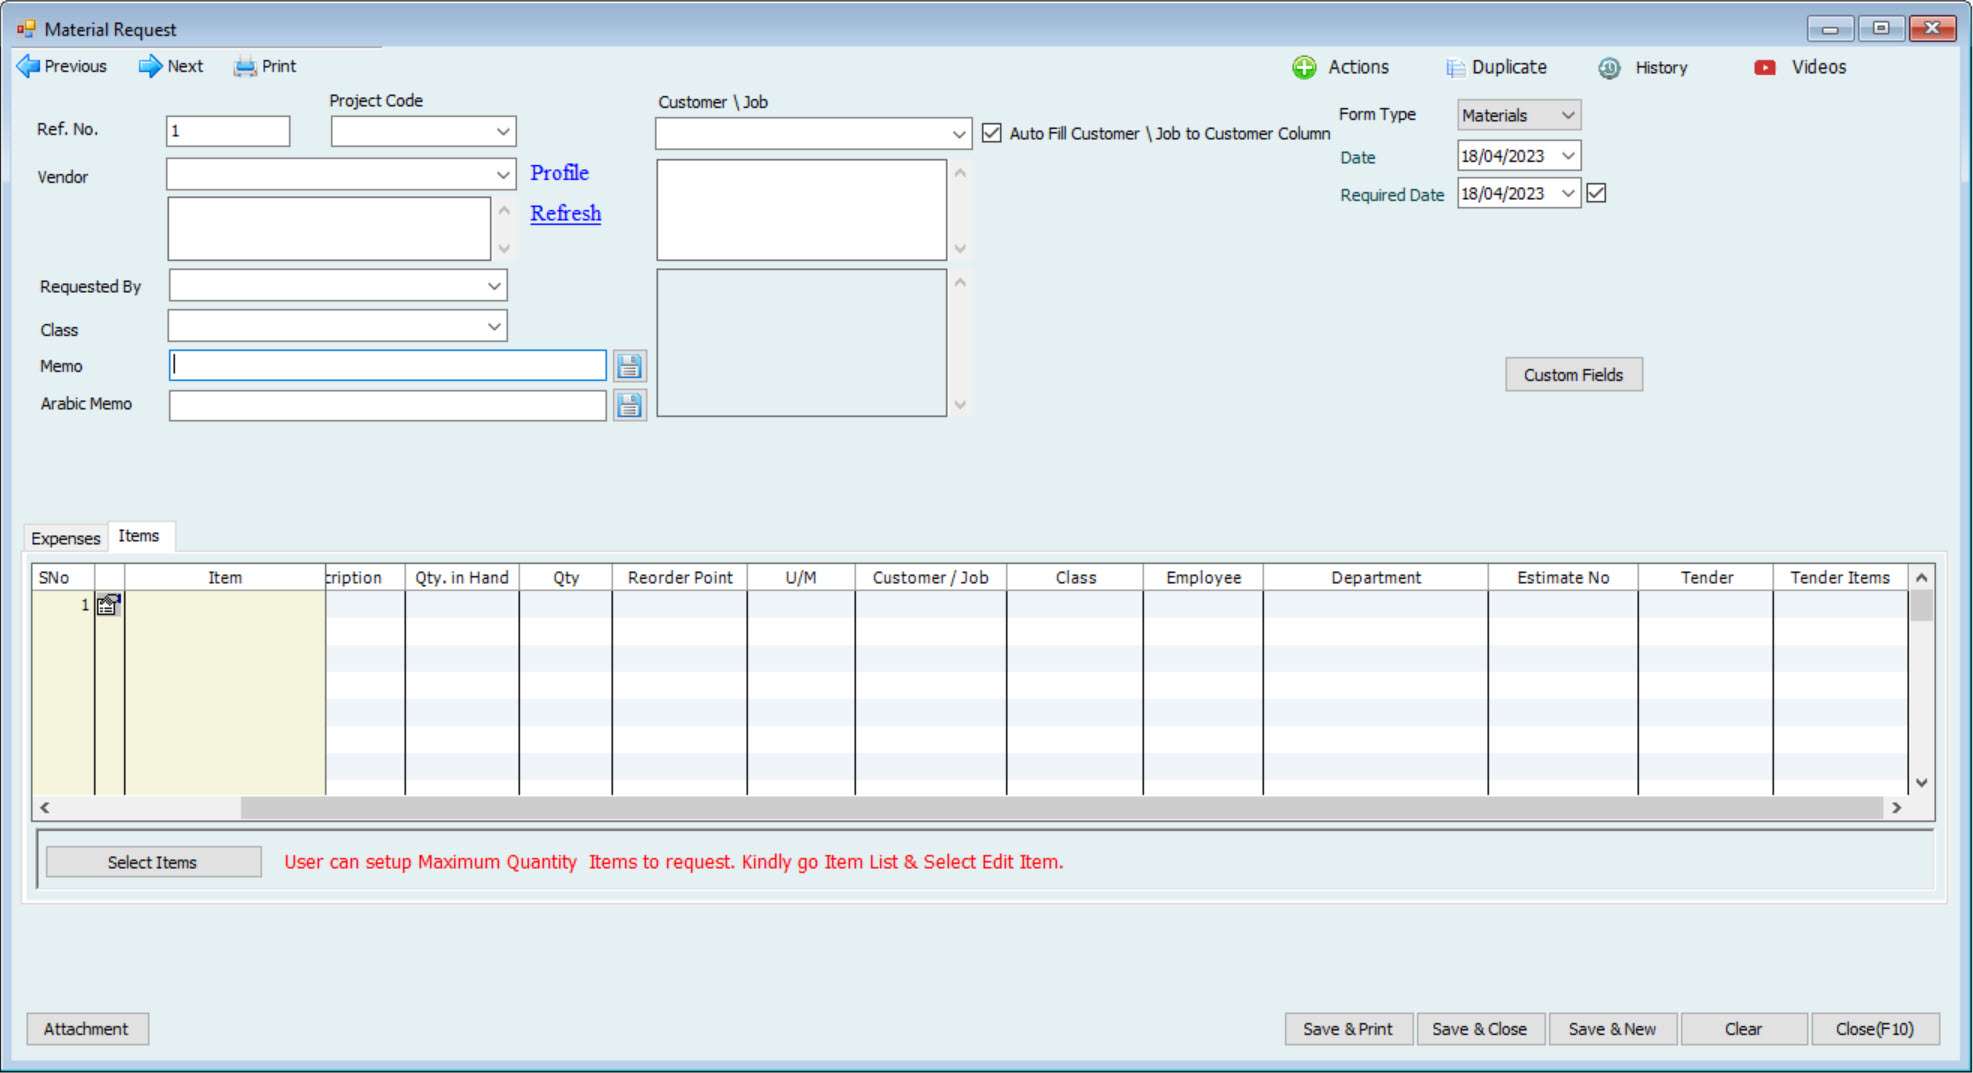
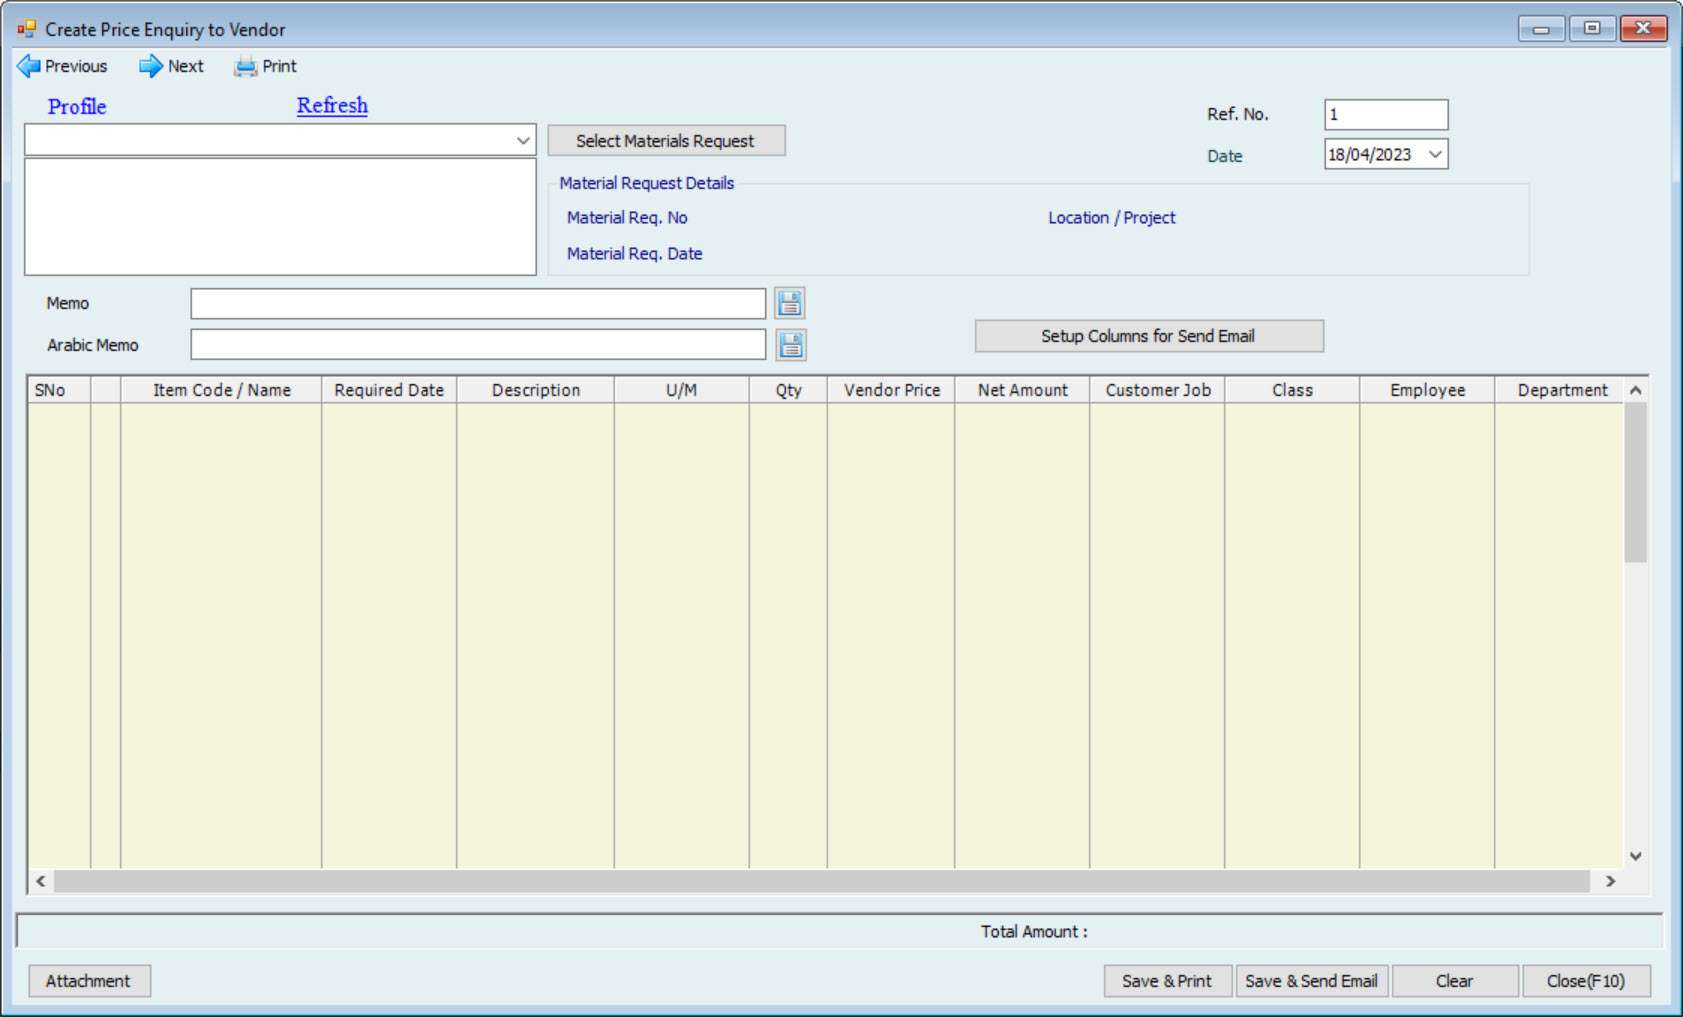
Users can create a price request to obtain pricing information and send it to one or more suppliers. They can also edit the request and choose to print or email a copy to the vendor(s). After receiving responses from different vendors, users can view a comparison sheet to aid decision-making and approve the selected vendor’s price. They can also print a copy of the approved price request or cancel it if it is no longer needed.
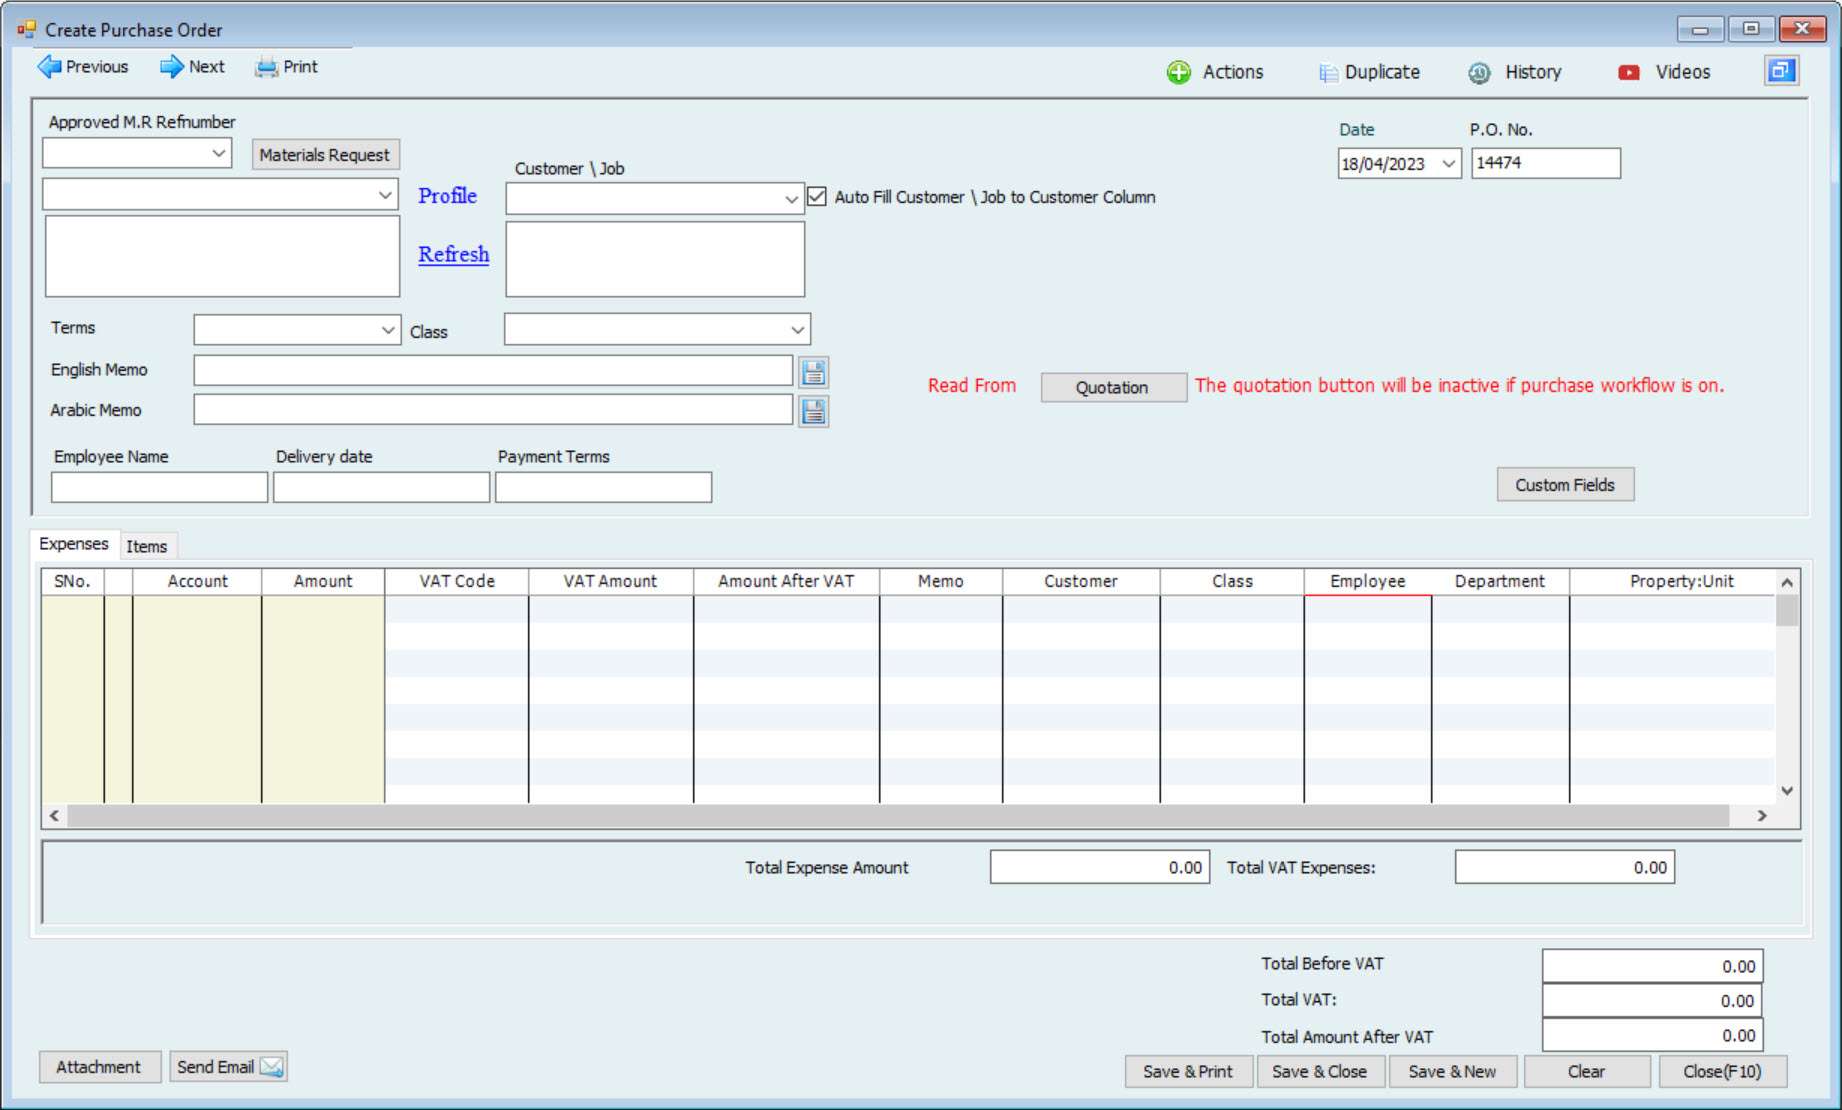
Once a vendor’s price is selected, users can create a purchase order to initiate the purchasing process. They can edit the order if necessary; an authorized user must approve it before processing it. If an order needs to be revised or canceled, the approval can be removed and returned to the requester for further processing. Once an order is fulfilled, it can be closed to mark it as complete, and users can print a copy of the order or void it if it is no longer needed.
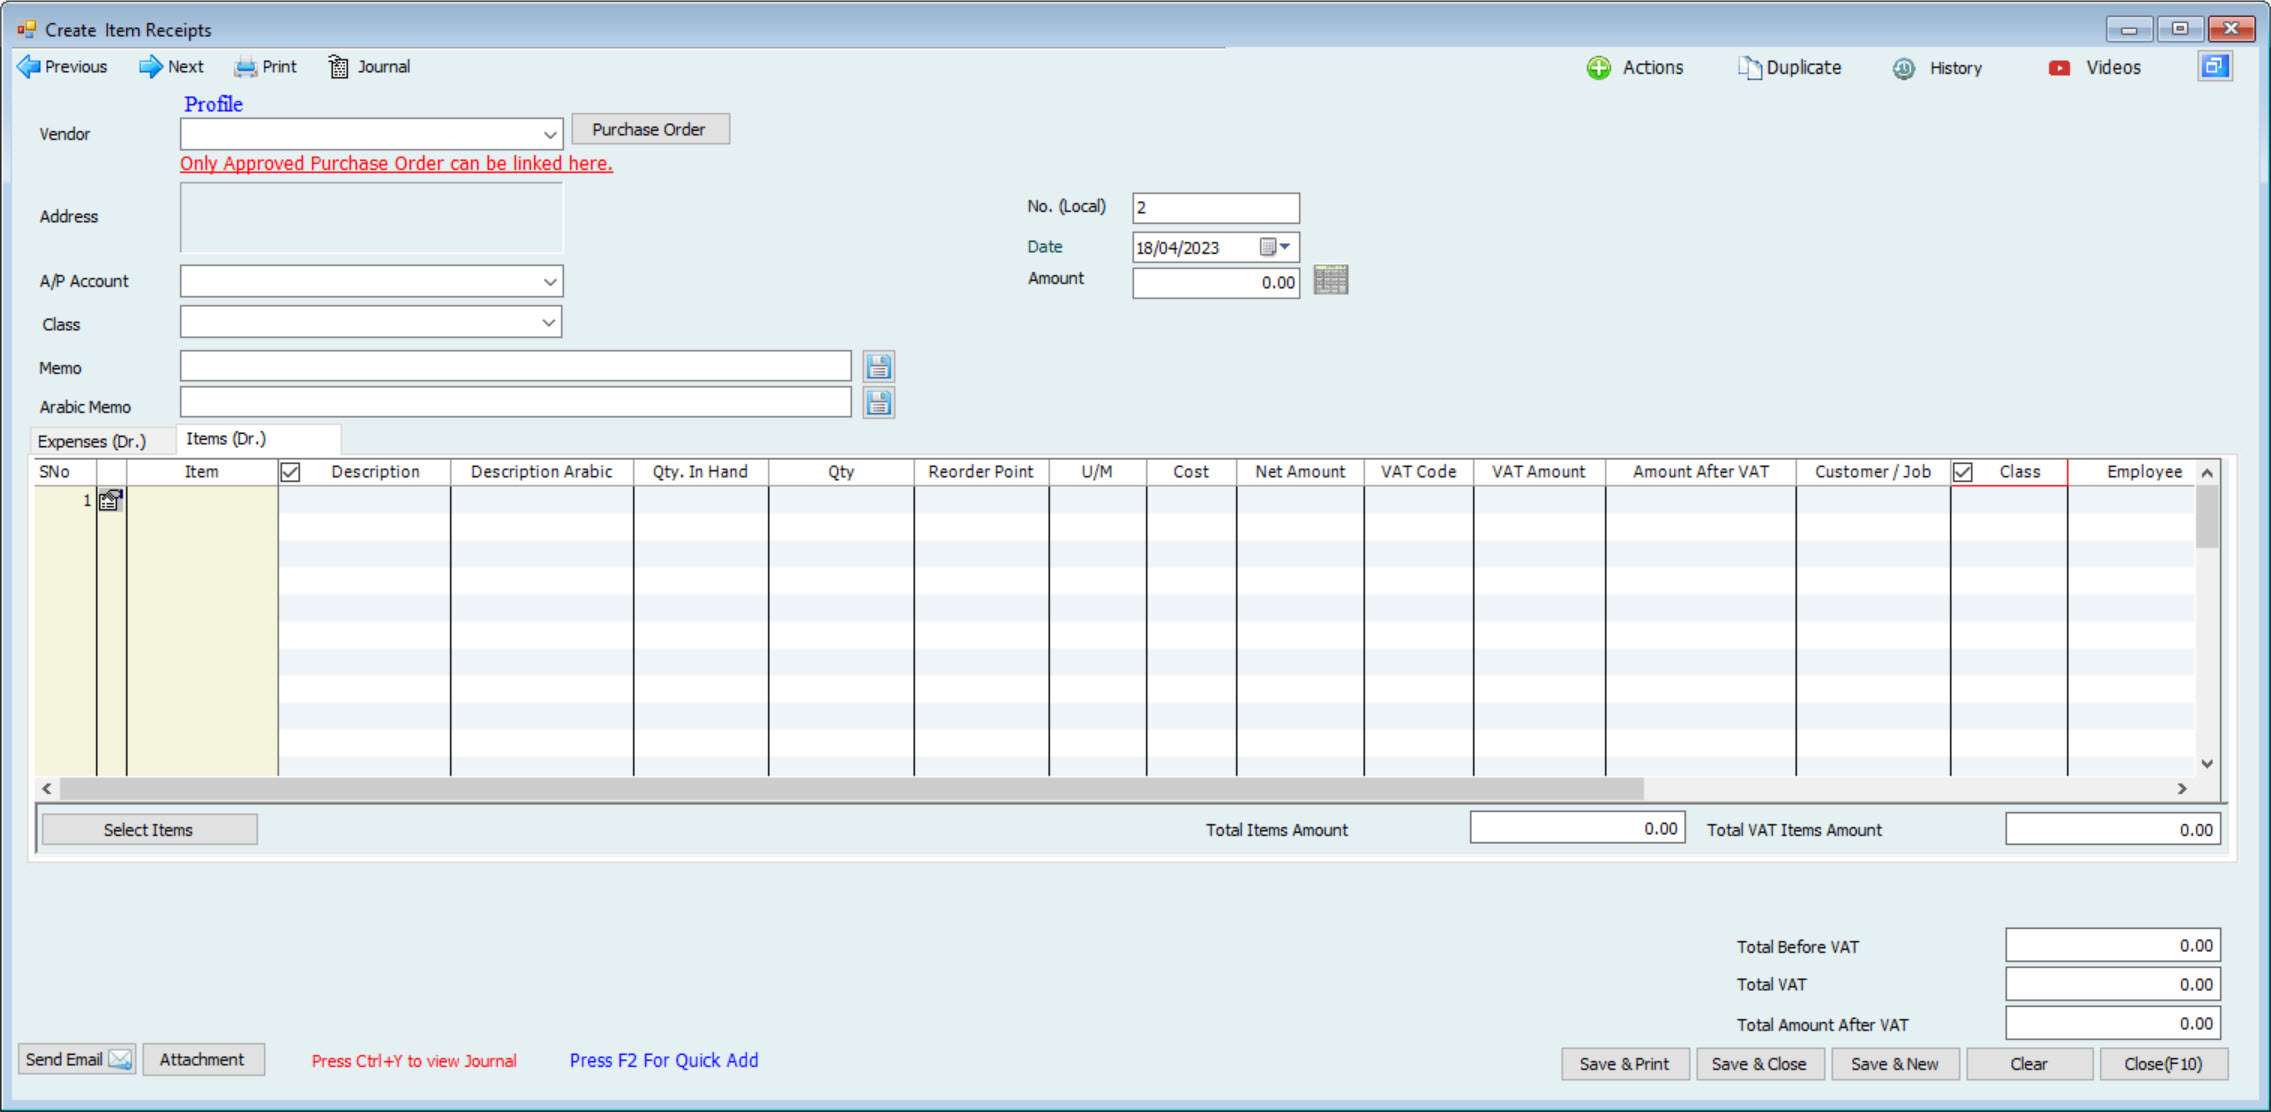
Users can create an item receipt to record the receipt of materials or services from a vendor. They can also edit the receipt, print a copy for their records, or share it with relevant parties. If a goods receipt is no longer needed, it can be voided to remove it from the system.
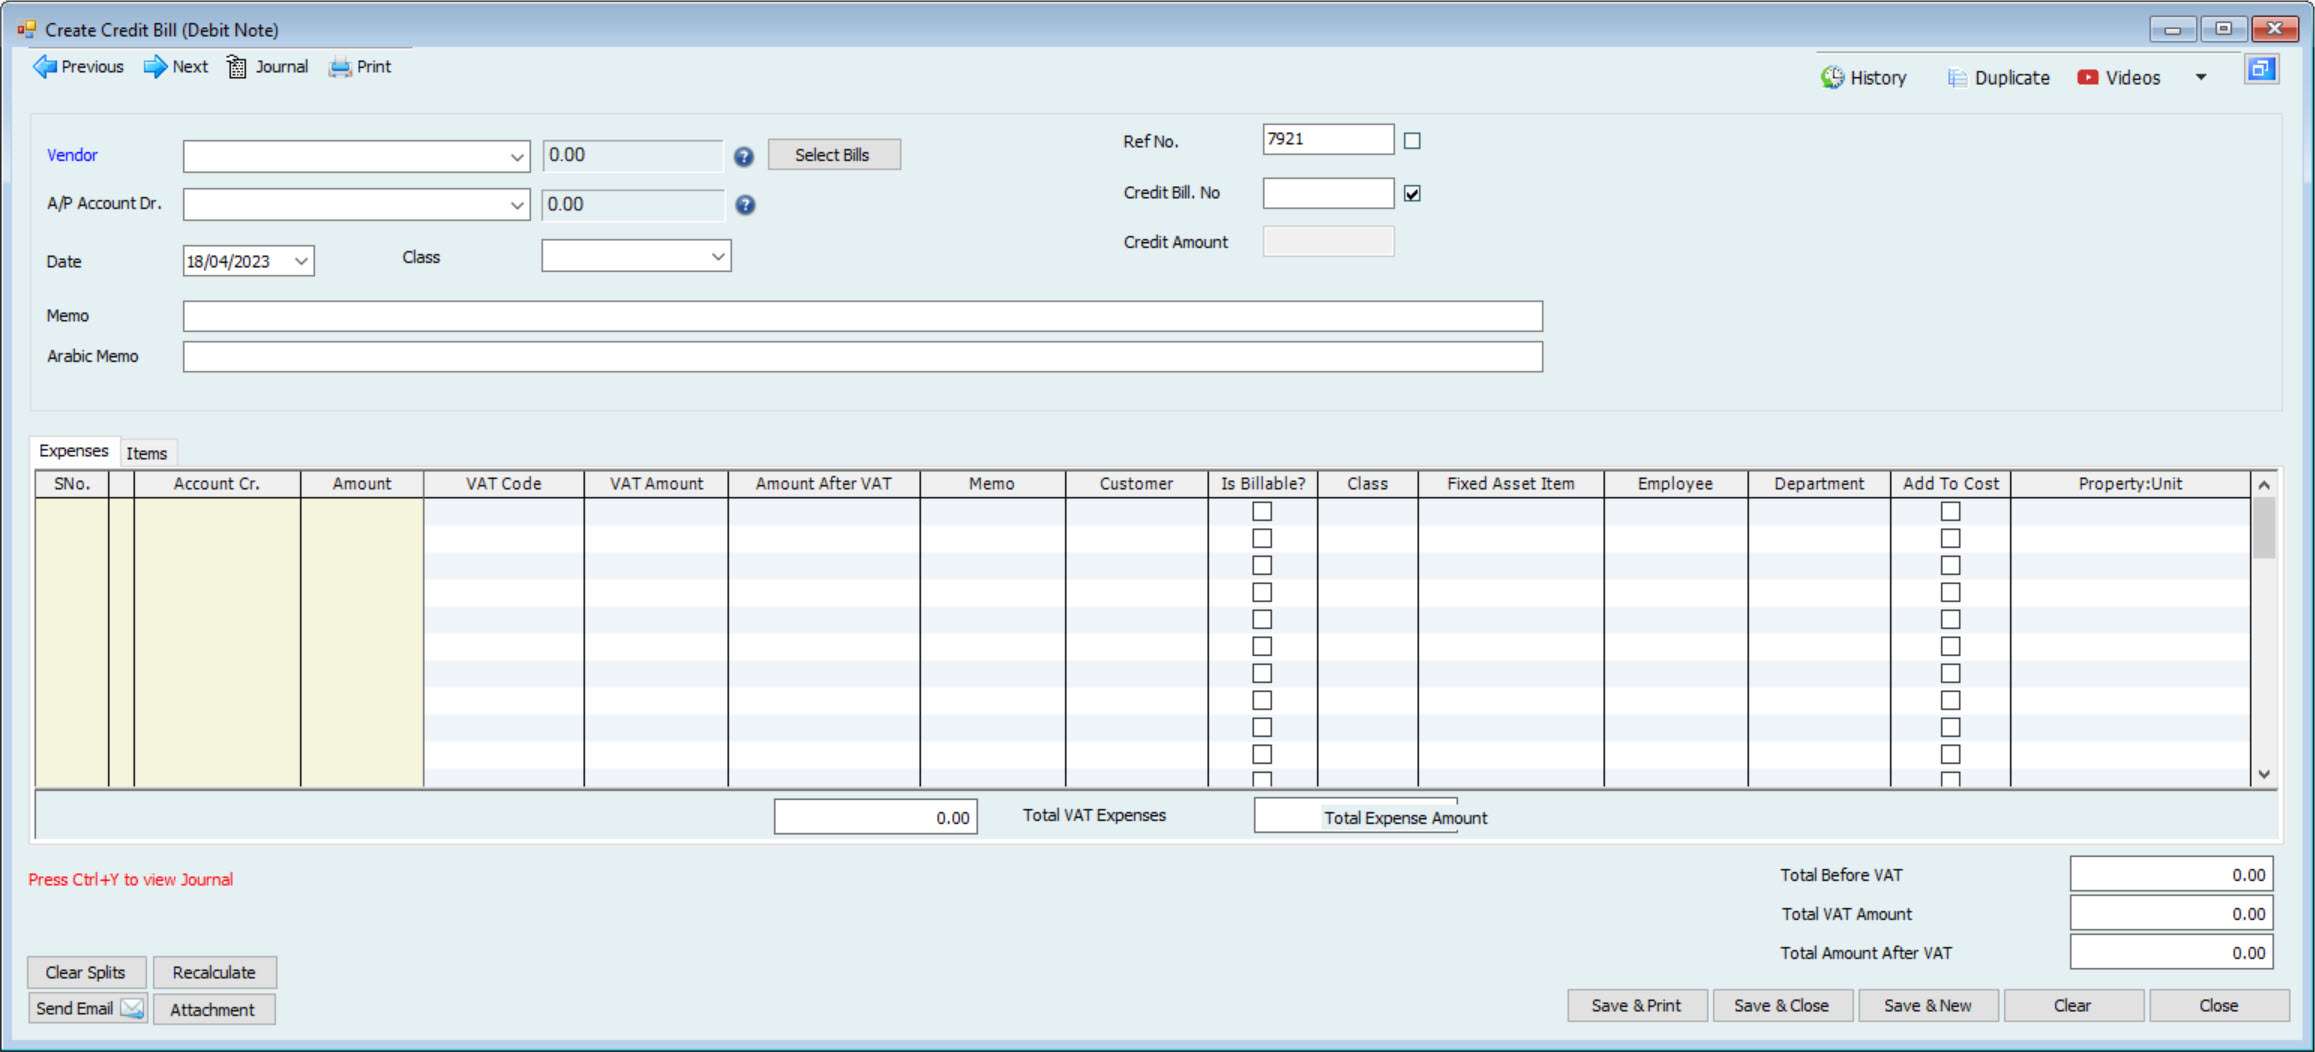
A bill is a document that lists the goods or services purchased from a vendor along with the associated costs. Users can edit a bill, print a copy, or void it if it is no longer needed. They can also link a bill with a payment voucher (PV), a journal voucher (JV), or a credit bill to facilitate payment.
The purchasing workflow in Hinawi ERP’s accounting module helps companies streamline their purchasing processes and make informed decisions about materials and services. It includes steps for creating and editing requests and orders, obtaining price quotes from vendors, comparing prices, approving and releasing orders, and creating and editing item receipts and bills. These steps help ensure that companies have the necessary documentation for their records and can make changes or cancel documents as needed.

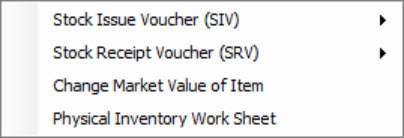
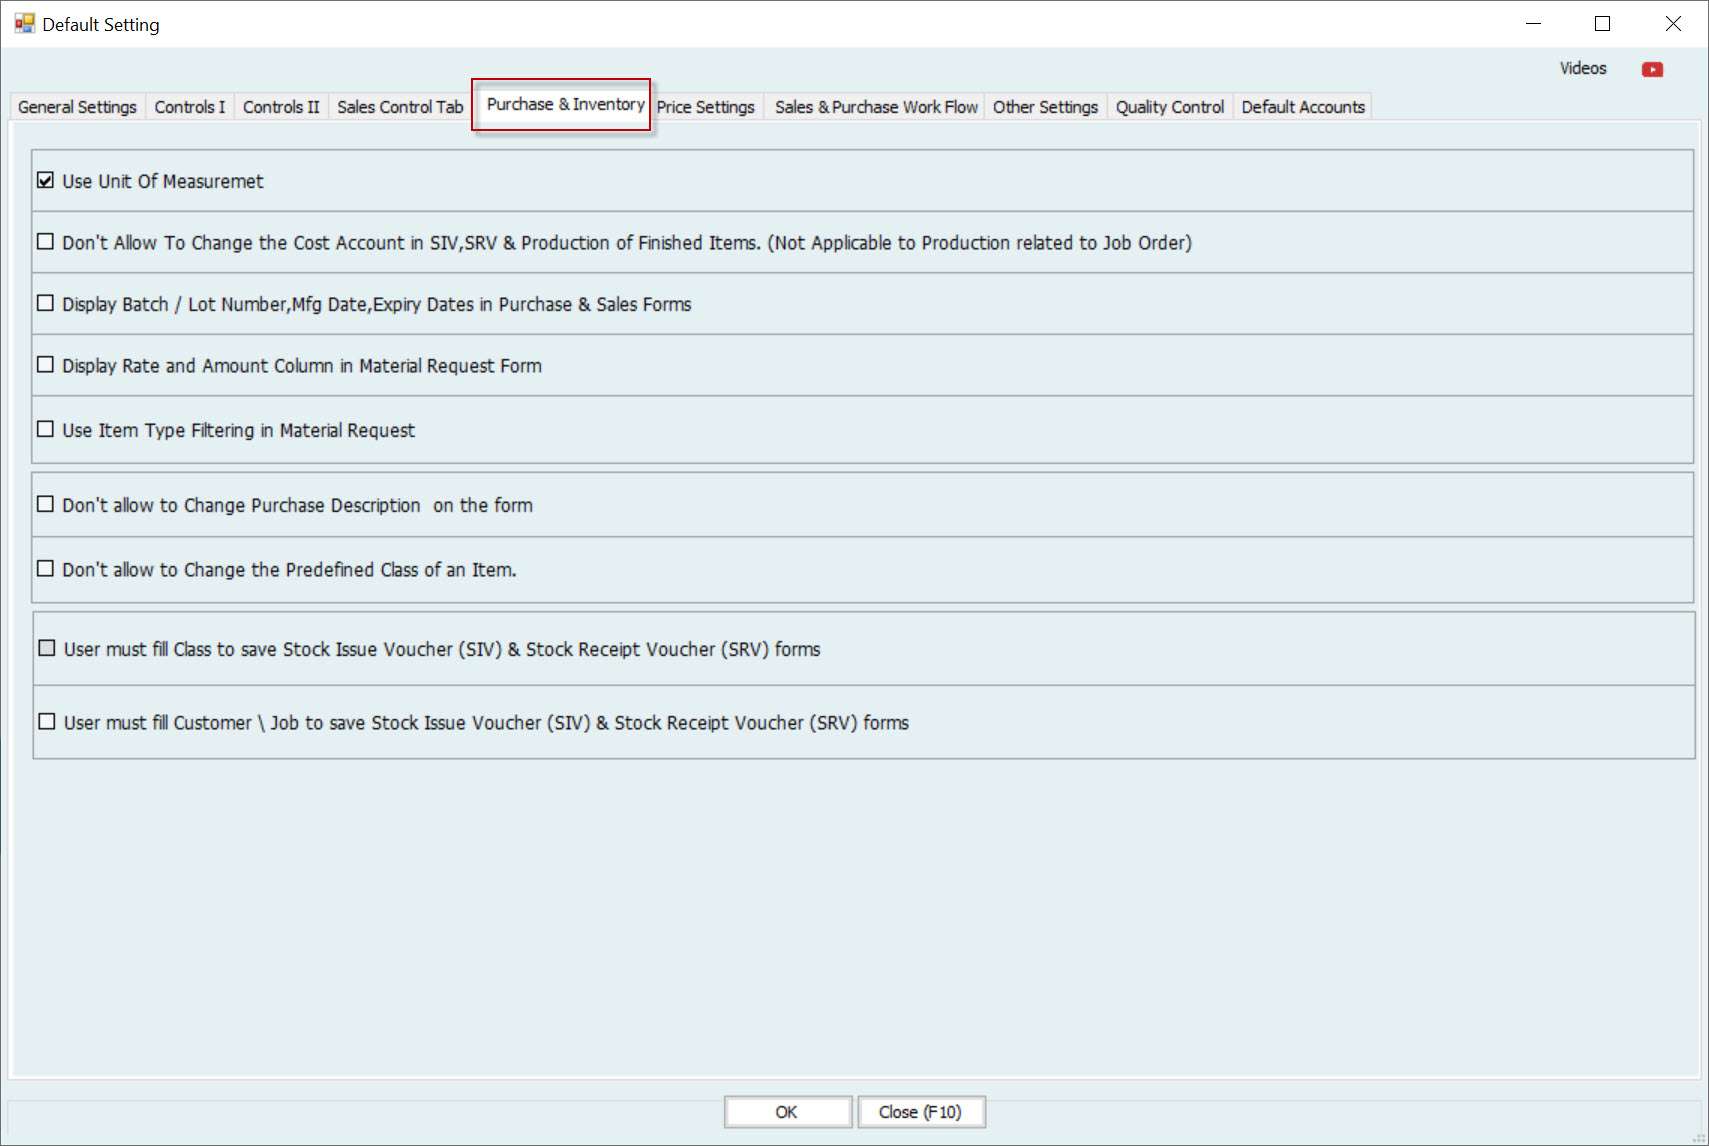
The Inventory in Hinawi ERP’s accounting module includes several features for managing and tracking stock levels.
The Stock Issue Voucher (SIV) feature allows users to create a document to record the issuance of stock items to customers or other parties. Users can print a copy of the SIV for their records or share it with relevant parties, or void the SIV if it is no longer needed.
The Stock Receipt Voucher (SRV) feature allows users to create a document to record the receipt of stock items from suppliers or other parties. Users can print a copy of the SRV for their records or share it with relevant parties, or void the SRV if it is no longer needed.
The Change the Market Value of stock share feature allows users to adjust the market value of an item in the inventory. This can be useful for tracking changes in the value of stock items over time.
The Physical Inventory, Work Sheet feature allows users to conduct a physical inventory count and compare it to the system’s records to ensure accuracy. This can help companies ensure that their inventory records are up-to-date and accurate.