
File-> Import \ Enter Lists and Balances -> Import from Third Party Integration -> More Information

a. If the User ticks this option, the User must provide the Items for each sales invoice transaction.
Note:
The User must first import the Item List into the System before the User can include the Item in the import using the standard CSV file.
b. If the User does not tick mark this option, the User must choose a default Item for all the sales invoices.
a. If the User ticks this option, the User must provide the Number of Items for each sales invoice transaction.
b. If the User does not mark this option, the System will consider the Item Quantity one (1) for all sales invoice transactions.
Note:
This option will be enabled if you tick the option for “Use Items from Third Party.
Software”.
a. If the User ticks this option, the User can include the payment terms for each sales invoice.
Note:
The User must first import the Terms of Payment List to the System before the User can include the terms in importing using the standard CSV file.
b. If the User does not tick this option, the User cannot include the payment terms for each sales invoice.
The User must choose the default deposit Account for the Cash Invoice.
The User must choose a default Item for all sales invoice transactions.
Note:
The default item can only be set if the User didn’t choose to mark the option “Use Items from Third-Party Software.”
The User must choose the default A/R Account for Credit Invoices.
The User must locate the default folder name where the System will read the entire CSV file.
Note:
The User must have Full permission of the default folder location (After Importing the CSV file, the file will be moved to the Imported Files Folder, which the System will generate automatically).
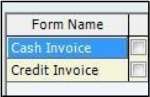
File -> Import \ Enter Lists and Balances -> From Third Party -> Import Cash Invoice / Import Credit Invoice.
Import Cash Invoice \ Credit Invoice
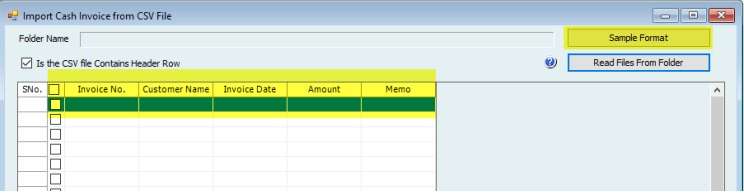
The folder name will be filled automatically depending on the Setup. Sample Format

Choose the Standard CSV format you will use for importing the Sales Invoice. Read Files from the Folder

Choose the Standard CSV format you will use for importing the Sales Invoice. Read Files from the Folder
– After clicking “Read Files from Folder,” one selection box will open, and it shows all the CSV files available in that default folder
Note: The File must contain Columns per the Setup in the following order.

Choose the CSV file you want to import to the System; tick mark the entire Sales invoice that will be imported to the System, then click “Update to QB.”
– The System will save the Invoice in Hinawi ERP and update it to QuickBooks afterward.
– After importing, the CSV file will be moved to the Imported Files Folder.