Company Settings and Related Activates (HRMS):
Setup is the most potent and inessential Module in Hinawi Software. We are proud to introduce this Module that allows the customers to build their own needs and ay the company policies and rules.
Under company settings, we merge both informal setup information and later activities in one place, so users can easily understand.
It's strongly recommended that the admin user do settings before using the system to get results as per their company policy.
Note:
Only the Admin user is authorized to have access to settings. Therefore, the user used in this document is Admin.
File → Setup Modules → HRMS Settings → General Settings has the following:
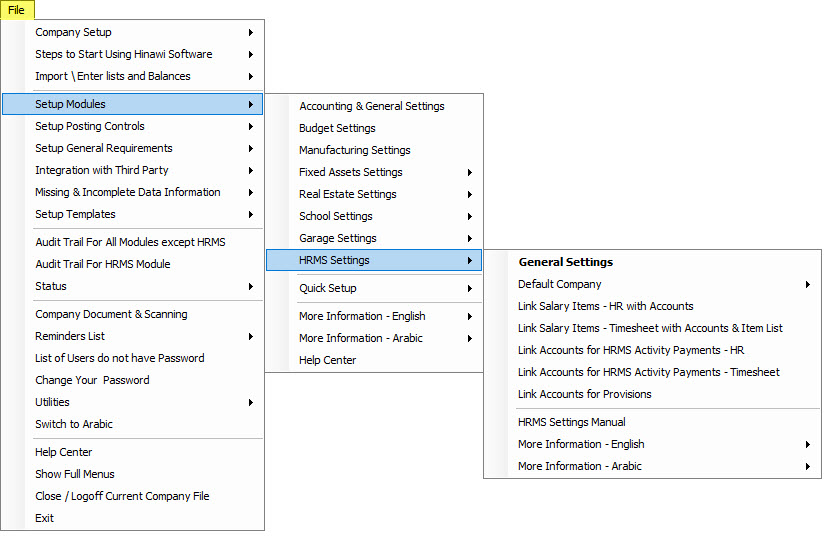

1. Company Setup
2. Basic Salary & Allowances (Monthly) Setup
3. Benefit Payment Setup
4. Benefit Provided Setup
5. HRMS Activities Setup
6. Timesheet Policy
7. Tax Setup
8. General Settings
9. Exit
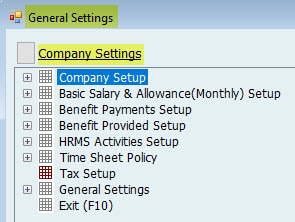
1. Company Settings
Here, the user can create a new company. The system allows users to create any number of companies in the same database or can create separate databases for each company. This feature helps hold Companies. There will be a separate setup, reports and level of acclevelsor each company.
Note:
When the icon is Gray, the setup is not done.

1-1. New Company / Company wizard:
To create a new company, go to:
File → Setup Modules → HRMS Settings → General Settings → Company Setup →New Company
All Information with (*) is a must to fill.
Company Information Tab
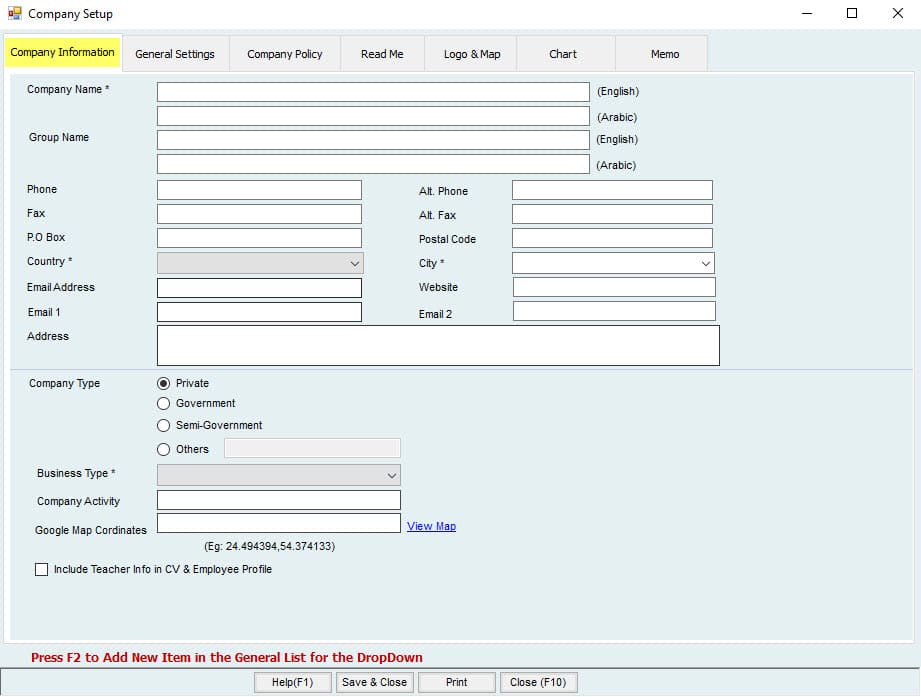
Fill in the Company name, phone, email ,etc,emailed first tab.
Note:
Filling the name in English is a must. If a user needs to run the software in Arabic, he should fill all the Arabic feel.
Check feel ox “Include teacher info in CV” if you are in school business. Use F2 to Quick Add more items or names in dropdown fields.
General Settings Tab
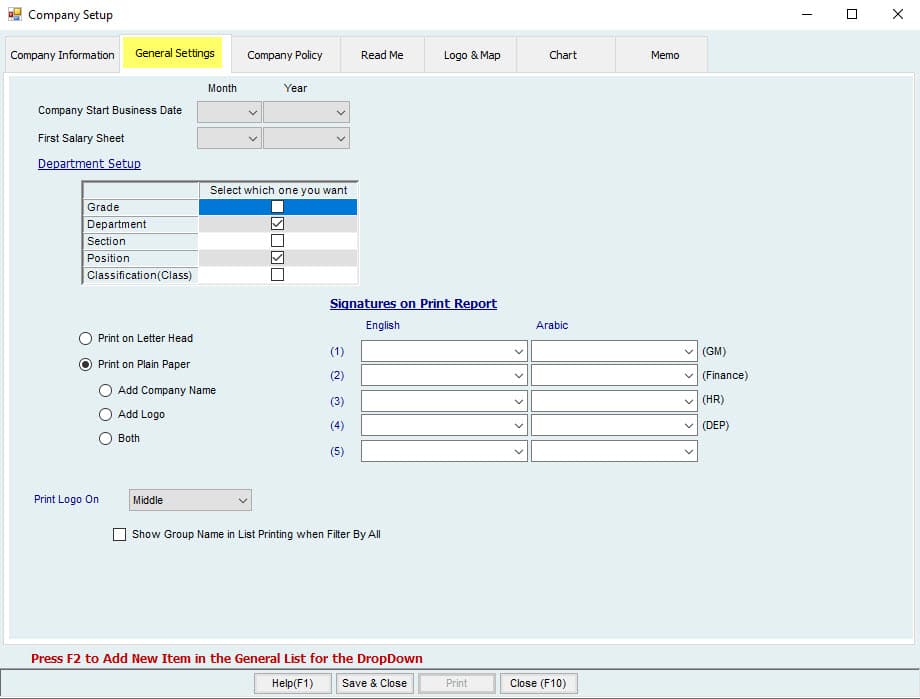
Business Start: Users can set the Month and Year of starting the business. Transaction entries before this Month/Year are not allowed before this date.
Payroll Start: Users. can set Can Month and Year of starting payroll for the Company. Creating a Payroll before this Month/Year is not allowed.
e.g., Business Start: 01/2010, Payroll start: 01/2014, then for the chosen company, the user can create new employees whose joining date should be greater than the business start date, i.e., 01/2010. And if an employee’s joining date is 01/01/2011, then set salary effective date should be greater than or equal to the joining date.
The user cannot create ate salary sheet for the employee before 01/2014 since the payroll strain at 01/2014.
Department Setup:
Here, the user can select what levels he/she wants to use for the employees by checking the Option wanted to Activate in the Company Default check Department and Positional and the user can't remove them.
The user can add and link between the selected levels in Company Settings→ Company set up Department Setup and then add different departments and position for the company.
The user will be able to view and select the levels (Department, position etc.) whenever a new employee is created.
For different levels, the user can various rent Activities p and can set basic salary & allowances benefit paymen the, benefit provide Setupup differently.
e.g the ., If IT department and Operation department are added in the department setup and Employees are added for each department, then in that case, the user can have different activities and sal setup for each department.
Print on Letter Head:
The user should check this if he/she wants to print on the Company Letter Head.
Print on Plain Paper:
The user should check this option if they wants to print the Company Name or Logo or both in letters.
on the ture on the report:
Here, the user can add the title on the reports. Fill in English if you are working in English and Arabic if in Arabic
Print Logo on:
The user can select where to print the logo on through the Dropdown.
Company Policy Tab:
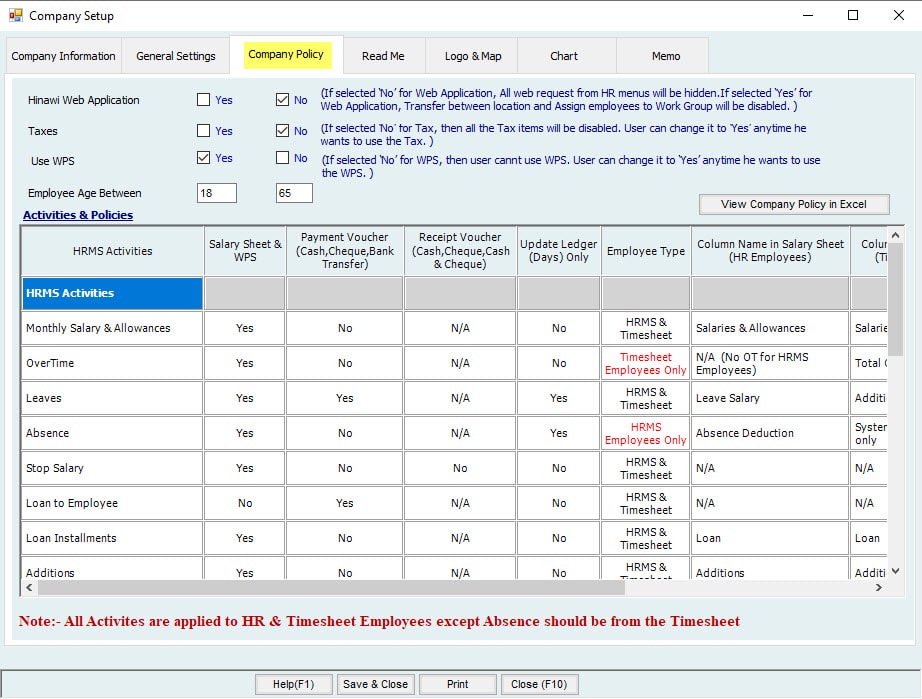
Please select the options whether the user wants to use the following or not. (Changes between Yes/No can be applied anytime with some conditions)
- If selected ‘No’ for Tax, the Tax items will be disabled. The user can change it to ‘Yes’ anytimthey wants to use the Tax.
- If selected ‘No’ for Web Application, all web requerequests HR menus will be hidden.
- If selected ‘Yes’ for Web Application, Transfer between location and Assign employees to group will be disabled.
- If employees Age is set between 16 and 65. The system will not act to have Employees with age less than 16 or more than 65.
The user can view how the catamount areasareis paid\taken to\from the Employees. Here, Payment mode will auto fill from advanced settings for each activity. User select the Payment mode from advanced settings for each activity. i.e., If the payment mode for
EOS is selected as “Pay through Salary sheet” from advanced settings, payment mode in this window for EOS will auto fill the value with “Pay through Salary sheet”. .”angels in the payment mode from advanced activities will update in this window.
Important:
- If Pay through salary sheet is selected, the amount to be given to the Employee is added to the Salary sheet in columns and the amount to be deducted from the Employee is also shown in the Salary Sheet.
- If Pay through the Payment Voucher is selected, nothing will affect the alary sheet in any columns.
- If Air Ticket is provided as Pay through Salary sheet, then it will be added in an Additional column of the Salary sheet for Both HR and Timesheet Employees.
- For Timesheet Employees, Absence salary is not paid in a separate column for Pay through salary sheet. Here, the salary is paid for the present days. i.e., If an Employee is absent for 2 days, the salary is paid for 28 if it is a 30 days month. Therefore, the amount is showed for 28 days in the Salarysheet, not a separate column for absence deduction.
- The user can pay for OT to Timesheet Employees only if “calculate OT” is yes.
The Amount will be shown in a separate column as Total OT.
- For HR Employees, if 1-day absence, 1 day will be deducted from the total days of a Month based on the setup. I.e., if the setup is Actual month days and Employee’s absence deducted ting from January, then the salary will be for total days = 30 days (31– 1 = 30, 1-day(s) absence will be deducted). If the setup is Fixed 30 Days and Employee absence is deducting from January, then salary will be for 29 Days.
- For Timesheet Employees, we calculate present days only. It is always based on Actual Month Days. So, when there is an Absence, the user can change the Status to ‘Absent’ for the absent day and that day will not be calculated.
- Remember that Company Employees can be defined (split in 2 parts) as employees or Times employee setesyee. An HR Employee will get his/her salary automatically, but a Timesheet employee will not get the salary unless the Timesheet is filled.
Read Me Tab:
When setting up a new company, User must read this part carefully.
Logo and Map Tab:
Here, the user can attach the Logo,, Map and Photo of the company. When printed, the logo will display.
Chart Tab:
The user can define the organization chart of the company. Right-click on the area and Click Add head to add a head for the organization. This chart is not linked with the department setup or any part\module in the system.
Management:
Here, the user can fill the in information of the management.
Memo Tab:
Users can add a general company memo here.
CAUTION!
1. It is strongly recommended to APPROVE each transaction\activity if you believe that there will be NO further Chan When an activity is approved, it will change the status of the Employee and affects the balances transaction.
2. Changes in the setup are allowed in the future they but it will not affect the previously approved activities/transaction.
3. Once done from the Default Setup, the user cannot change the settings from there anymore since it’s a 1-time setup. Items theater setup will be grayed out. The user can go to Advanced Settings for more option.
4. Creating EOS will not affect any transaction\activities unless EOS is approved.
5. We strongly recommend the Admin user not to share the admin paswithord to anyone since they may change the company police.
Note:
Approved activities can’t be changed.
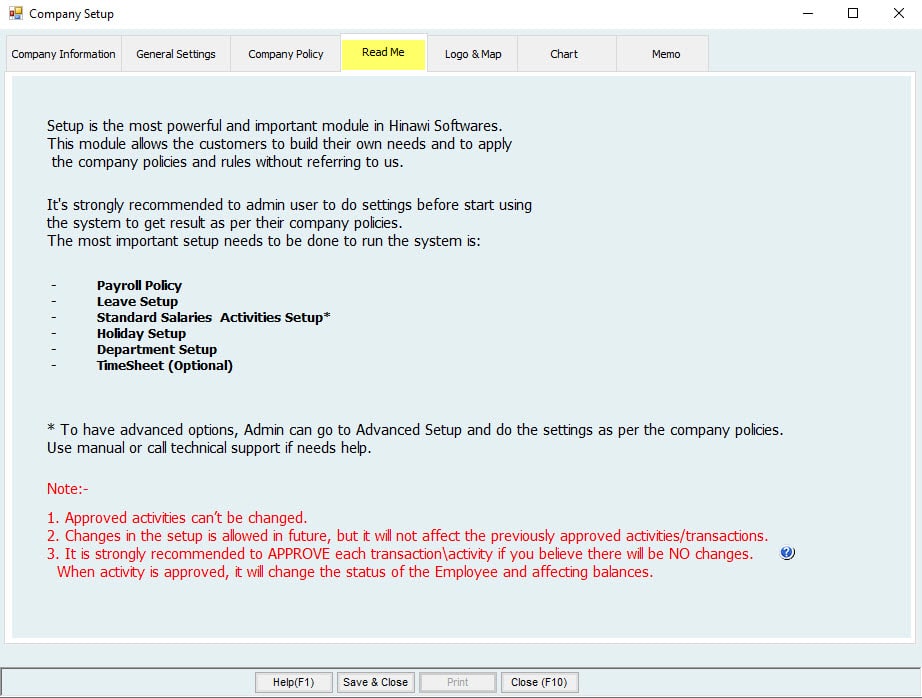
Because setup is the most powerful and important module in (Hinawi Software) and this module allows the customers to build their own needs and to ly the company policies and rules without referring to us, it’s strongly recommended for ththat the admin usersure all settings are complete before starting to use the system to get accurate results as per their Companyolicy.
The default setup required to be done before running the the system is:
- Payroll Policy
- Leave & Pension Policy
- Standard Setup
- Holiday Setup
- Timesheet (Optional)
- Department Setup (Optional)
*To have advanced options, the Admin can go to Advanced Setup and apply more settings as per the company policy. Use the manual or call technical support if any help is needed.
Please Read:
The user can split Employees to two categories, Employees in HR and Employees in Timesheet. He/she can decide on how to categorize the employees. He/she They all of them in one category or divide them to two. The default feature in the system is to consider all employees as HR. To change to Timesheet the , go to Tithe me Sheet menu then assign employees to Timesheet.
For HR Employees, salary sheet is created automatically, but for Timesheet Employees salary sheet is not created unless Timesheet is filled. The user must fill Timesheet for each employee.
Changes between categories are possible.
Note:
1. Approved activities can’t be changed.
2. Changes in the setup are allowed in the future, but it walnut affects the previously approved activities/transaction.
3. It is strongly recommended to APPROVE each transaction\activity if you believe there will be NO change When an activity is approved, it will change the status of the Employee and affects the balances transaction.
1-2. Edit Company
Company Settings→ Company set up. Edit Company
Here the user can edit the company set up details as mentioned in step 1-1

 العربية