the end OF service help page
Setup
Feature setup is essential for setting the company’s regulations, arrangements, and control policy.
Before recording any operations, the user must set up the company file.
If these settings are not made, the customer may find that the results do not comply with its policies and need to re-enter its operations.
Therefore, settings are vital when using the software. It’s very important to understand this. The setup unit is the most important step and must be done before using the software.
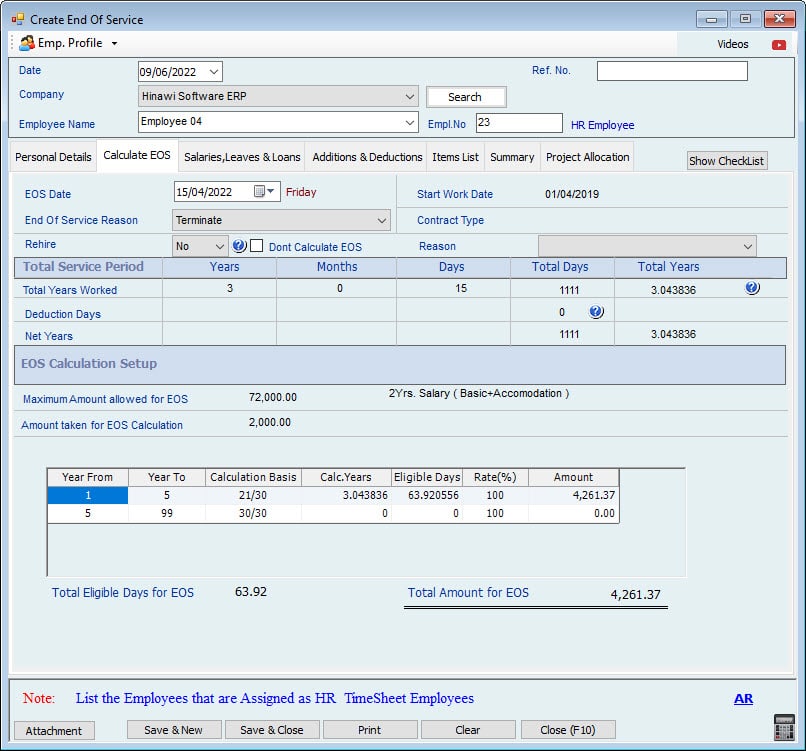
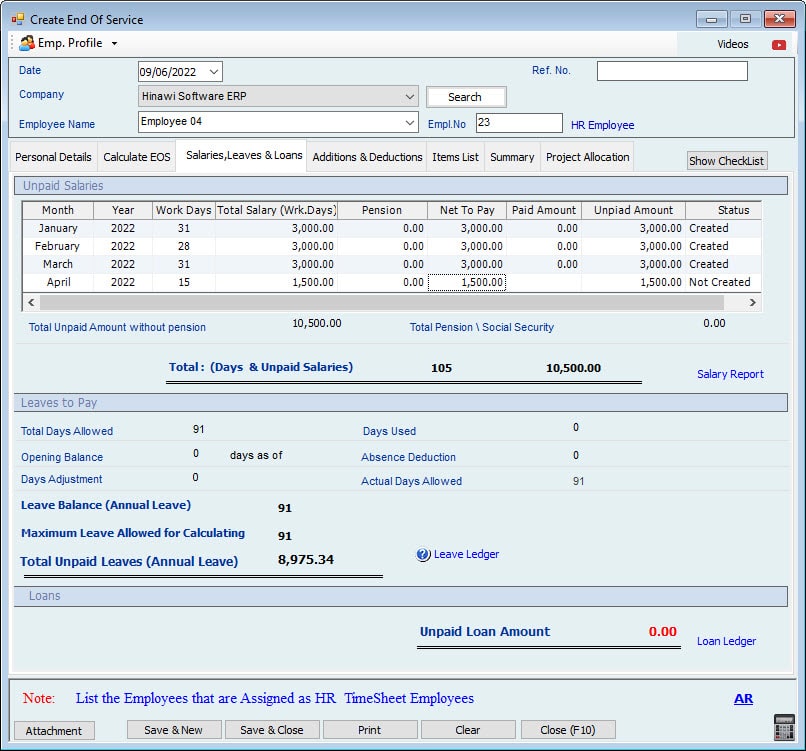
End of Service (EOS) Work Process
HR and Time Sheet Employees
Kindly go to HRMS Activities (Menu), then select End of Service
End of Service Process for the HR Employees:
If an Employee is on the 15th of the month, the process will be
Verify the Status of Previous HRMS Activities:
Verify the status of the previous month's HRMS Activities and Salary sheets.
Approval of all HRMS Activities of previous months:
All HRM Activities of Previous months should be Complete, Approved, and paid from the System.
Approval of Salary sheet of previous months:
All Salary Sheets for Previous months should be Complete, Approved, and paid from the System.
End of Service with Salary Sheet
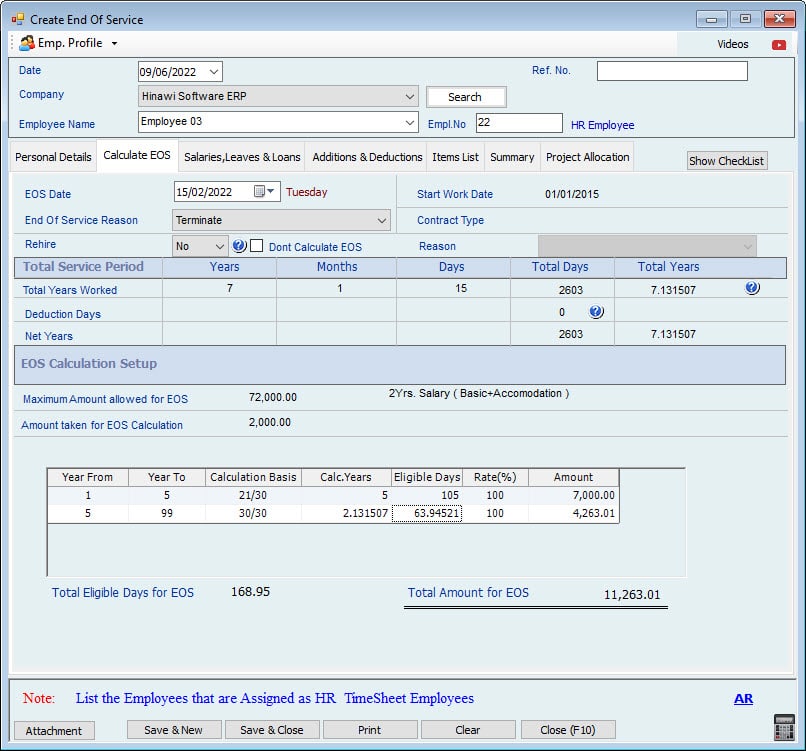
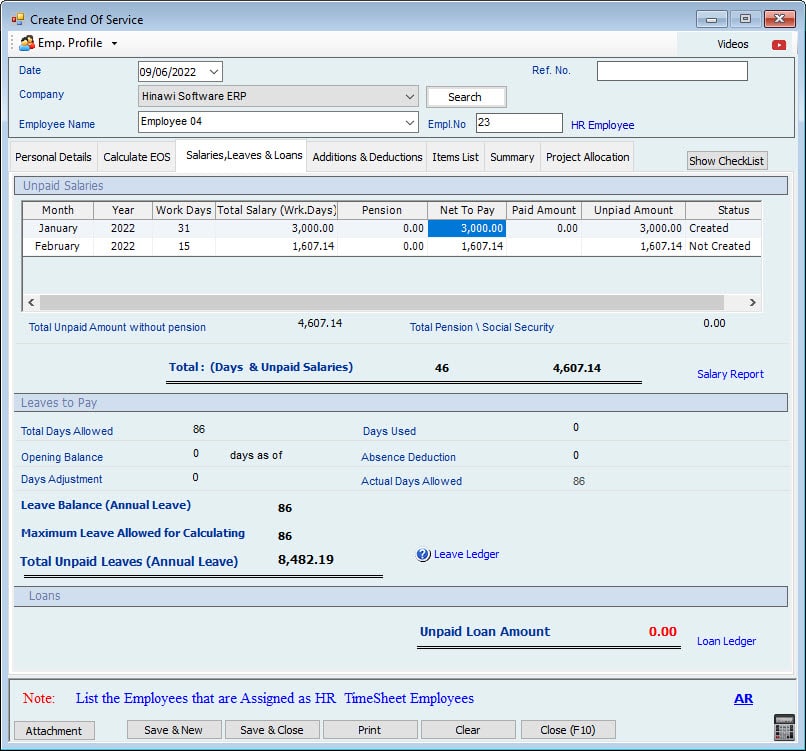
Create EOS with Salary sheet.
Create the End of Service:
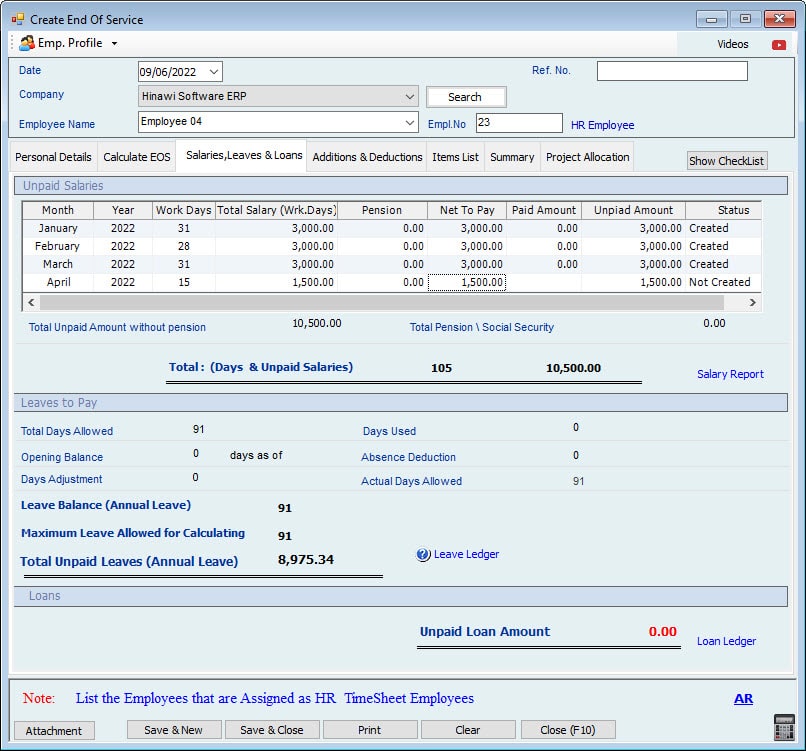
Create the End of Service on the 15th and the Salary of Salary4 working days (1st to 14th) System will automatically create the End of Service Form.
Edit/ Delete End of Service:
Users can also edit or delete the End of Service after creating.
Approve End of Service:
After creating the End of Service, the User will approve the End of Service.
Post of End of Service:
When the End of Service is approved, the User must Post the End of Service in QuickBooks the Accounting effect. For the posting, kindly go to (Update to QuickBooks-----HRMS Update----------Post EOS Benefit)
Pay End of Service:
Pay the EOS and 14 working days' Salary from this Pay End of Service window in one Payment Voucher (PV) under HRMS Activities (Payment of Activities-----Pay End of Service). The mode of payment for the End of Service is reading from the pre-defined Setup in the set Setup Setup & benefits window.
Receive Payment for EOS Final Settlement:
After creating the End of service, if Company still has to receive some Amount from the Employee side, the Employee lipoid Loan, in this carmaker User can make the final settlement from the (Receive Payment for EOS Final Settlement) window. For this, Kindly go to them;
(HRM Activities ---------Receiving from Employees-------- Receive Payment for EOS Final Settlement)
The Company can create Receiving Voucher (RV) and receive the final settlement payment from the Employee side. But this option will only apply if the End of Service Final Settlement Amount is less than Zero.
Note:
The HR Employees User cannot pay the Salary separately from the sheet. Use Salary only pays the Salary of the Salary ways within the End of the Service window.
End of Service Process for the Timesheet Employees:
If an Employee resigns on Employees of the month, the process will be as follows;
Verify the Status of Previous HRMS Activities:
Verify the status of the previous month's HRMS Activities and Salary sheets.
Approval of all HRMS Activities of previous months:
All HRM Activities of Previous months should be Complete, Approved, and paid from the System.
Approval of Salary sheet of previous months:
All Salary Sheets from Previous months should be completed, Approved, and paid from the System.
Salary Sheet:
Complete the process of the Salary Sheet as usual.
Create the Timesheet and Save:
Create the Timesheet for 14 days. And the rest of the Days from the 15th to the 31st, create the absence in the Timesheet for these days and select the Calculate column "NO."
Create Salary Sheet & Approved:
Then create the Salary sheet for the 14 days the Employee works and approve the Salary.
Pay the Salary from the Salary Sheet:
Then Pay the 14 days of Salary from the Salary Sheet; Salary User has the option to pay this 14th Days Salary with the EOS Payment Salary
End of Service with Salary Sheet
Create EOS with Salary sheet.
Create the End of Service:
Create the EOS on the resignation Date of the 15th of the month.
Edit/ Delete End of Service:
Users can also edit or delete the End of Service after creating.
Approve End of Service:
After creating the End of Service, the User will approve the End of Service.
Post of End of Service:
When the End of Service is approved, the User must Post the End of Service in QuickBooks for the Accounting offer the posting. Kindly go to (Update to QuickBooks-----HRMS Update----------Post EOS Benefit)
Pay End of Service:
Pay the EOS from the Payment of Activities window. The Payment Mode for the EOS is reading from the pre-defined Setup of the Mode of Payment (Cash, Cheque, bank transfer) which User has selected in the set Salary & benefits window.
Receive Payment for EOS Final Settlement:
After creating the End of Service, if Company still has to receive some Amount from the Employee side, like an unpaid Loan, in Employee, the User can make the final settlement from the (Receive Payment for EOS Final Settlement) window. For this, Kindly go to them;
(HRM Activities ---------Receiving from Employees-------- Receive Payment for EOS Final Settlement)
The Company can create a Receipt Voucher (RV Company the final settlement payment from the Employee side. But this option will only apply if the End of Service Final Settlement Amount is less than Zero.
Note:
For the Time Sheet Employees, users can pay the Salary separately from the Salary sheet or the Salary with the Salary.
Important Note for Salary & Timesheet Employees:
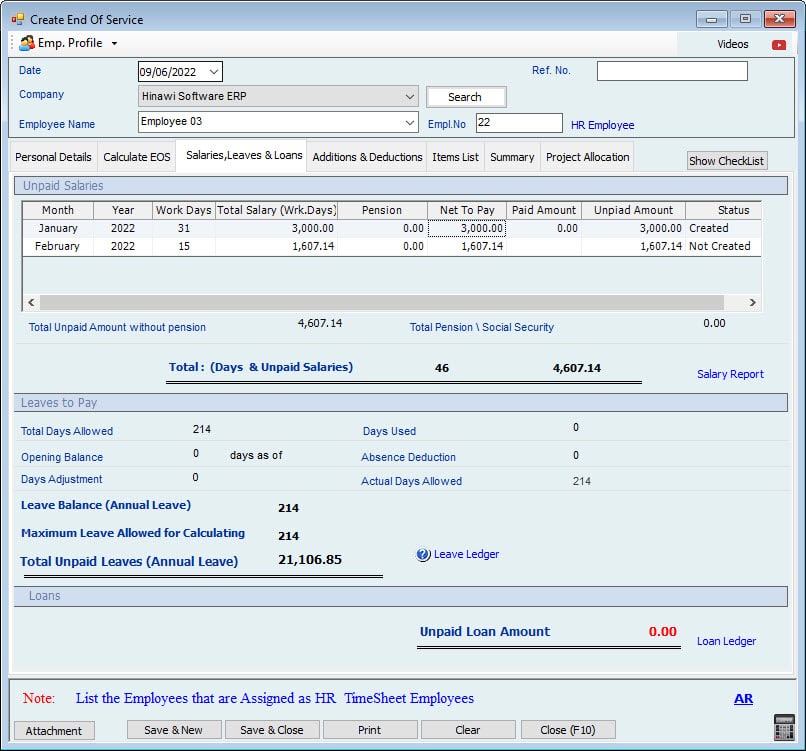
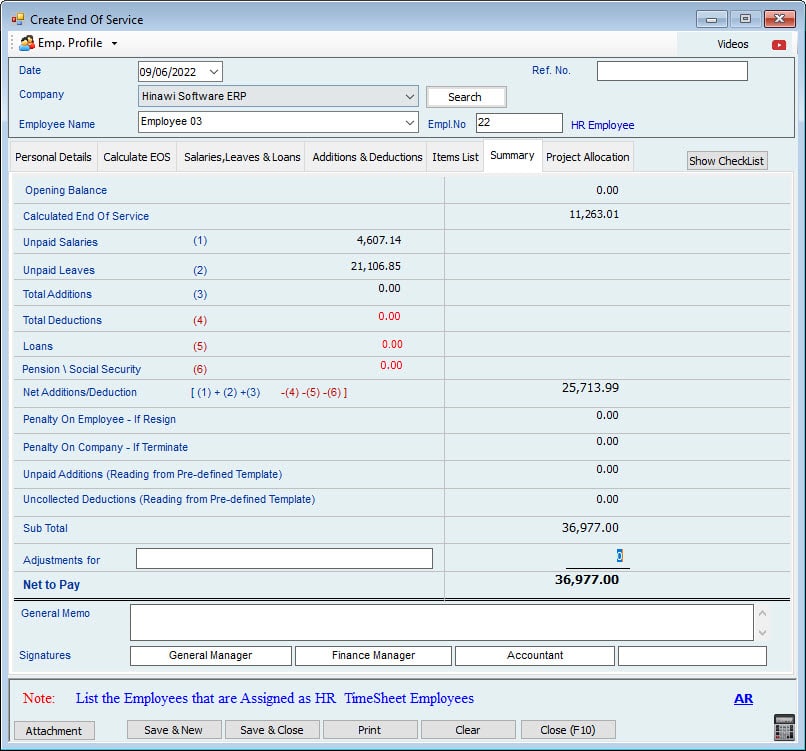
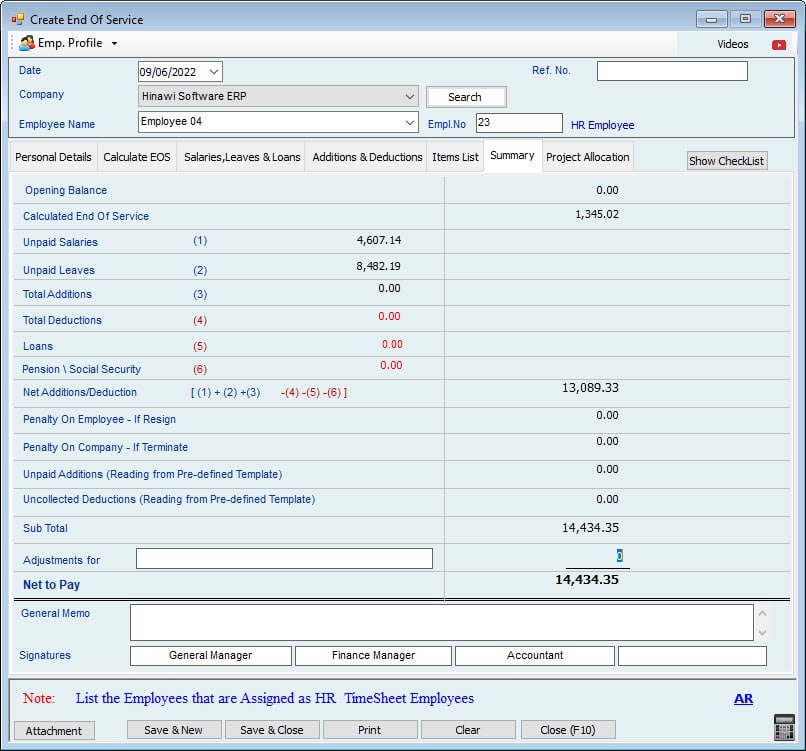
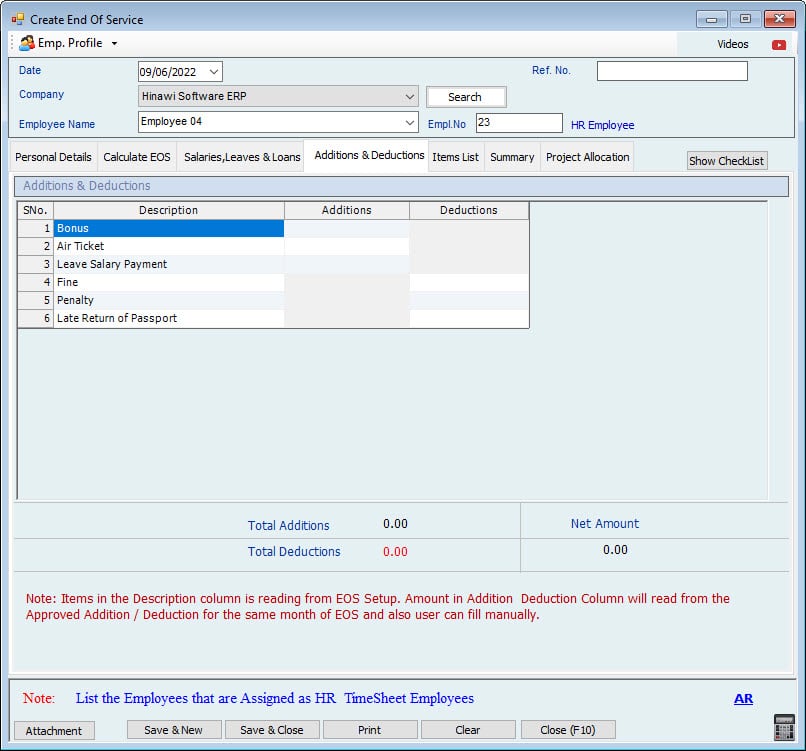
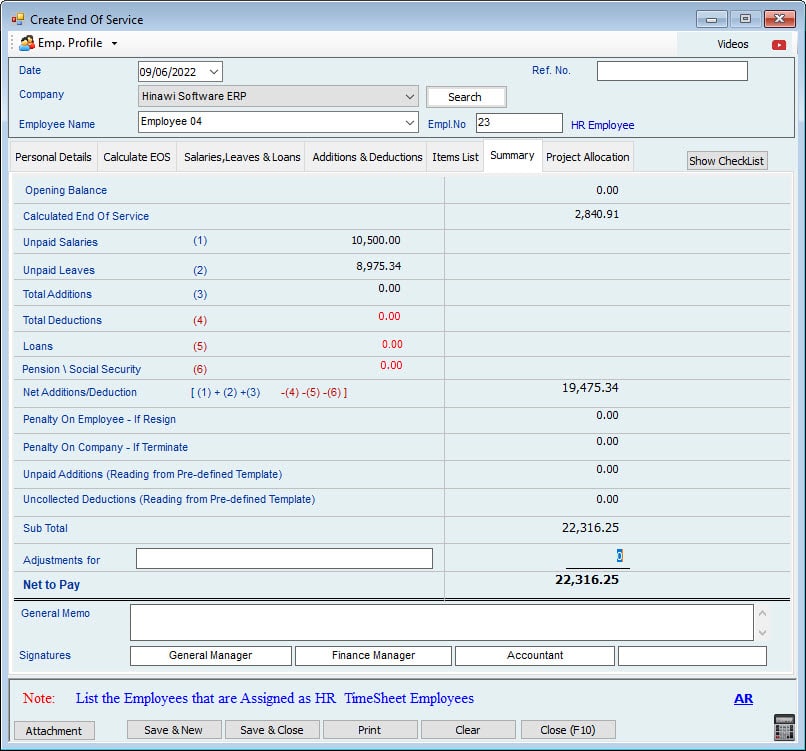
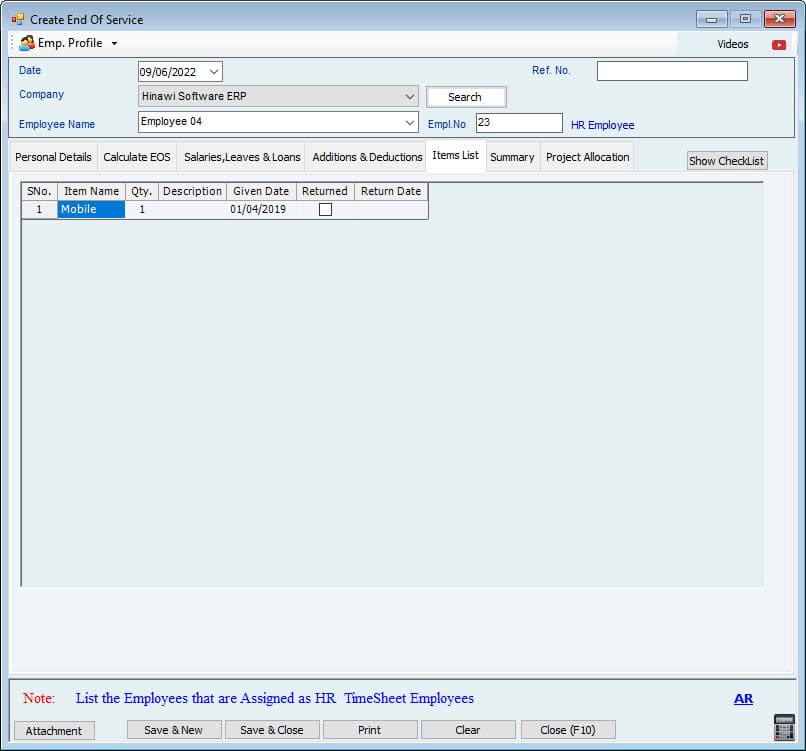
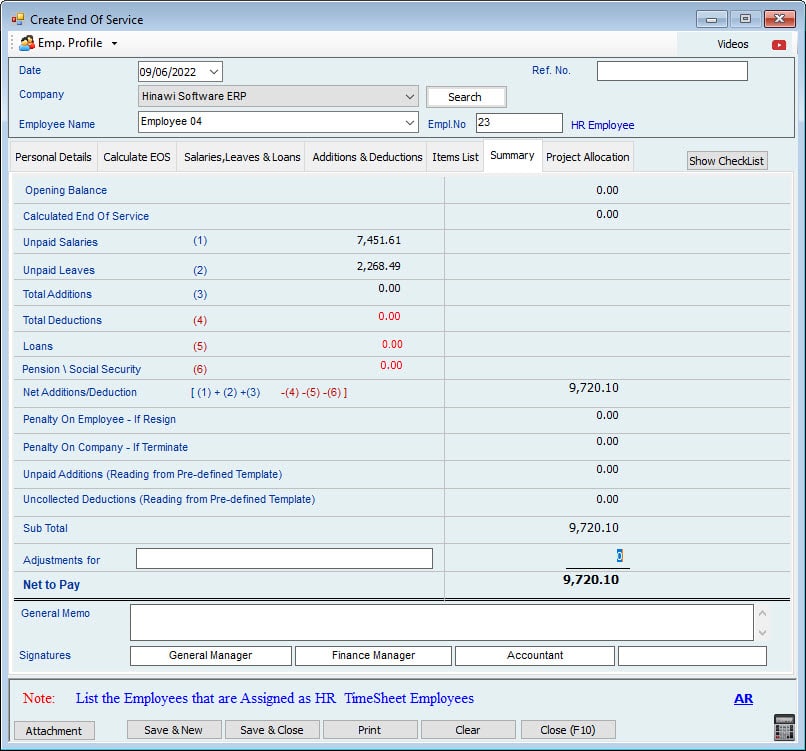
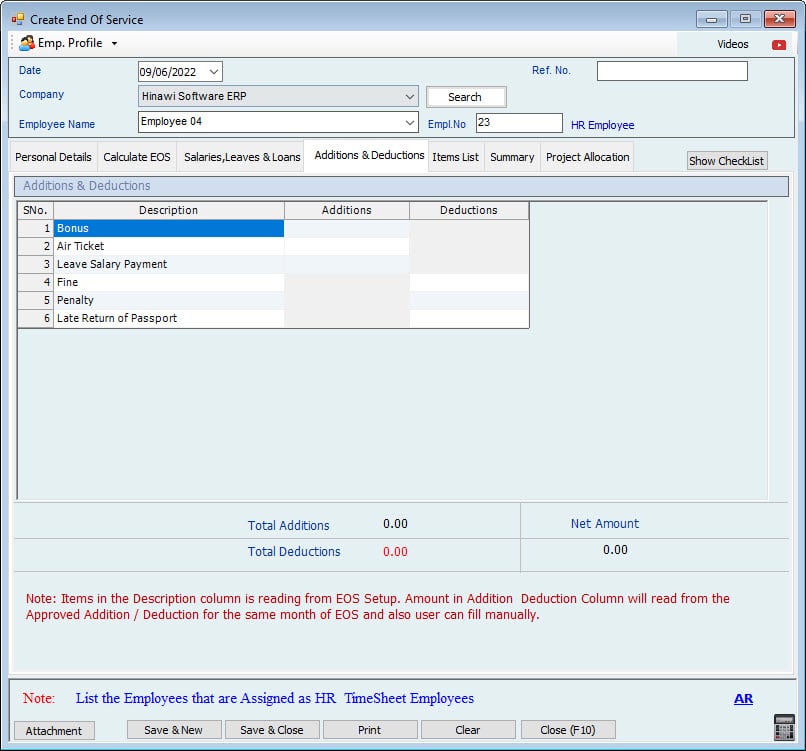
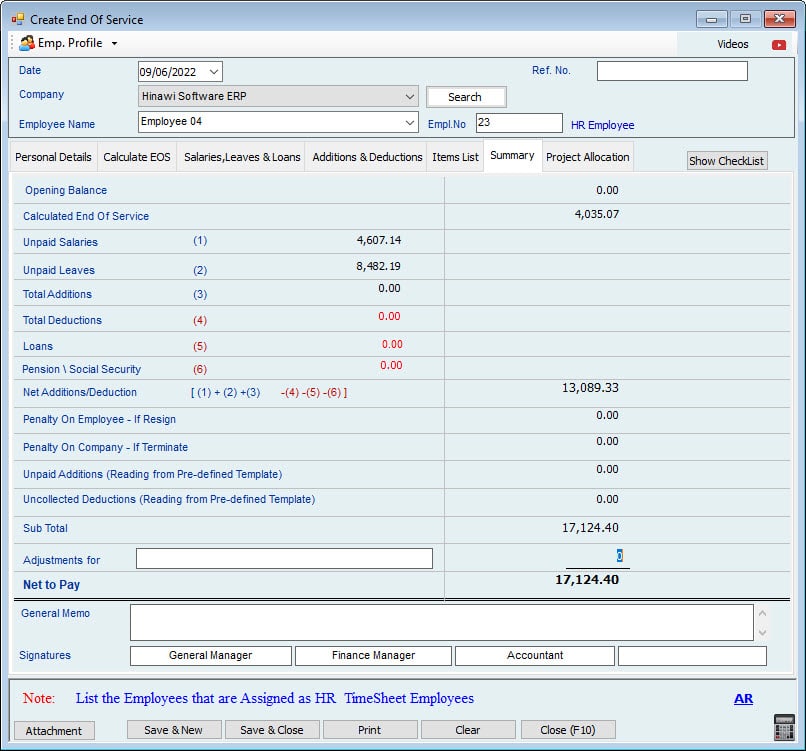
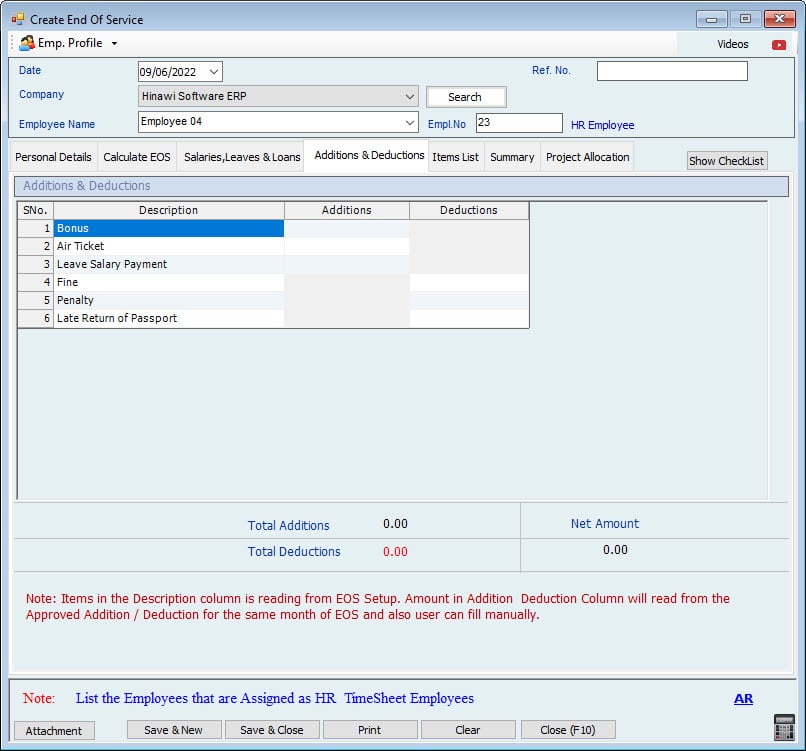
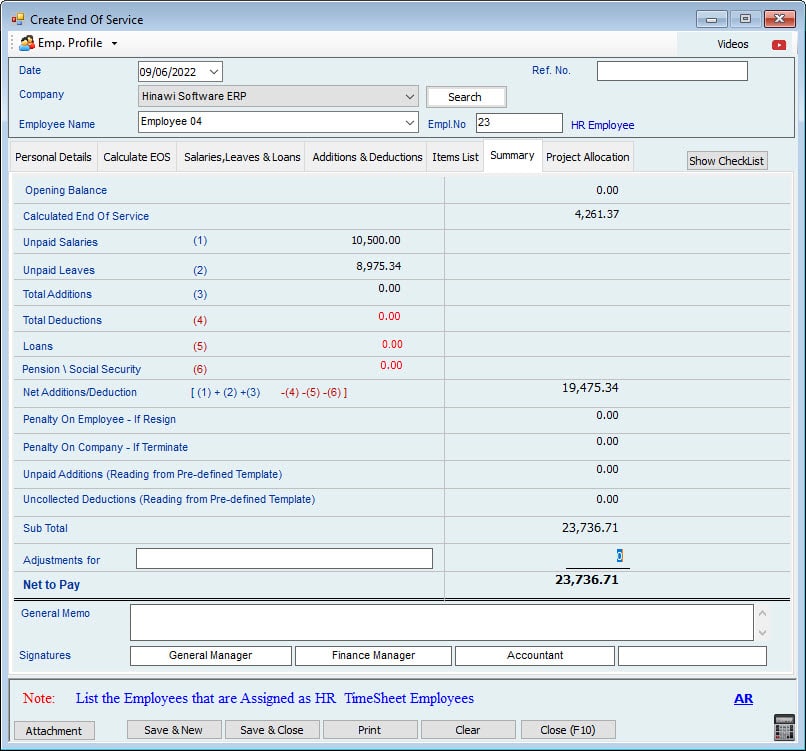
Templates are created through Addition & Deduction Activities, and if the option selected is Every Month automatically, and the Template Stop Date is greater than the End of Service Date, the System will automatically calculate the outstanding unpaid Amount by Employee or by Company, and this Amount will be shown in the create End of Service window in the Summary Tab by the below-mentioned Names;
Unpaid Additions
Uncollected payment.
After the adjustment of Unpaid Addition to Employee or Uncollected payments from the Employee, in the end, the final Amount will be shown in (Net to pay).
And when the User Pay EOS from the Payment of Activities (Menu), the Actual Amount will show after adjusting the Unpaid Additions to Employee and Uncollected Payments from the Employee.
| Accounting Entries for creating End of Service (EOS) for HR and Time Sheet Employees | EOS Summary Workflow | |||
| A. Create Form | B. approvals | C. Post to Accounting | D. Payments / Collection | Memo |
| Create EOS. Payment of EOS will be Through Payment Voucher only. | Approve EOS is the required System. | The System will calculate all amounts due to Employee, including Unpaid salaries, EOS, Leave, Additions, Deductions, Items not returned, Loans, and the penalty on the Company if terminated Employee before the limited Contract end. And penalty on the Employee if Resign before limited Contract end. | By Cash or Cheque or Bank Transfer only. The payment mode is based on the Setup. The Employee must refund the Company if the total calculation of EOS dues is more minor than penalties. Or less than Items not refunded. Refund will be by Receipt Voucher. | Admin can make a Predefined Setup to link the EOS with Char the t of Accounts. When the payment is created, the Debit Side will display automatically from the previous step posting in column F. |
| EOS Accounting Details | e.g., EOS effective from 16 of the month. | |||
| B & C: Accounting Entries on Approvals | Menu Location | D. Entries of Payment of EOS. | Menu Location | Memo for C Column. |
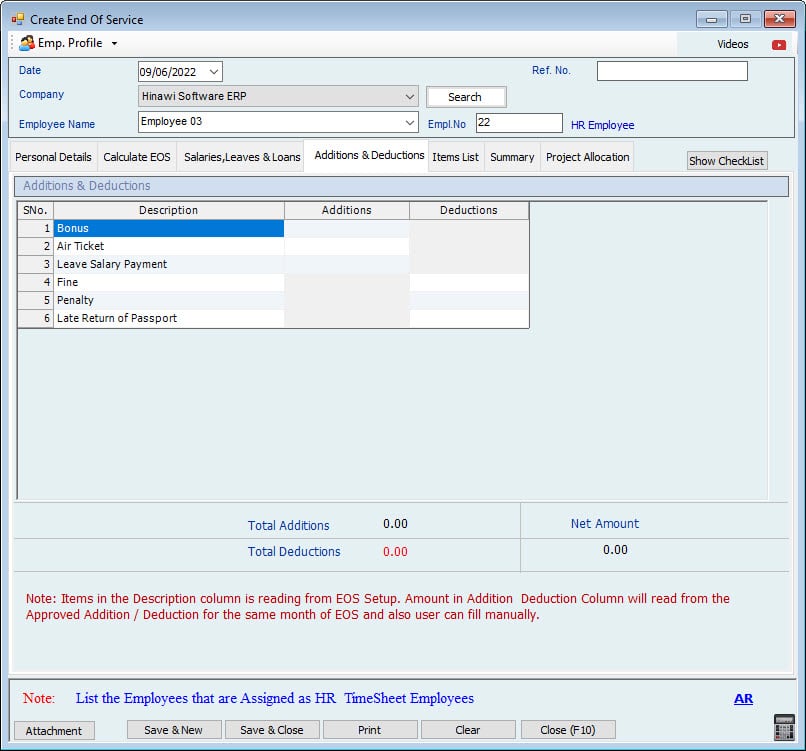
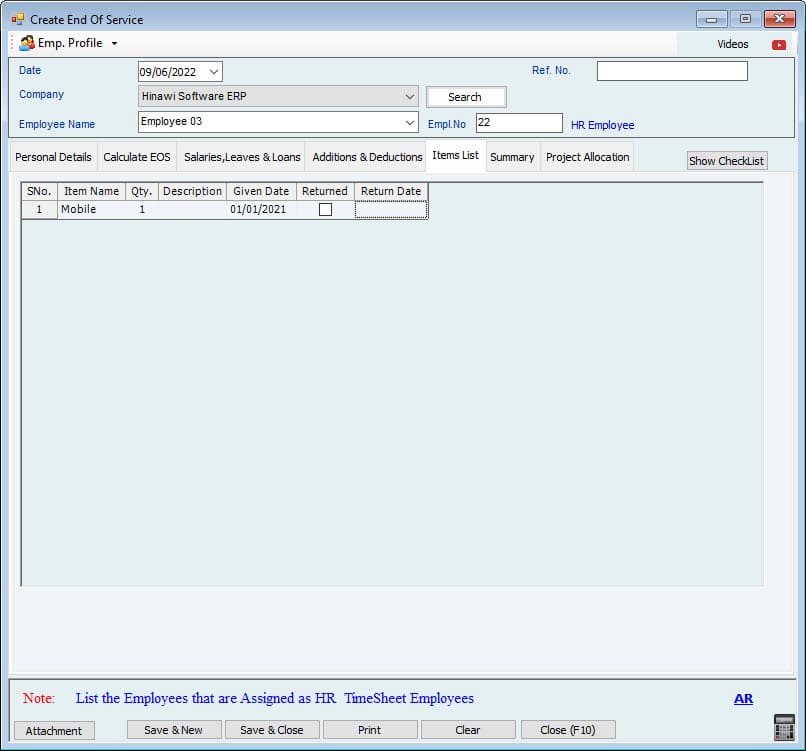
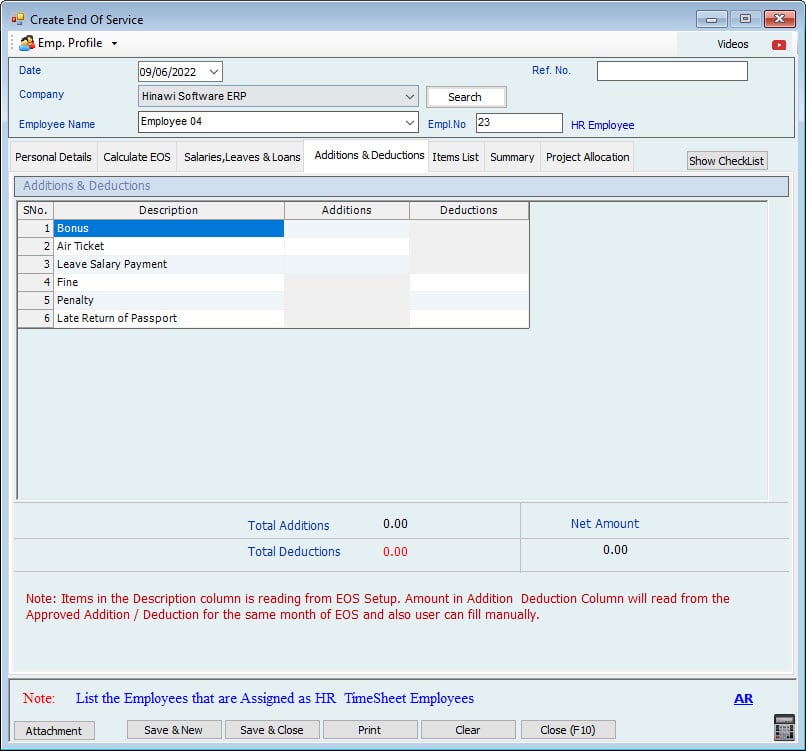
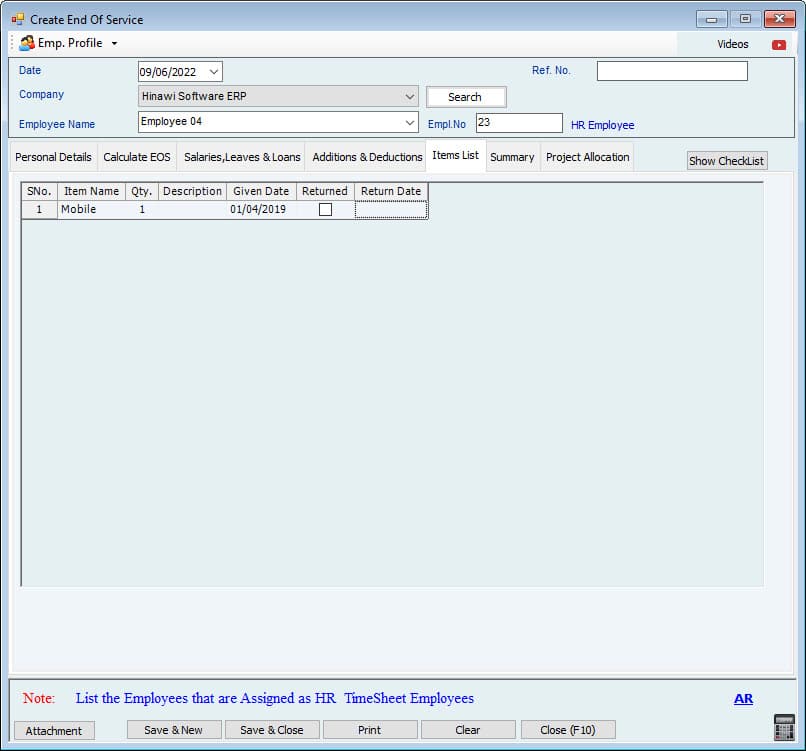
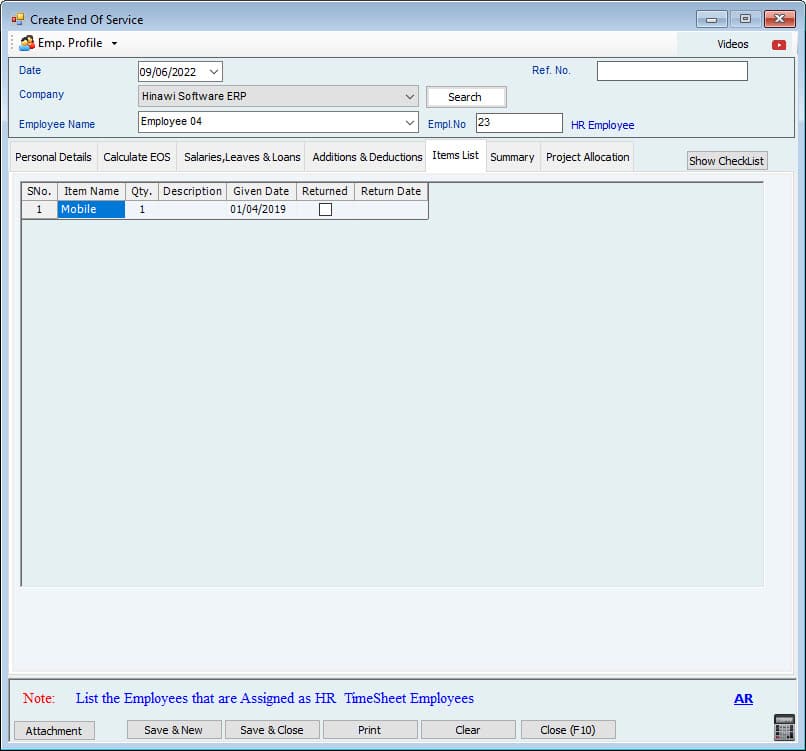
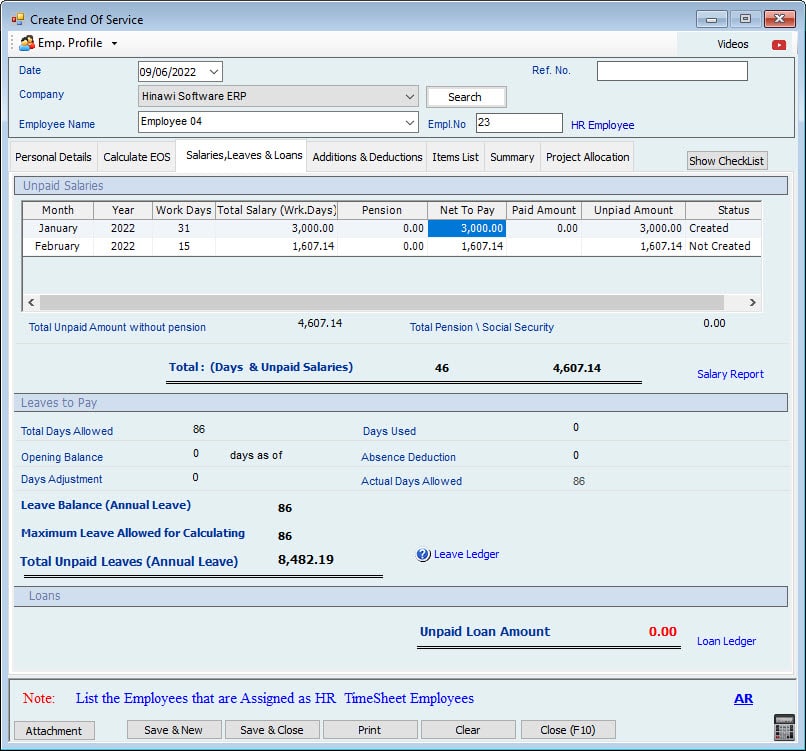
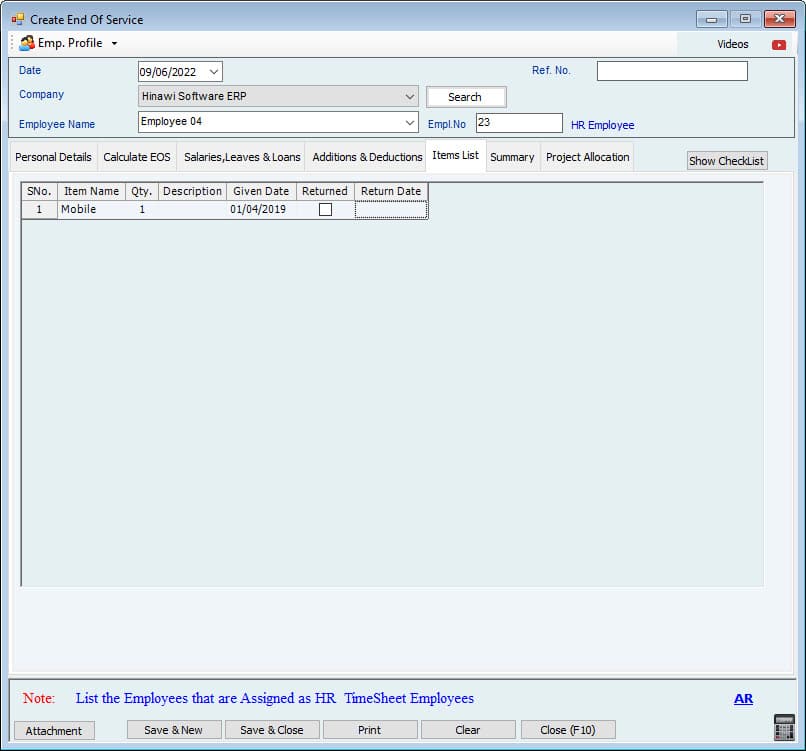
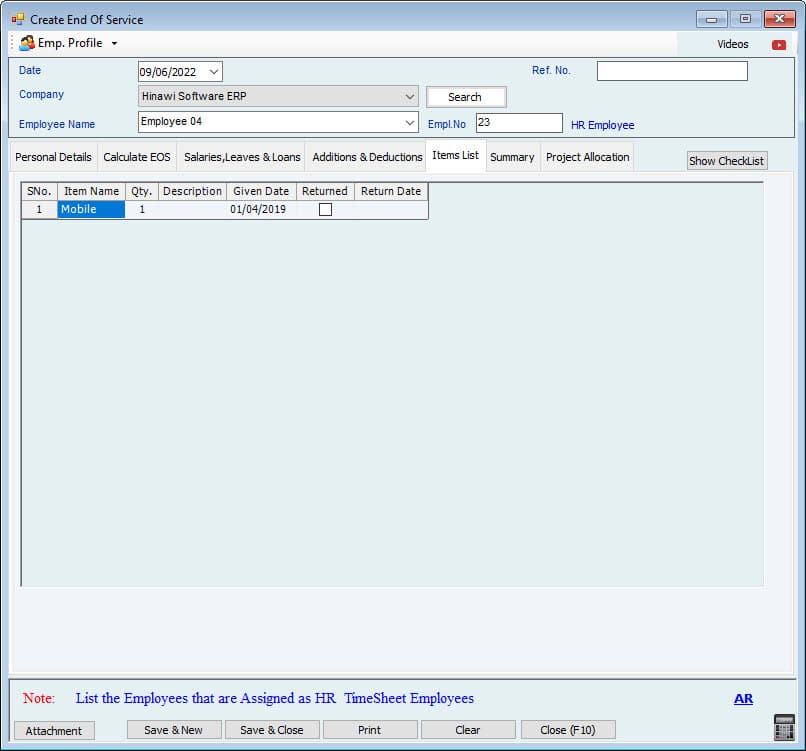
| Debit Side ( All or some ) | If the Net Amount is Credit, it means the Company has to pay to Employee as below entry:- DR. Accrued Unpaid (EOS) Cr. Cash / Bank | Go to: HRMS Activity Menu >>>> Payment of Activities >>>> Pay EOS. | * Because EOS is from the 16th of the month, the System will Calculate 15 days automatically. * System will calculate the outstanding unpaid Leave Salary. * Penalty on the Company if terminated Employee before completing Limited Contract. * Unpaid deductions Like pending unpaid bonuses to Employees. This is reading automatically from the Addition / Deduction Module. * Adjustments will be on the Debit side if the Company decides to give extra money to the Employee. * Items not returned, Like mobile or laptop or other things. * Adjustments will be on the Credit side of the Company decided to take money to the Employee. * Penalty on the Employee if he resigns before completing of Limited Contract. * Like pending uncollected traffic fine by Employee. This is reading automatically from the Addition / Deduction Module. | |
| Dr. Salaries and Allowances Dr. Leave Salary Dr. EOS Dr. Penalty on Company Dr. Unpaid Addition Dr. Adjustments | Go to: Update to Accounting Menu >>>> HRMS Update >>>> Post-EOS Benefits. | |||
Cr. Penalty on Employee Posting is by Journal Entry | If the Net Amount is Debit, it means Employee has to pay to Company by creating a Receipt Voucher as below entry:- Dr. Cash / Bank Cr. Accrued Unpaid (EOS) | Go to: HRMS Activities Menu >>>> Receive From Employees >>>> Receive payment from EOS settlement calculations. | Calculations of the amounts above are based on settings. Go to File Menu -->> Modules Settings -->> HRMS Settings |
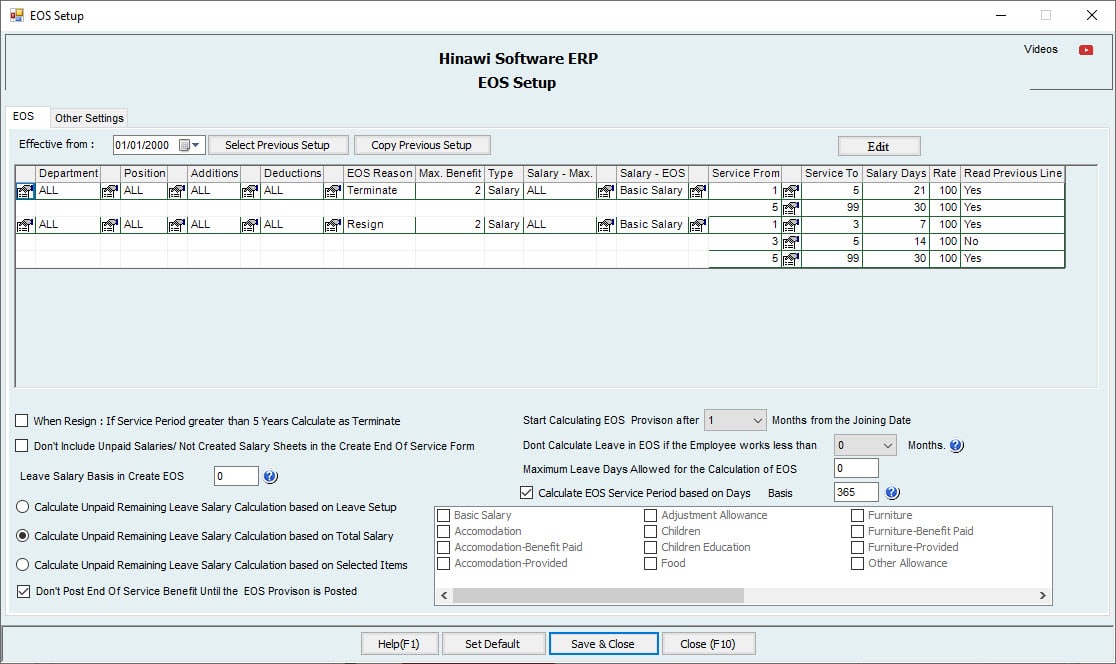
Resign Case
Service Less than 1 Year - Resign Case.
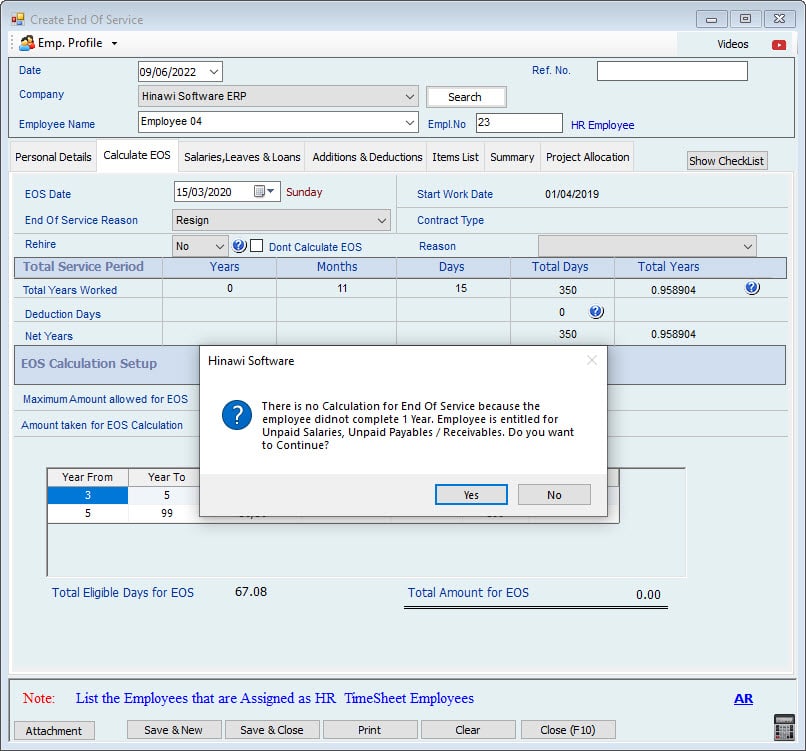
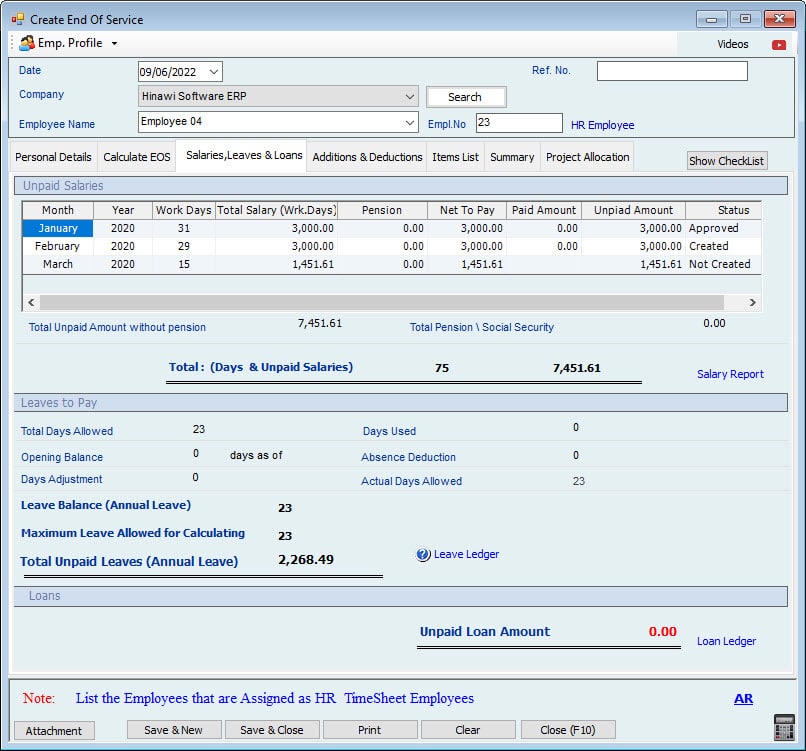
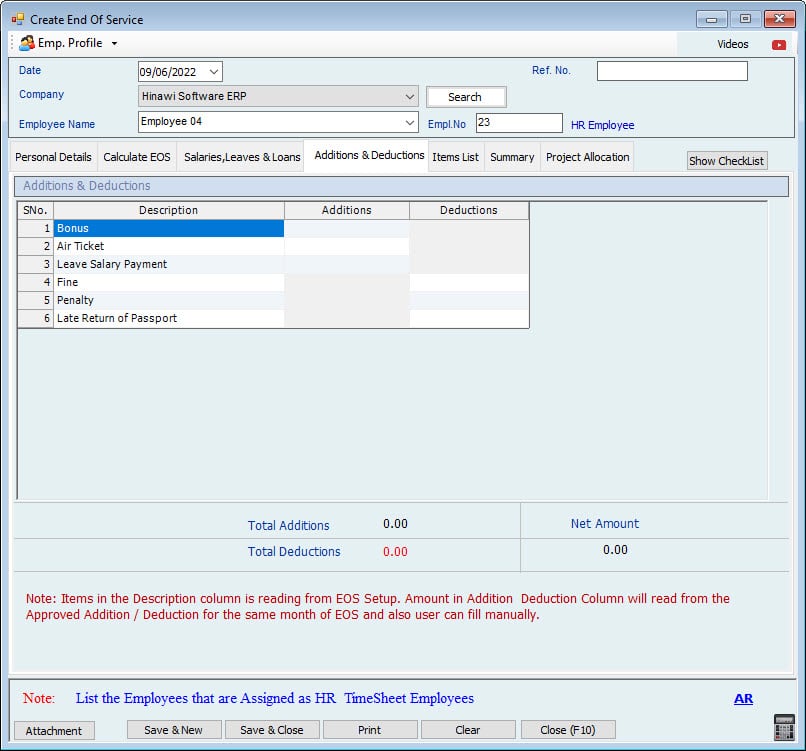
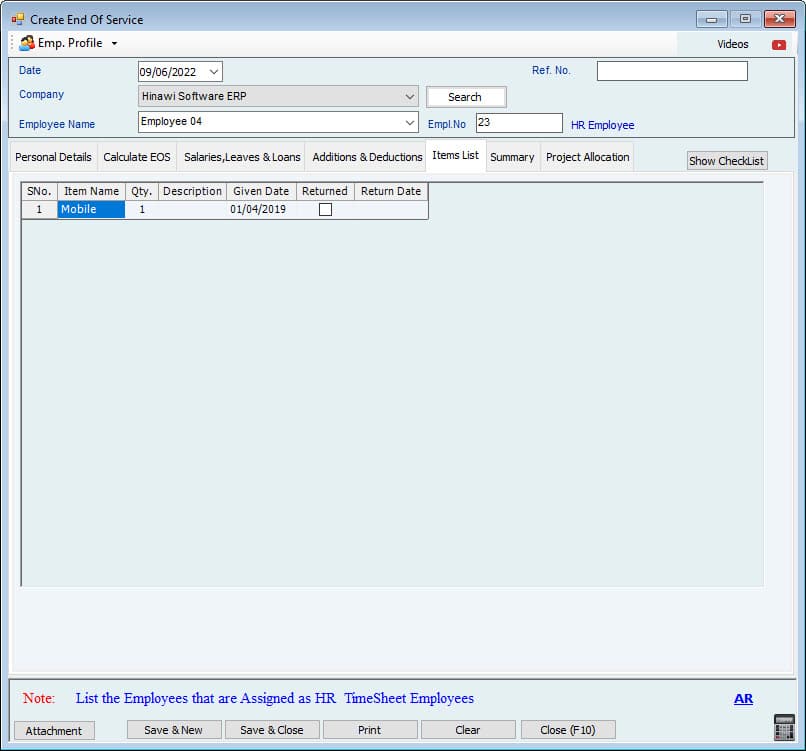
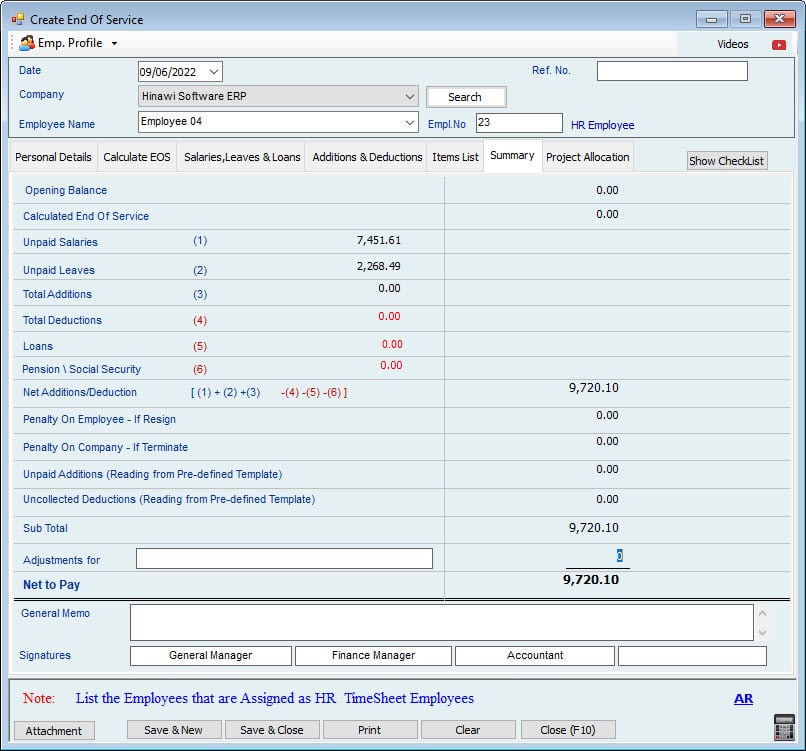
Service Less than 3 Years - Resign Case.
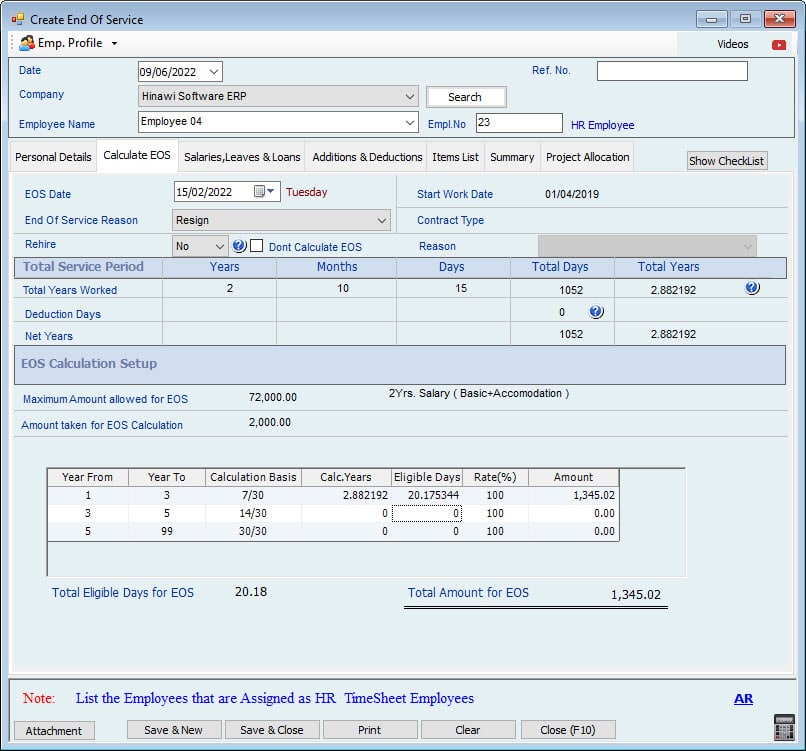
Service Between 3 - 5 Years - Resign Case.
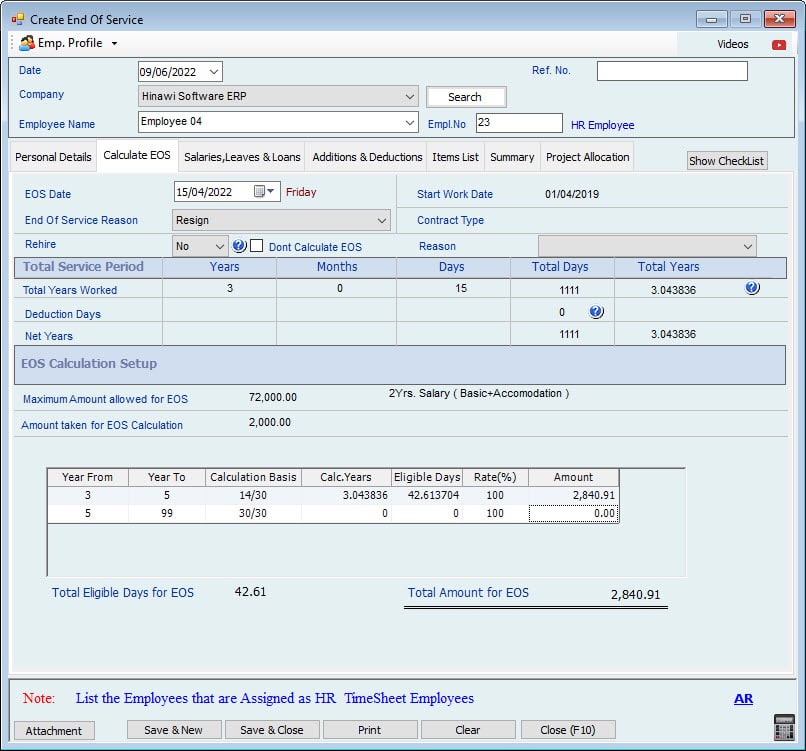

Service Greater than 5 Years - Resign Case.
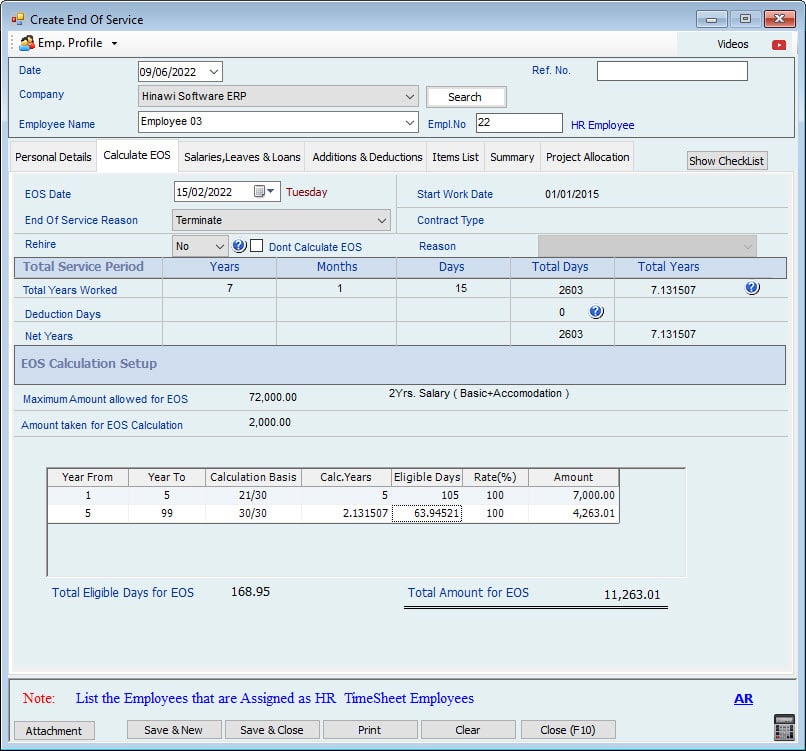
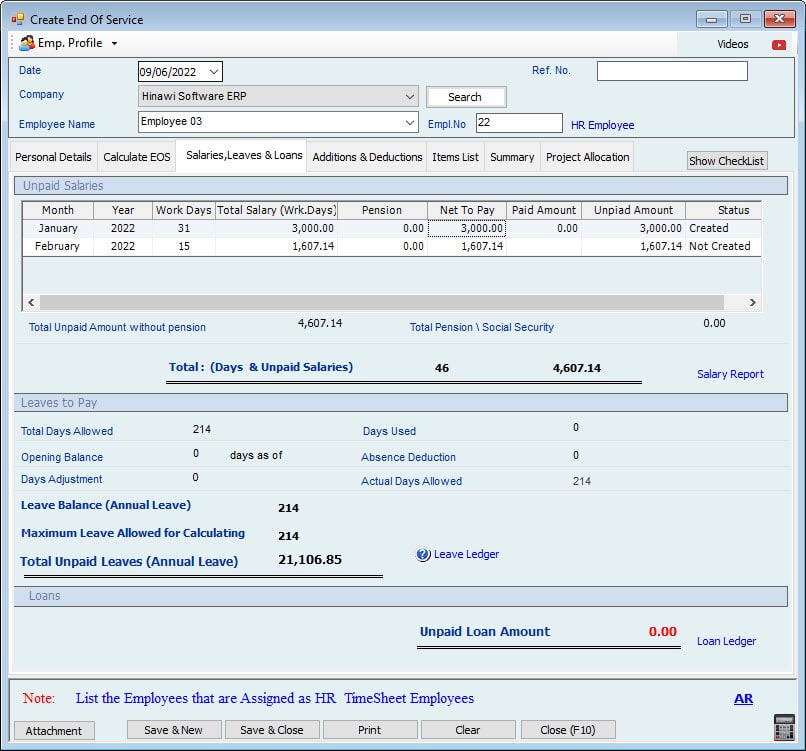
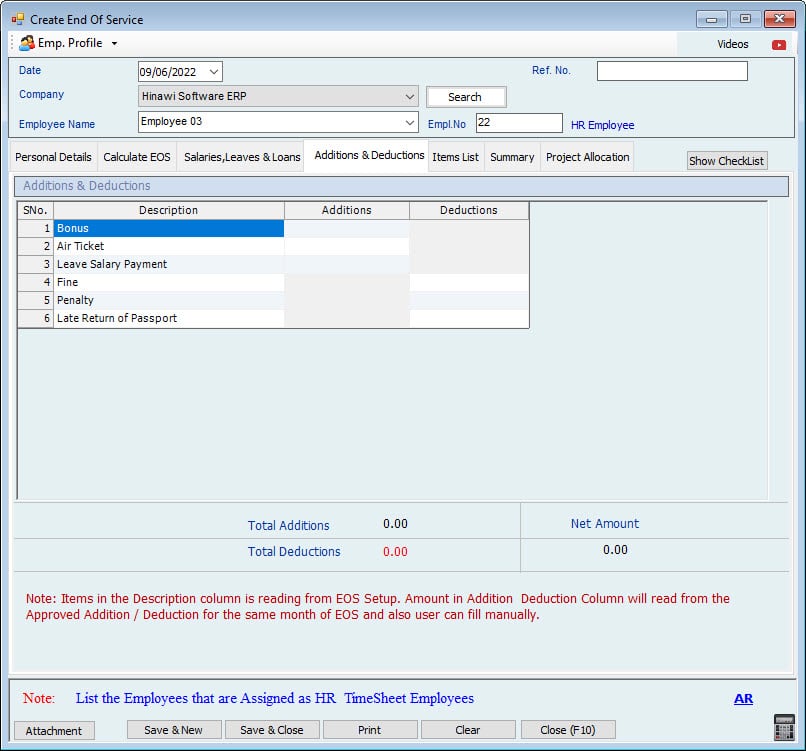
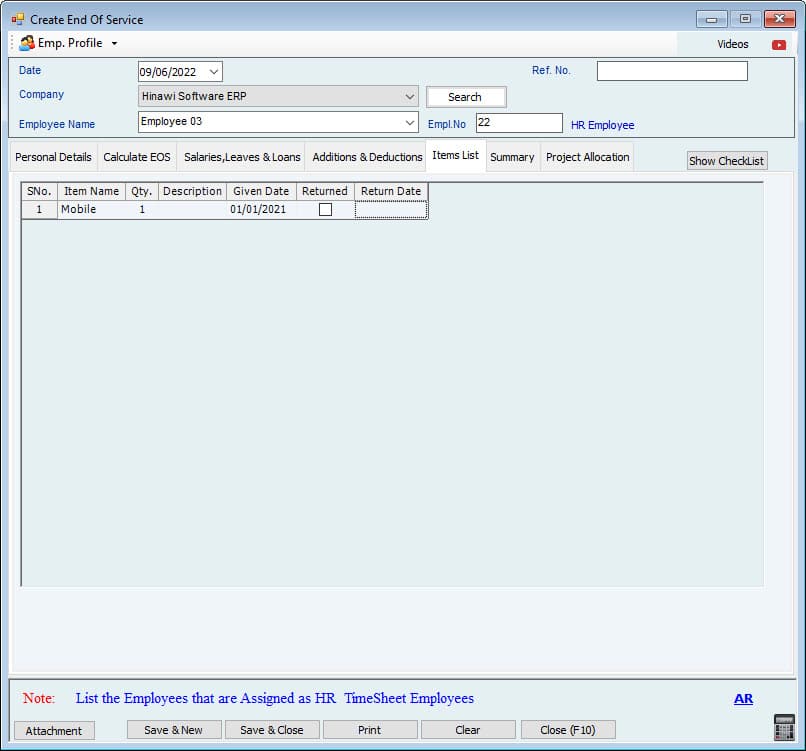
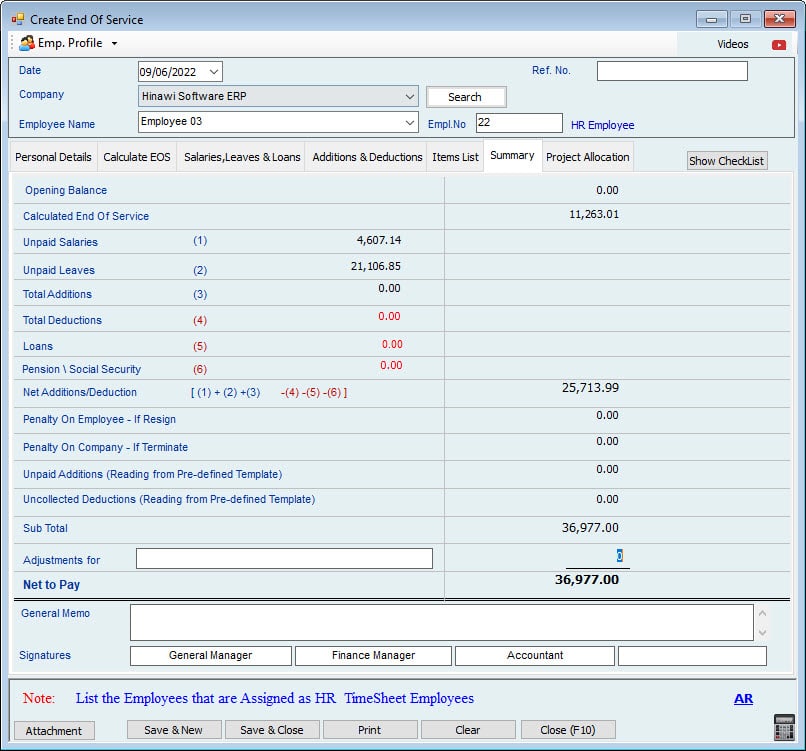
Termination Case
Service Less than 1 Year - Termination Case.
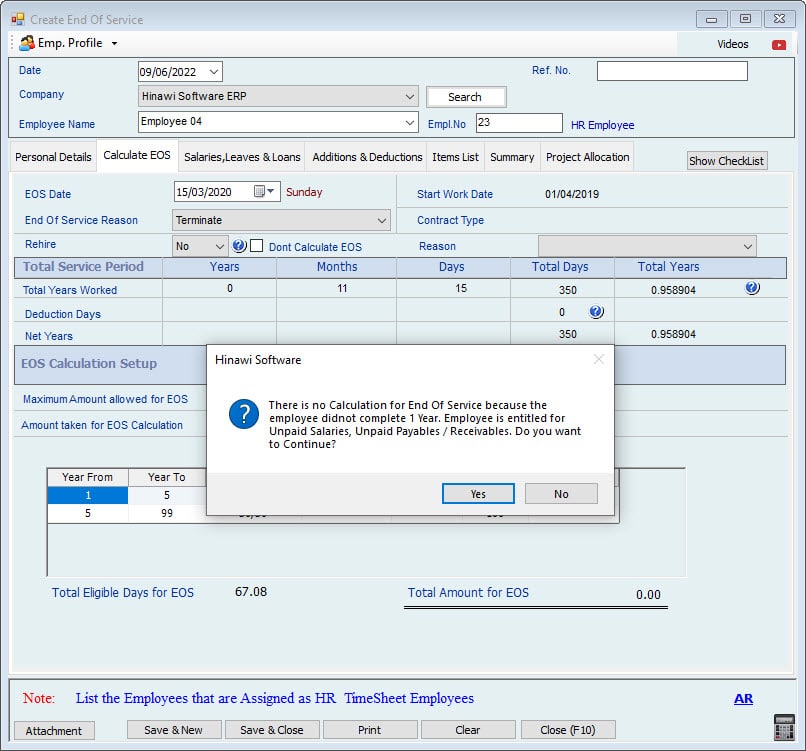
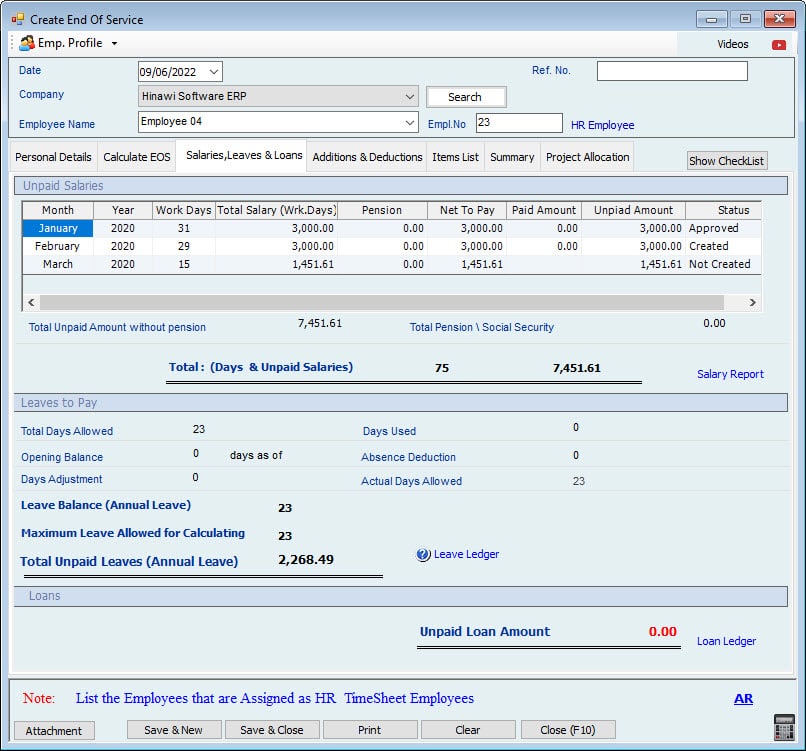
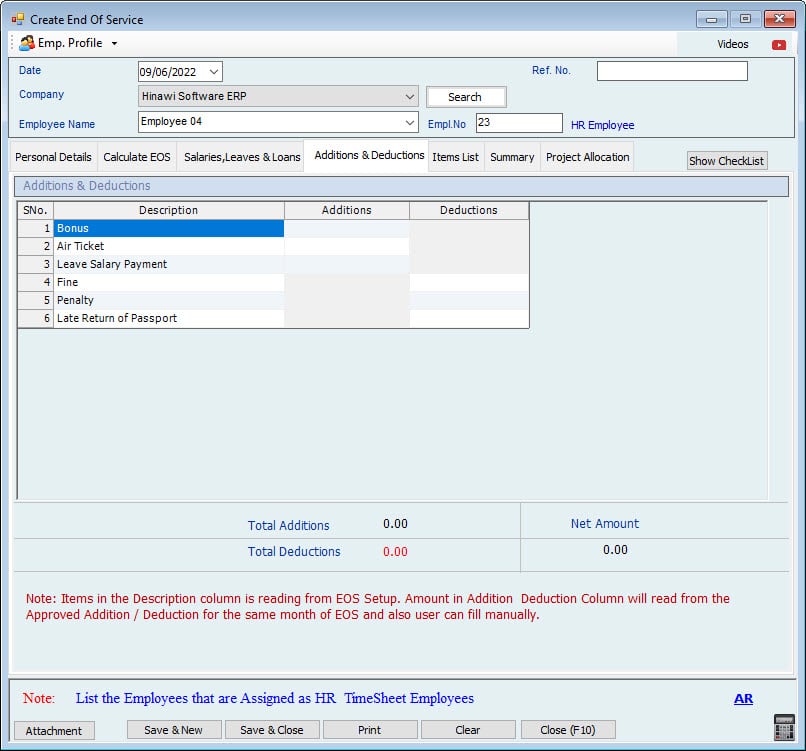
Service Less than 3 Years - Termination Case.
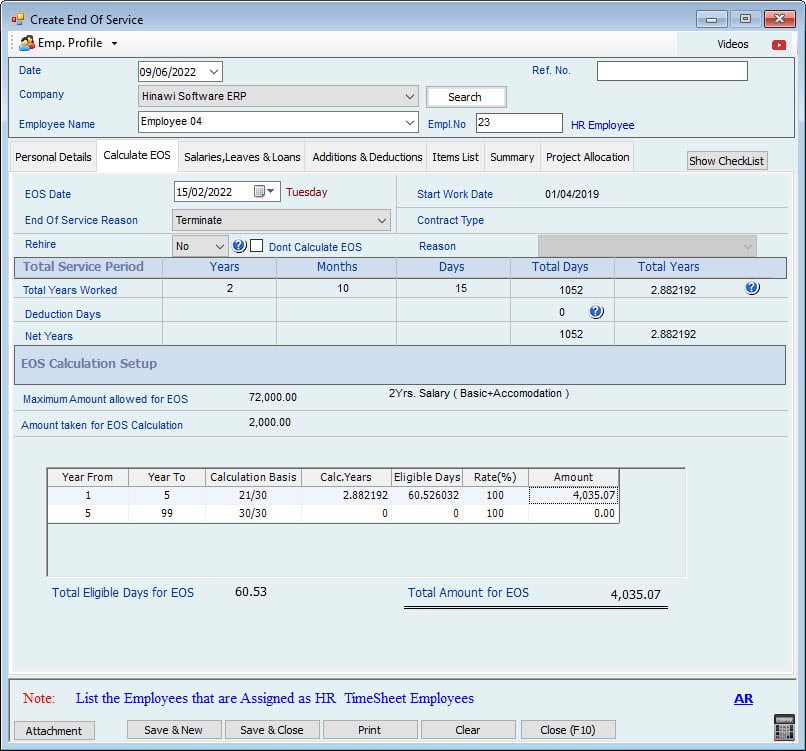
Service Between 3 - 5 Years - Termination Case.

Service Greater than 5 Years - Termination Case.
