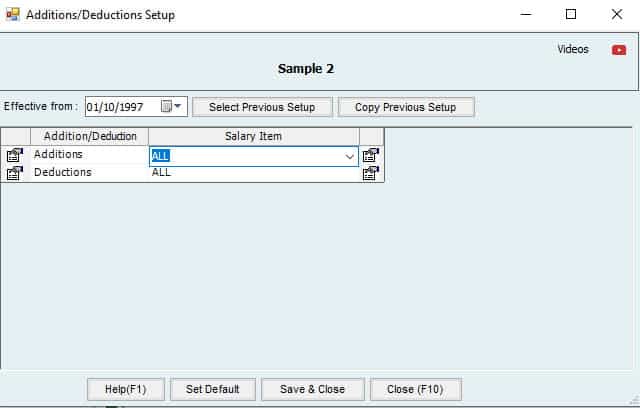
the Additions/deductions menu Help page
Setup
Feature setup is essential for setting the company’s regulations, arrangements, and control policy.
Before recording any operations, the user must set up the company file.
If these settings are not made, the customer may find that the results do not comply with its policies and need to re-enter its operations.
Therefore, settings are vital when using the software. It’s very important to understand this. The setup unit is the most important step and must be done before using the software.
STREAMLINE YOUR HRMS PROCESS WITH HINAWI ERP
Introduction
| Accounting Entries for Additions / Deductions for HR and Time Sheet Employees | Additions / Deductions Summary Workflow | ||||
| A. Create Form | B. Approvals | C. Post to Accounting | Accounting. Payments | Memo | |
| Additions / Deductions | Use create Additions / Deductions for any amounts to give or cut from Employees other than monthly Salaries and Allowances. This can be repeated monthly by using a Template. | Approval is required. | Post to Accounting will be done when Posting the Salary Sheet. These amounts will be in a separate column named: Additions / Deductions. | Payment is through Salary Sheet Only. | Admin can make a Predefined Setup to link the Additions with the Chart of Accounts. This will affect Accounting when posting the approved Salary Sheet. |
| Additions / Deductions Accounting Details | |||||
| B & C: Accounting Entries on Approvals | Menu Location | D. Payment | Menu Location | Memo | |
| Additions / Deductions | Additions / Deductions column in Salary Sheet. Dr. Additions / Deductions Cr. Accrued Salary Posting will be by JV through Salary Sheet. | Go to: Update to Accounting Menu >>>> HRMS Update >>>> Post Salary Sheet | Payment of all types of Additions / Deductions will be through Salary Sheet only. | Go to: Payroll Menu >>>> Pay Salary Sheet. | The air ticket will be under the Additions / Deduction column in the Salary Sheet. |
Addition/Deduction Work Process:
The process is the same for HR and Timesheet Employees.
Kindly go to HRMS Activities (Menu), then select create Addition/Deduction
Create Addition/Deduction:
Kindly go to HRMS Activities (Menu) and decide to take a screenshot of Addition/Deduction. Below is the screenshot;
Select the Employee Name, Trans. Type & Description:
- Select the Employee Name to create the Addition or deduction in this Column.
- Select the Type Addition or deduction in this Column.
- Select the Description against Addition or Deduction. g. (Bonus, fine, penalty, Incentive, etc.)
Select the Pay on Type, Value & Amount
Example no 1:
- When the User wants to pay some amount as a bonus or Incentive to Employee with the Salary.
- Select the Amount option in the (Pay on) Column; the User wants to pay a specific amount to the Employee, then fill in the Addition value in the (Value) column. When the value is filled, the amount will automatically come in the (Amount)
Example no 2:
- When the User wants to deduct some amount as a fine or Penalty from the Employee's Salary.
- Please select the Amount option in the (Pay on) Column; it means that the User wants to deduct the specific amount from the Employee Salary, then fill the deduction value in the (Value) column; when the Value column is filled, then the amount will come automatically in the (Amount)
Save Addition/ Deduction:
After filling in the complete information in the Create Addition/ deduction (Menu), save this window.
Edit Addition/Deduction:
Users can also edit the Addition/ Deduction after saving.
Approve Addition/Deduction:
After Creating the Addition/Deduction, kindly go to HRMS Activities (Menu), then select Approve Addition/Deduction.
Create Template:
Kindly go to HRMS Activities (Menu) and select Create Template. Below is the screenshot;
Addition and Deduction Template:
When the User wants to pay or deduct from the Addition/Deduction for a specific Employee, by using this Menu User can create the template for the selected Employee as shown below;

Template:
Kindly finish filling in the Template Name in the Addition & Deduction Template.
Every Month: the
If you unselect the option every month, the System will automatically create and approve the Addition or deduction with the Salary sheet until you unselect the Stop date from the Addition & Deduction Template or the Employee becomes Inactive.
Update Manually:
Suppose the User selects the option update, Manu. In that case, Ally has toto to go into the ate Addition & Deduction window and open the template to create Addition and deduction manually.
Stop Date:
(This option is available Every Month)
If users want to stop the Addition & Deduction Template, use the Stop date option.
Additions \ Deductions Setup

